
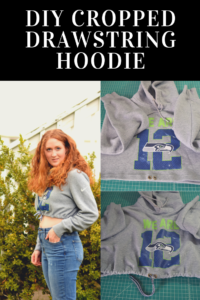
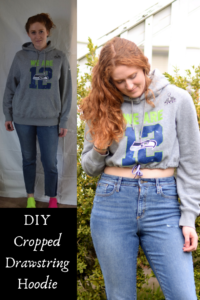
While I have to admit I love a good oversized hoodie, sometimes you want something just as comfortable but a little more flattering. That’s what brought about this DIY, where I upcycled a loose sweatshirt into a cropped hoodie with a drawstring waist to give a more flattering fit.
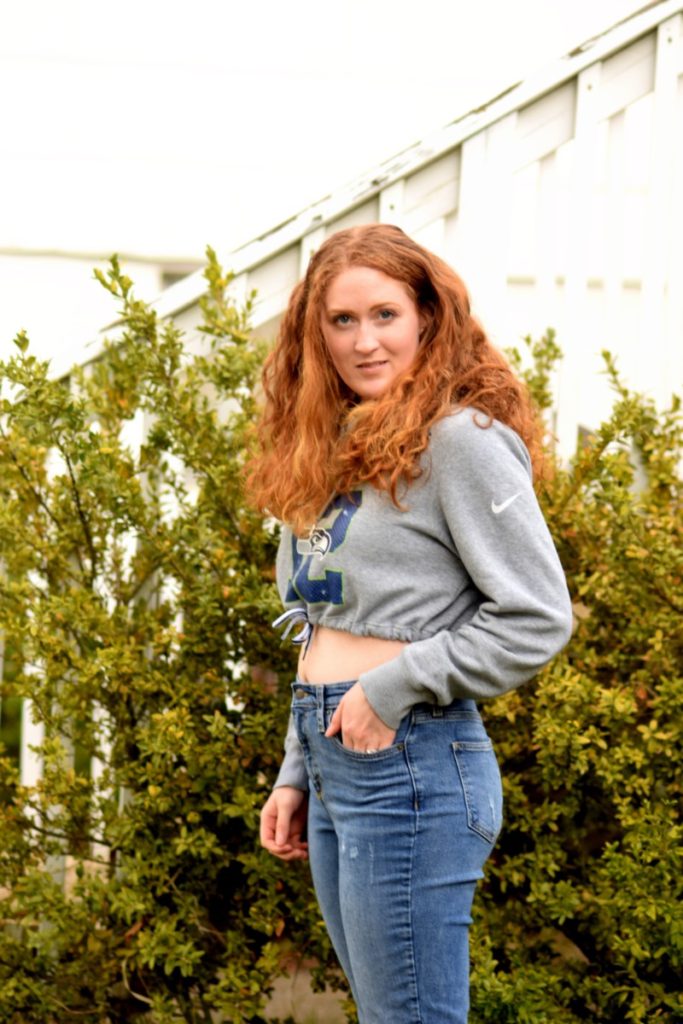
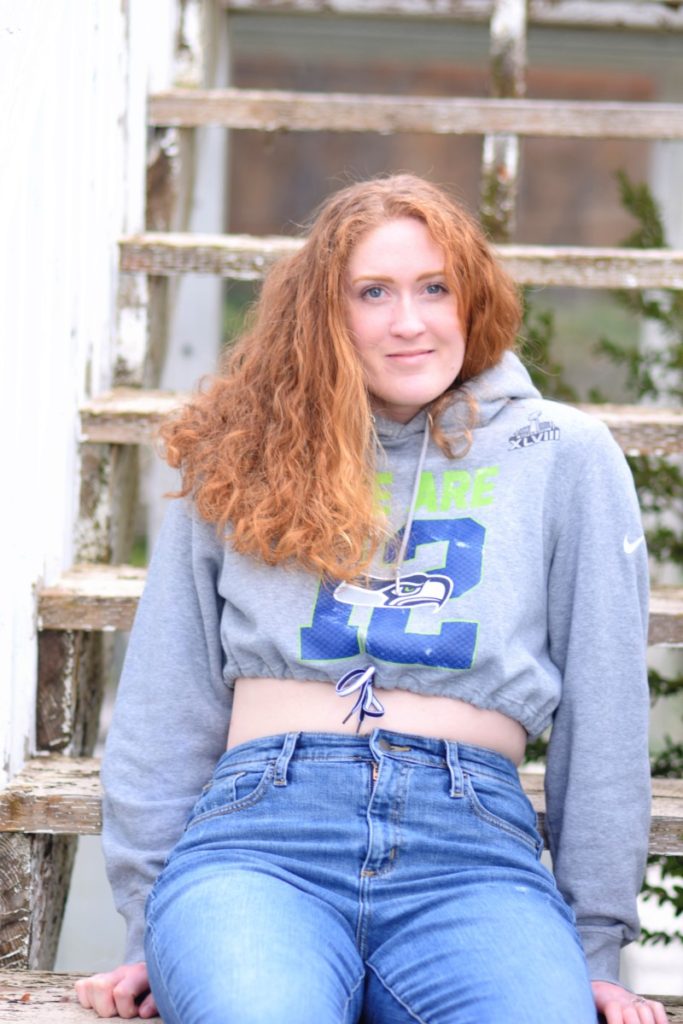
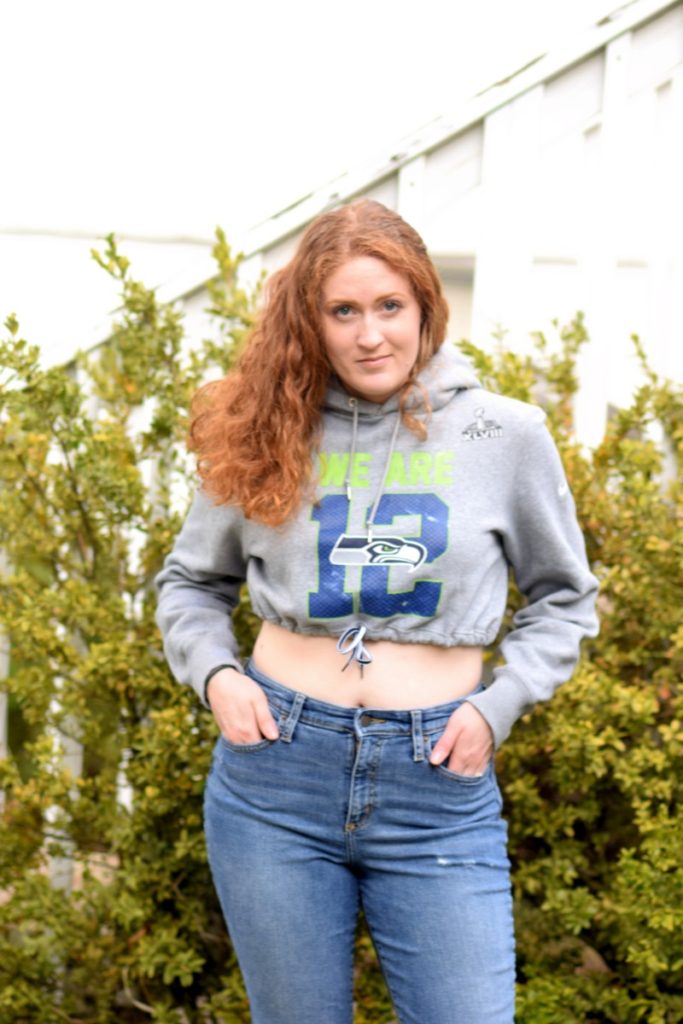
If you have an oversized sweatshirt you want to upcycle (or pick one up at a thrift shop!), I have a full tutorial below showing you how to make your own cute cropped drawstring hoodie.
*This list contains affiliate links for your DIYing convenience, so I receive a small commission if you buy something through my links. This really helps to support my site so I can keep creating DIY tutorials to help you create your dream wardrobe.
What you need:
- oversized hoodie
- fabric marker or chalk
- ruler
- scissors
- seam ripper
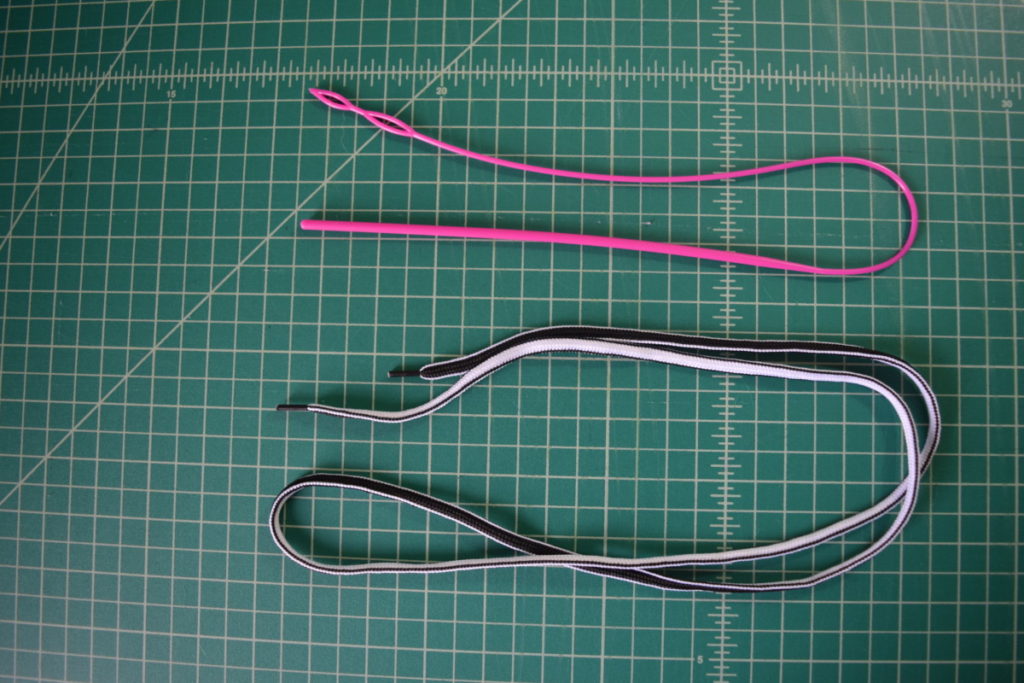
- drawstring: I like getting a pack with several, like THIS, so I can use them in other projects as well
- eyelets and eyelet pliers
- sewing machine
- thread
- ballpoint sewing pins
- double needle or ballpoint needle
Steps:
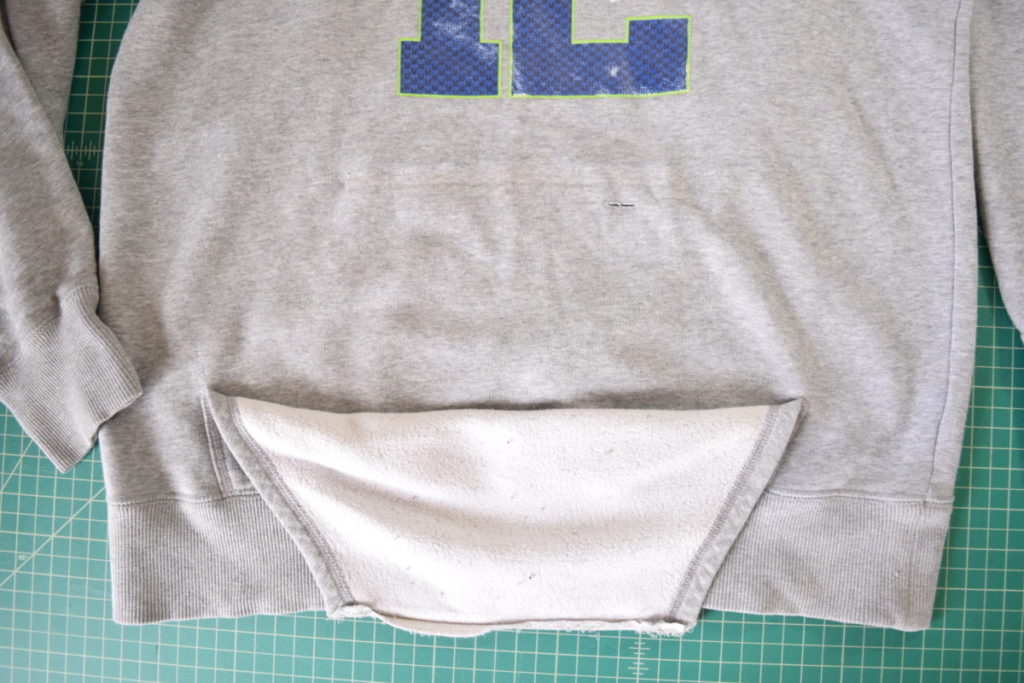
- Seam rip the top of the pocket off the sweatshirt front
- Crop the hoodie
- Insert eyelets
- Fold up hem and sew in place to make a drawstring tube
- Insert drawstring through eyelets
Instructions:
Step 1
The first step is to seam rip the top edge of the pocket off the front of the sweatshirt. Try to be really careful not to catch any of the sweater fabric while you seam rip or you might end up with small holes or pulls.
Step 2
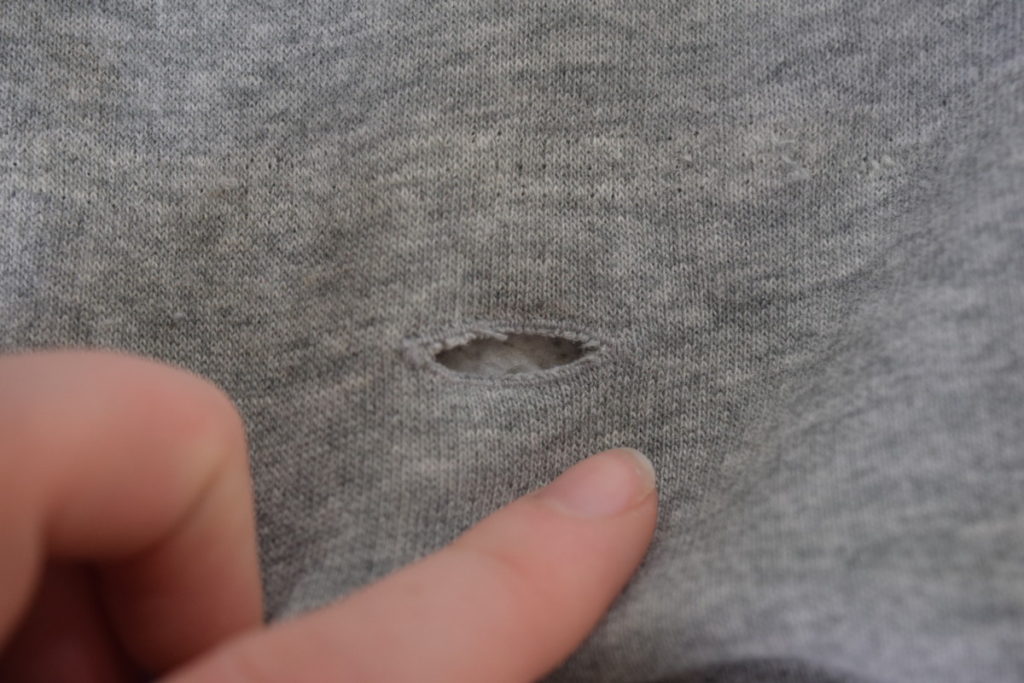
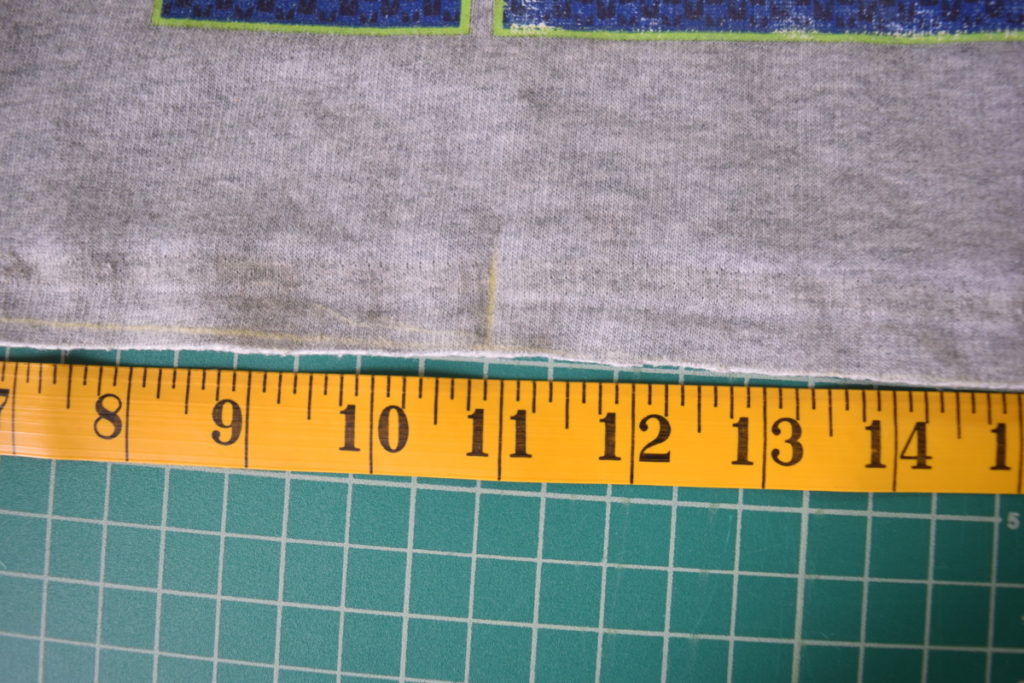
Next, try the hoodie on and mark about 1 inch below the length you want it cropped to. My hoodie had a weird random buttonhole where the pocket used to be (you can see in the photos). I’m not sure if this was a mistake in manufacturing or what. But because of this random buttonhole in the front of the sweater I decided to crop mine right at the buttonhole so I wouldn’t have a hole in my sweater.
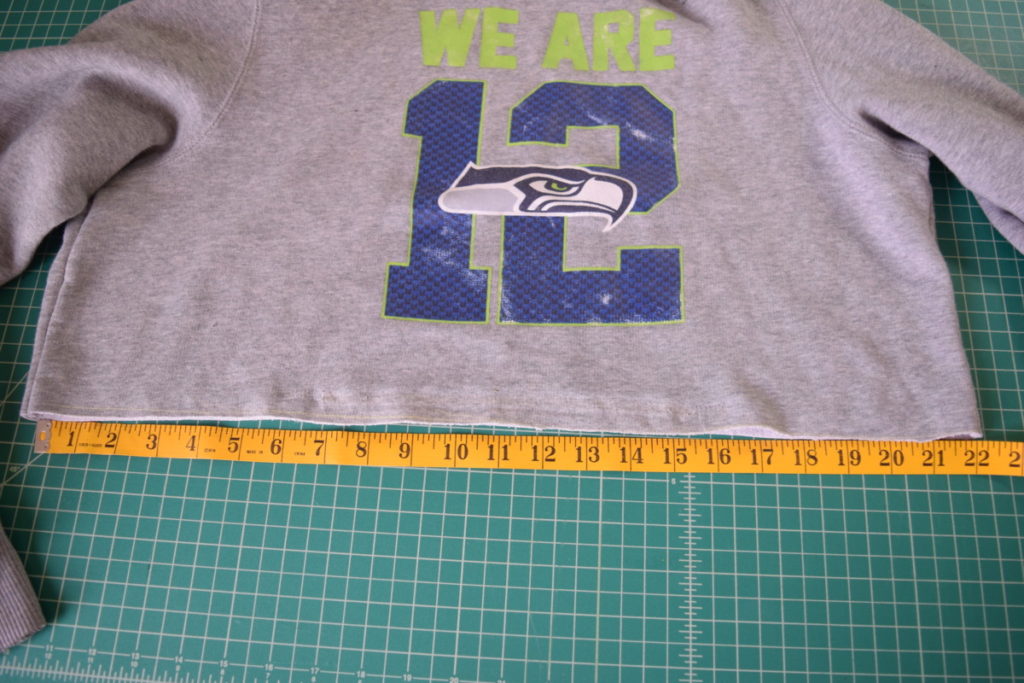
Once you’ve marked where you crop your sweatshirt, lay the sweater flat, lining up the side seams and the front and back hem. Draw a straight line across the sweatshirt, going through your mark.
Next, cut along the line, going through both layers of the sweatshirt, to remove the bottom of the hoodie.
Step 3
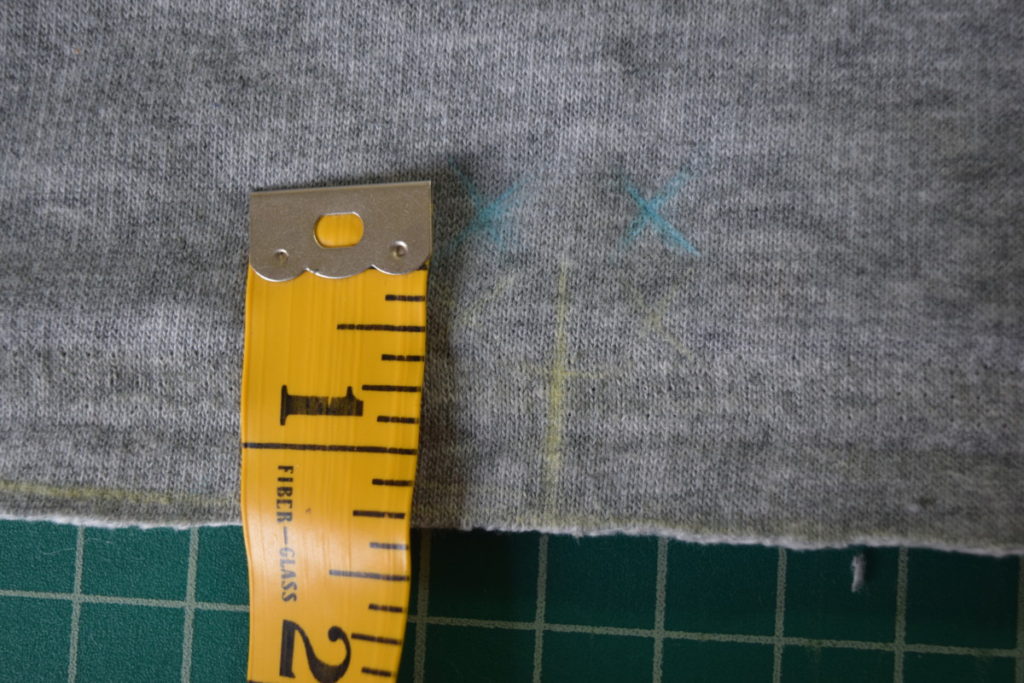
Now we’re going to insert our eyelets in the center front. First, measure across the front of the sweatshirt to find and mark the center front.
Next, mark where you will insert the eyelets on either side of the center front marking. Make your marks about 1.25 inches above the hem.
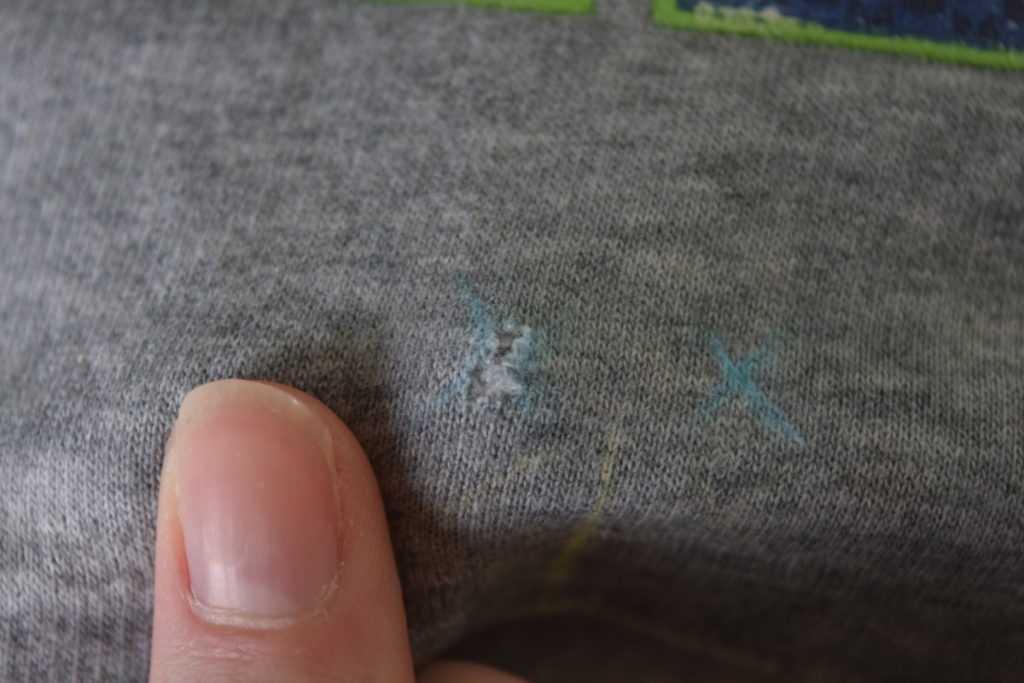
Now insert the eyelets into the two spots you marked. To insert an eyelet, you first need to make a very small hole in the center of one of the marks.
Next, grab a front eyelet piece (the top one in the photo below) and insert it into the hole from the outside of the sweatshirt, stretching the fabric to fit the eyelet.

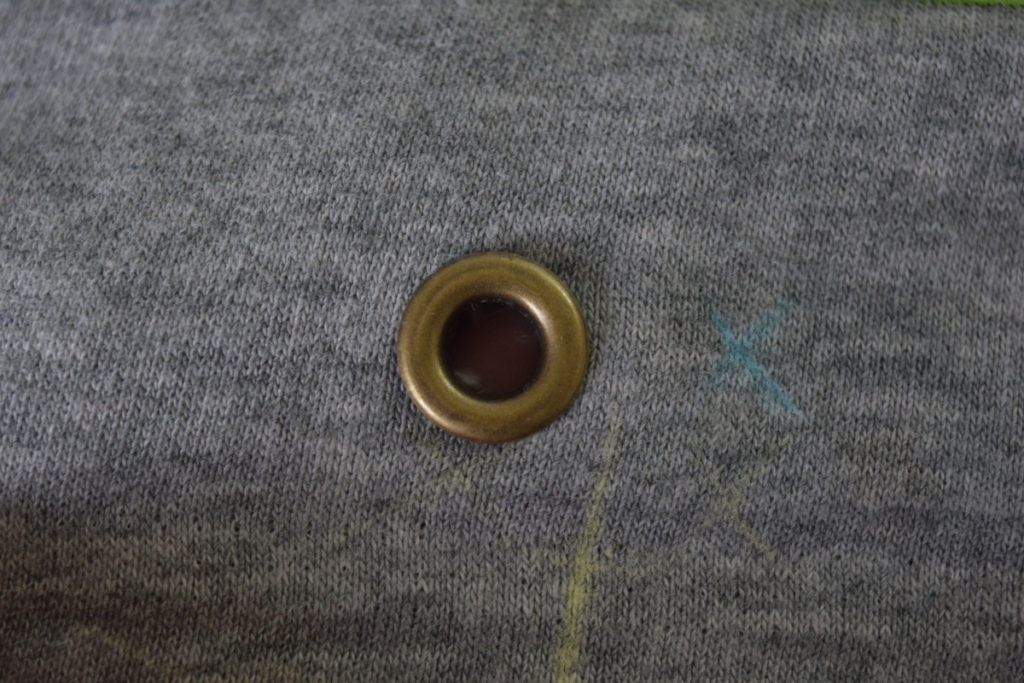
Then put the back piece over the front piece on the inside of the sweater and hold it in place.
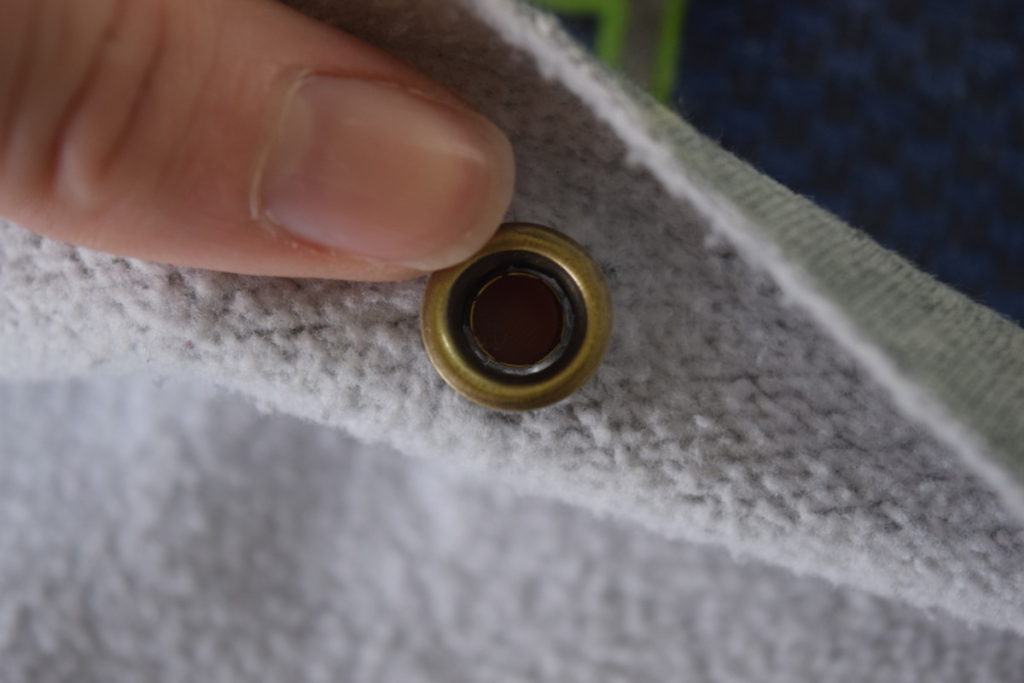
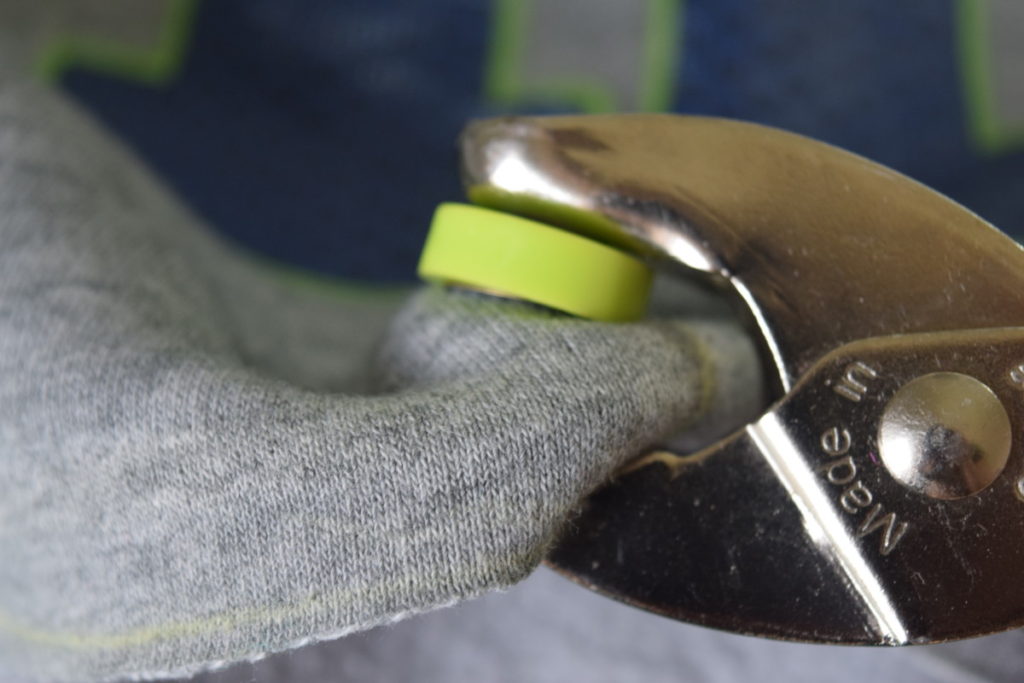
Next, grab your eyelet pliers and place the eyelet between the pliers with the larger plastic side on the outside of the sweatshirt. Squeeze the pliers until you feel the eyelet snap into place.
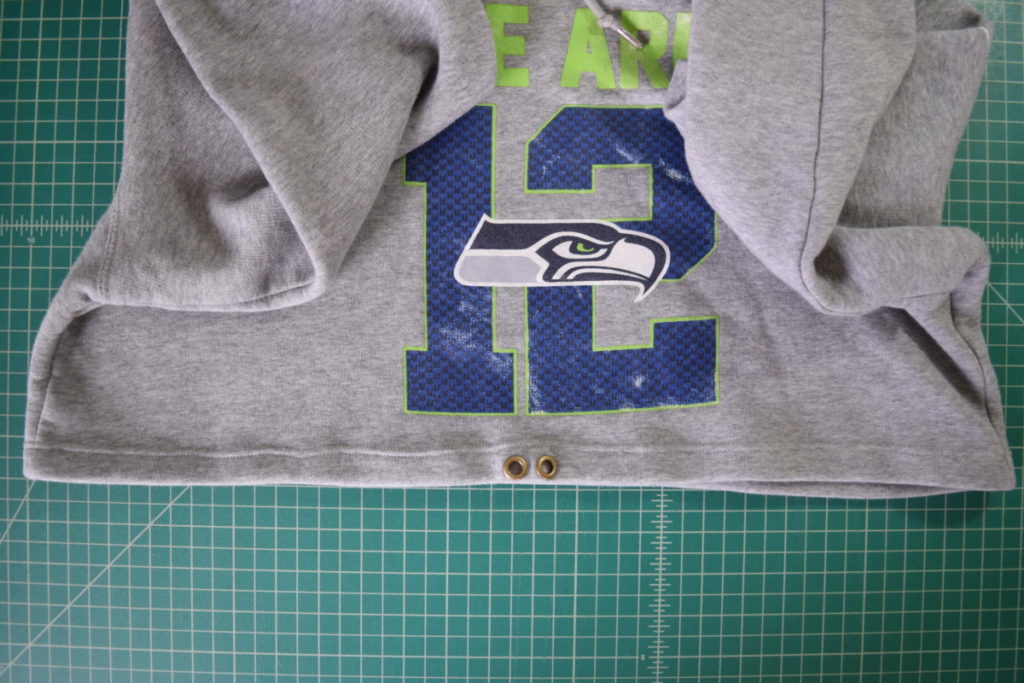
Now just insert the other eyelet and it will look something like this:

Step 4
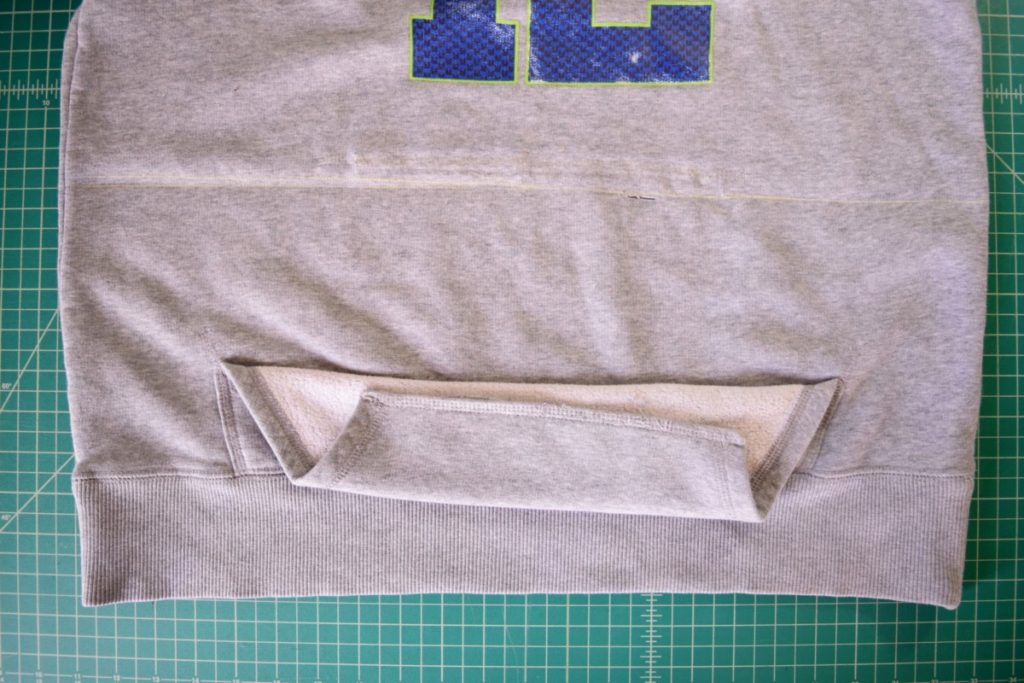
Now we need to make our drawstring tube. To do this, first fold up a 3/4 inch hem around the bottom of the sweater and pin in place.

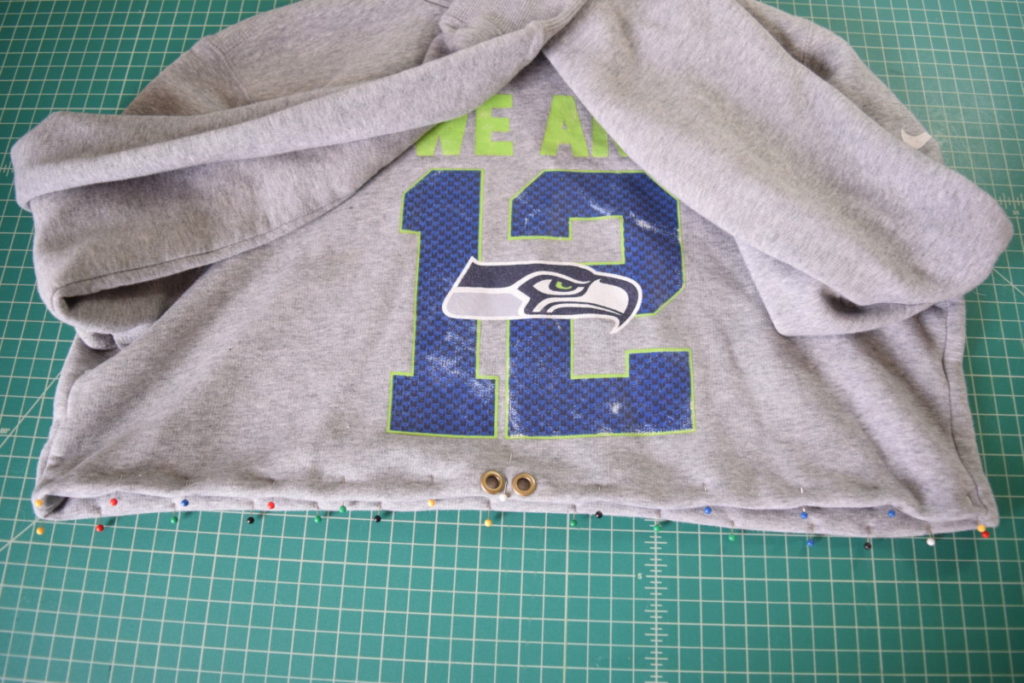
Next, use a double needle or a zigzag stitch to sew the hem in place, making sure you’re catching the hem inside the sweatshirt all the way around. Once it’s sewn, I would iron the hem for a nice professional looking finish, but this is optional.
Step 5
Our last step is to insert the drawstring! The drawstring pack I bought from Amazon (link is in “what you need” list) came with a drawstring inserting tool. I chose this black and white drawstring from the pack because I thought it went well with the logo on the hoodie.
First, I inserted the end of the drawstring into the tool.
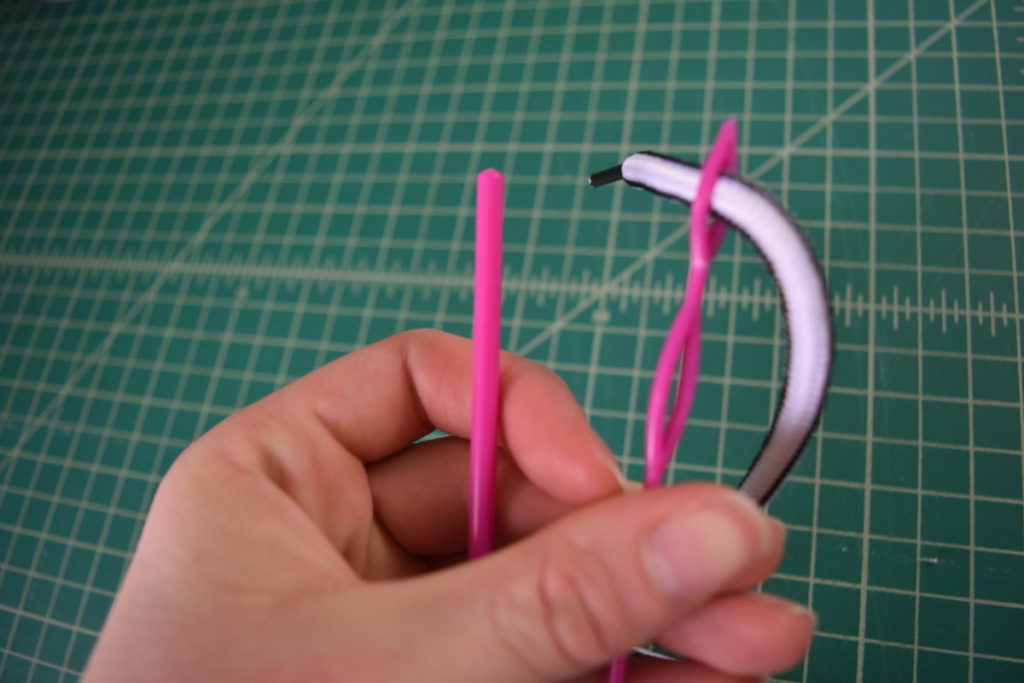
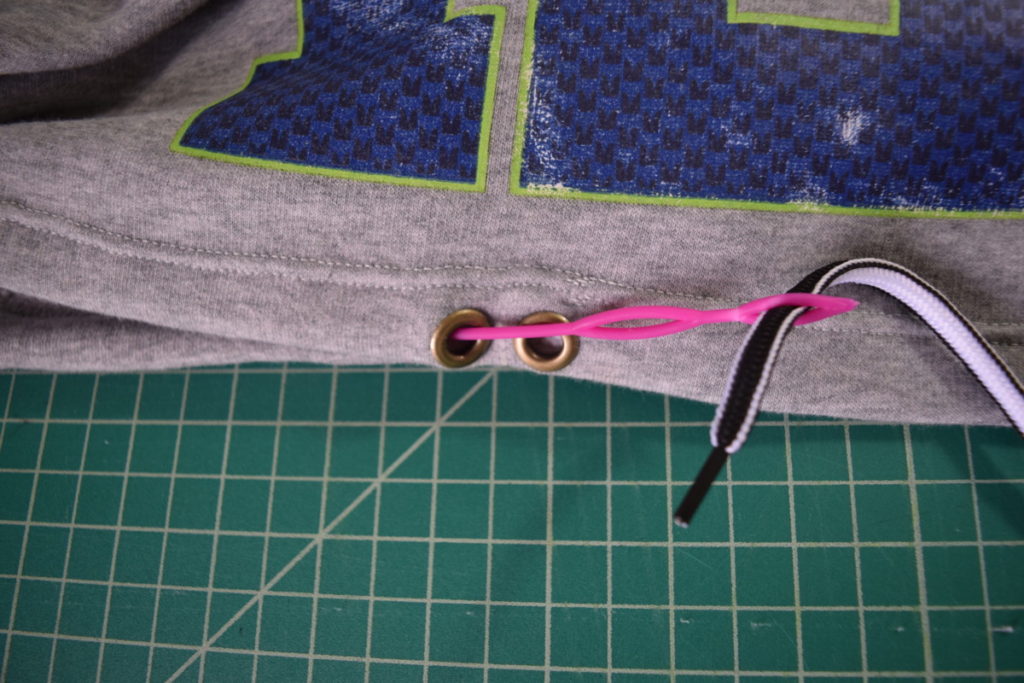
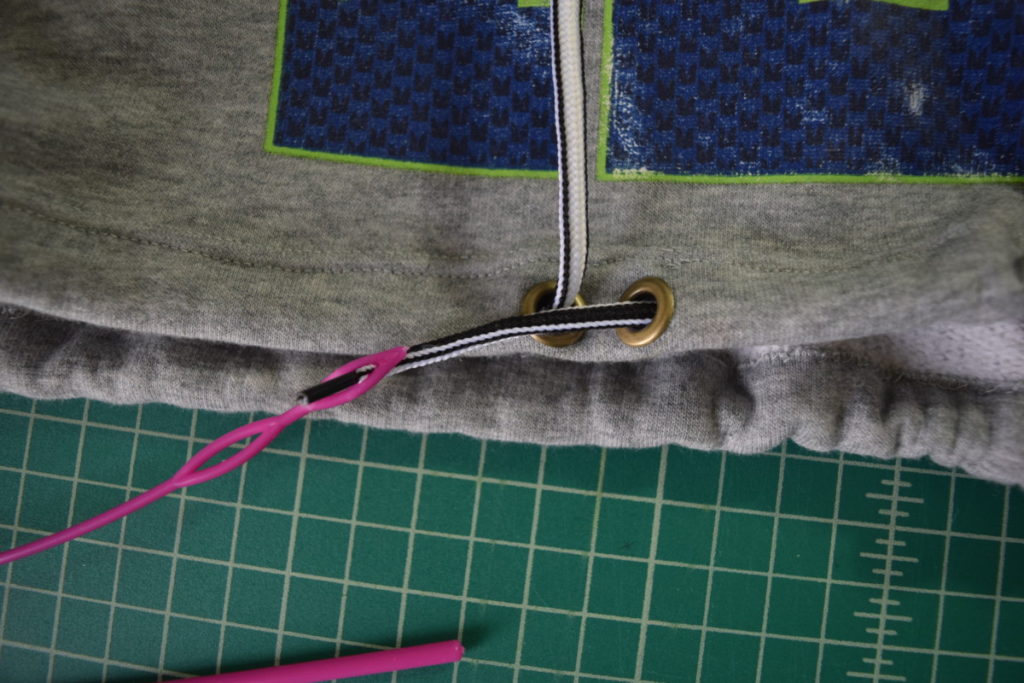
Then insert the blunt end of the tool into one of the eyelets and pull it through the tube until the drawstring end comes out the other eyelet.
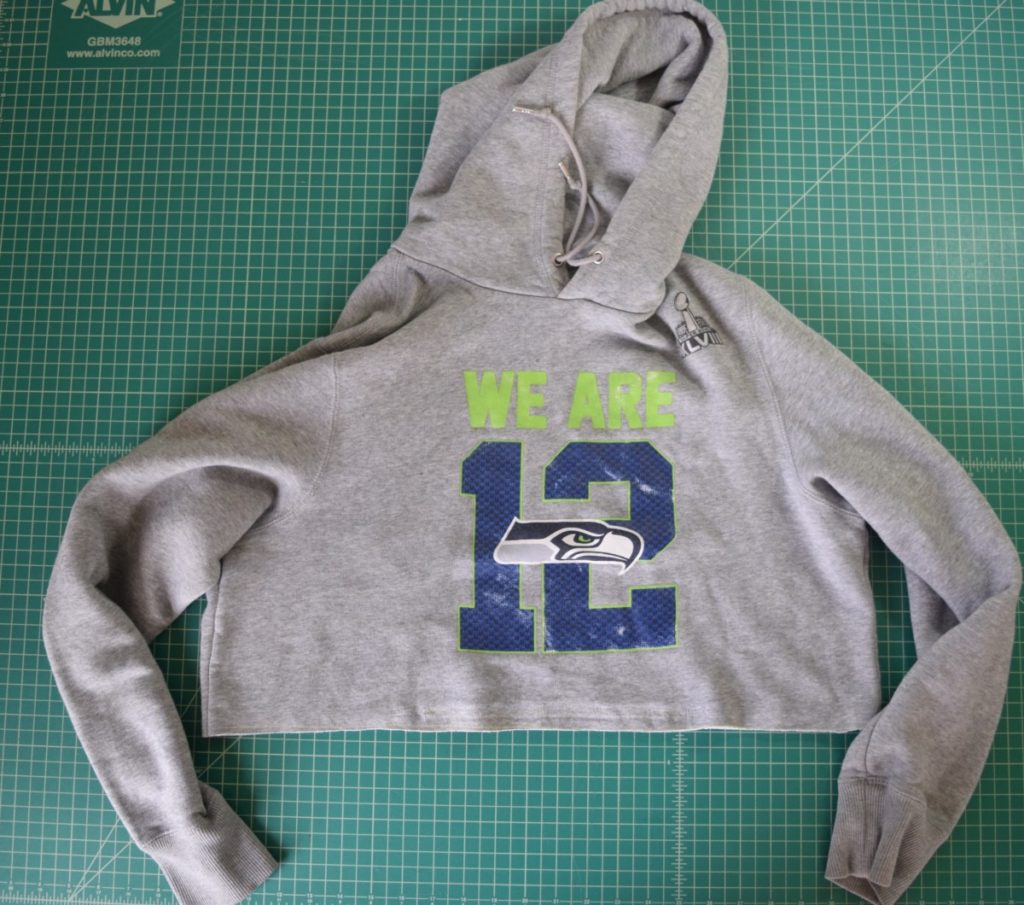
And that’s it! Just throw on your new cropped hoodie and pull on the drawstring ends to tighten down the waist!


Love this! Just followed to make my own and it turned out soooo cute! 🙂
Yay! I’m so glad your hoodie turned out 🙂
[…] love cropping hoodies – in fact, I’ve already done a cropped hoodie tutorial (find it HERE) – but the design of that refashion required that I remove the pocket from the hoodie. But […]
Thoughts talk within just around the web control console video clip games have stimulated pretty professional to own on microphone as well as , resemble the perfect “tough guy” to positively the mediocre ones. Basically fundamental problems in picture gaming titles. Drug Recovery
Truly no matter if someone doesn’t be aware of then its up to other
users that they will assist, so here it occurs.
The THC concentrations in CBD Guru products are below detectable levels. These THC-free broad-spectrum CBD Gummies will never flag a drug test. The reason for this is simple: no one tests for CBD. Athletes can use it in the Olympics, the elderly are thriving on these products, and plenty of people are only taking these products to enhance their daily lives. There is no penalty for taking a thoroughly tested and carefully formulated cannabidiol product. Your mind and body will thank you, and local law-enforcement agents recognise the legal availability of these hemp items. You never need to worry when purchasing a CBD gummy product.
Hello there, just became aware of your blog through Google, and found that it’s really informative. I am going to watch out for brussels. I’ll be grateful if you continue this in future. Lots of people will be benefited from your writing. Cheers!
In fact when someone doesn’t understand then its up to other people that they will assist, so here it occurs.
CBD Edibles are currently legal in the UK, making them a safe and convenient option for those looking to incorporate CBD into their wellness routine. At our store, we use only high-quality CBD oil in our edibles, ensuring that you get the best possible experience.
CBD Edibles are currently legal in the UK, making them a safe and convenient option for those looking to incorporate CBD into their wellness routine. At our store, we use only high-quality CBD oil in our edibles, ensuring that you get the best possible experience.
Hello, this weekend is pleasant in favor of me, since this occasion i am reading this
great informative piece of writing here at my residence.
Hey there! This is my first visit to your blog!
We are a group of volunteers and starting a new initiative in a community in the same niche.
Your blog provided us beneficial information to work on. You have done a extraordinary job!
excellent points altogether, you just won emblem reader. What would you suggest in regards to your publish that you simply made some days ago? Any certain?
Great day. your blog is full of spam, you should should antispam software,
saving your marriage should always be a priority whenever things turn sour on a marriage..
Blaine is not the best magician but i can say that he has great showmanship and i like his show.
What’s Taking place i’m new to this kind of, I stumbled onto this I’ve thought it was absolutely useful and it has helped me away lots. I am hoping to be able to add & assist some other customers such as its assisted me. Excellent career.
bed frames that are based on steel would give you a more durable bed and a bed that last longer,,