
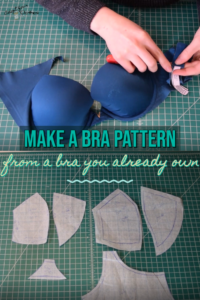
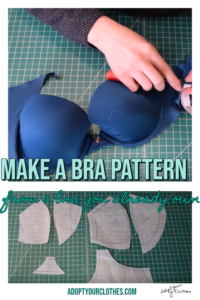
Have you ever wondered about making your own bras? It sounds super complicated and scary… especially fitting the pattern. But what if I told you that you could make a pattern for yourself that fits on the first try??
If you have a bra that you like the fit of but is getting a bit worn out and needing replaced, turn that thing into a sewing pattern! That’s what I’m showing you how to do today. I had this super worn out bra… my dog had even gotten ahold of it at one point, so there were holes in the band!
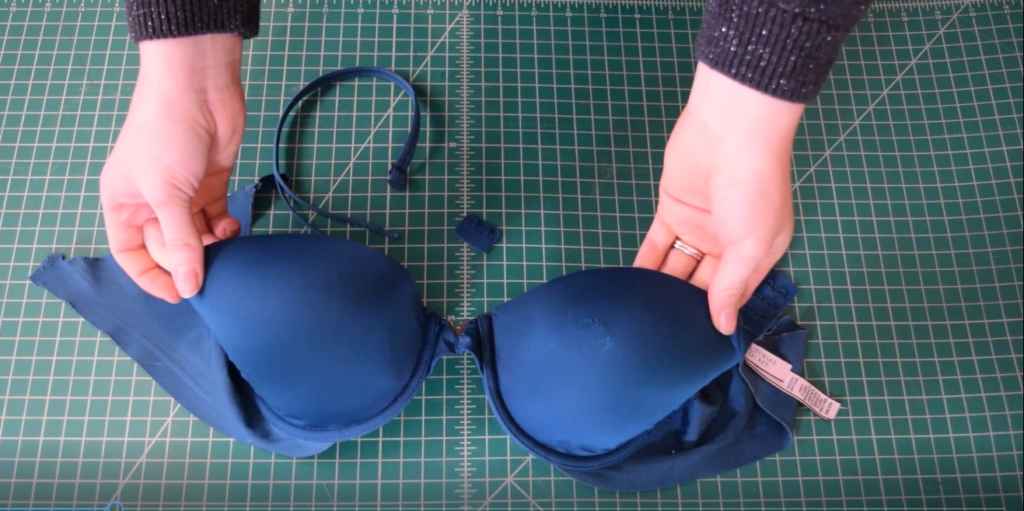
Sadly, it was my favorite bra… I looooved how comfortable it was! And I hadn’t been able to find a good replacement for it. So I decided to bite the bullet and turn it into a pattern so I could make many more versions of it.
And of course, I made a tutorial so you can do the same! 🙂 And don’t worry, I won’t leave you hanging – next week I’ll have a tutorial on how to sew a bra up using the pattern you make with this tutorial.
Now let’s get started! I have a video tutorial for you below. And if you want the scan-able version there’s a written tutorial further down. But first, here’s what you’ll need:
What you need
*This list contains affiliate links for your DIYing convenience, so I receive a small commission if you buy something through my links. This really helps to support my site so I can keep creating DIY tutorials to help you create your dream wardrobe.
- well-fitting bra you are willing to sacrifice for the cause 😉
- pattern paper
- straight edge ruler
- french curve ruler (optional)
- pen
- scissors
- seam ripper
- fabric chalk or marker
Video Tutorial
Written Tutorial
Deconstructing the Bra
Now let’s start deconstructing this bra. First, I seam ripped off the straps and the two pieces of the back clasp. I also saved them for a future project. But if you don’t plan on reusing them, just toss the straps and clasp.
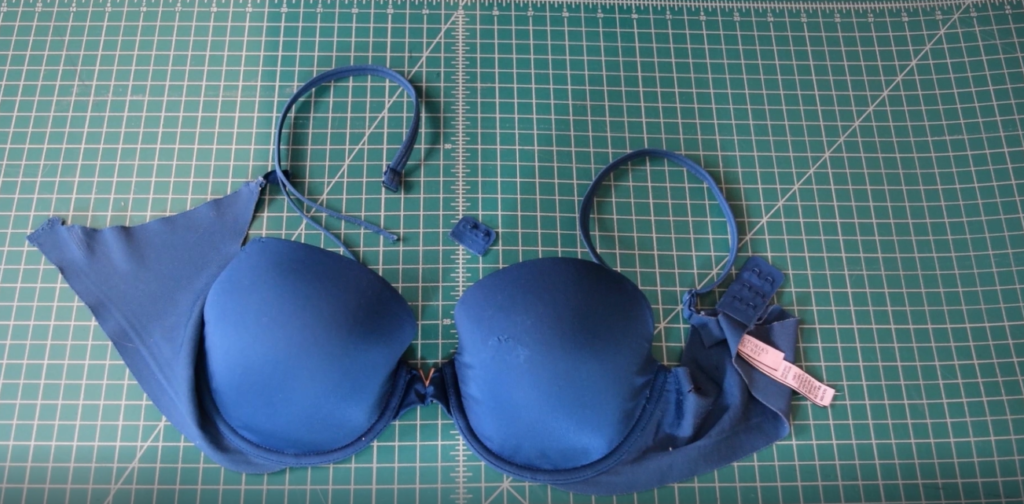
Next, seam rip one of the cups off the center bridge.
Now we only need to fully deconstruct ONE of the cups to make our pattern – because the each side of the bra is a mirror image of the other. So we only need to make a pattern for one side.
So I removed the wires (to save for another project). Then on one cup I seam ripped off the underwire channeling, the back band, and the fabric cover over the cup. So the cup was just the foam at this point. I also saved the back band to make my pattern, but tossed the channeling and fabric cover.
Next, seam rip off that little triangle bridge piece at the center of the bra.
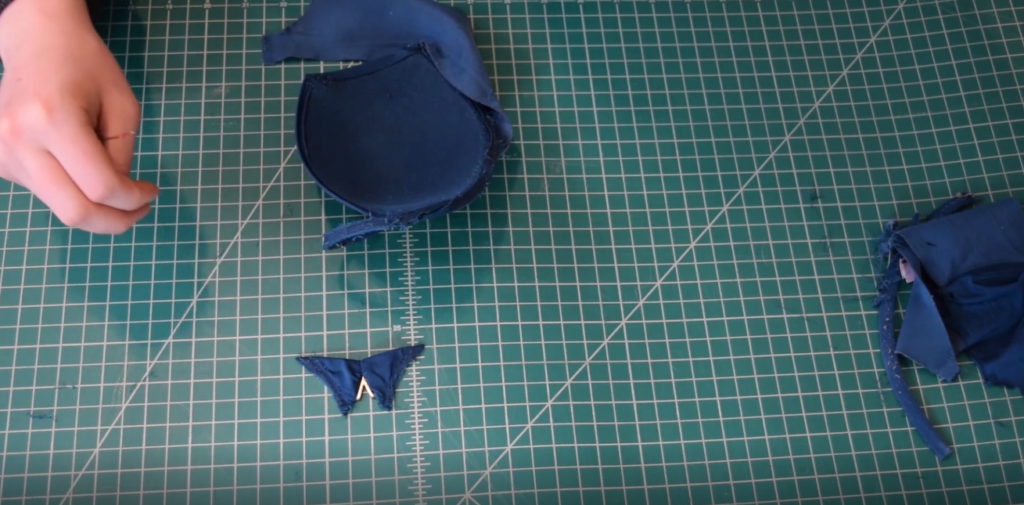
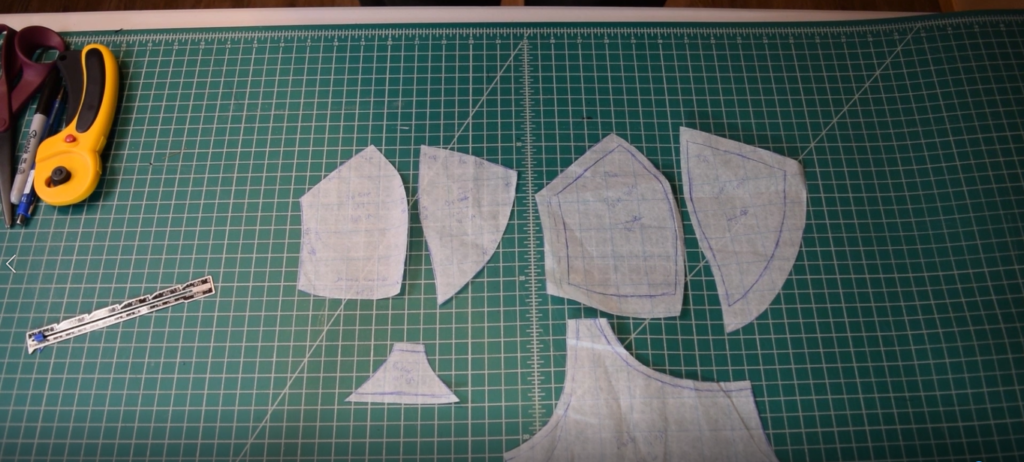
Now we have all the pieces we need to make the pattern: one cup and the corresponding back band piece, as well as the bridge.
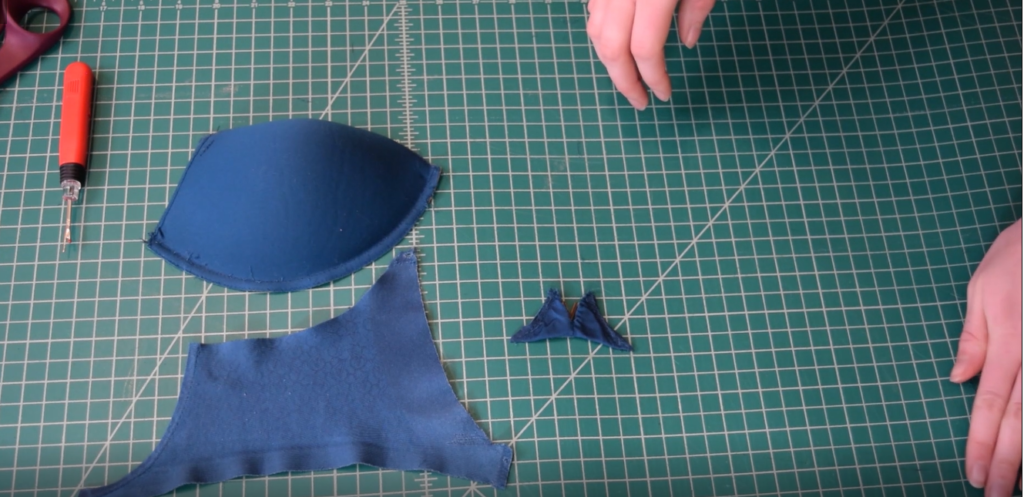
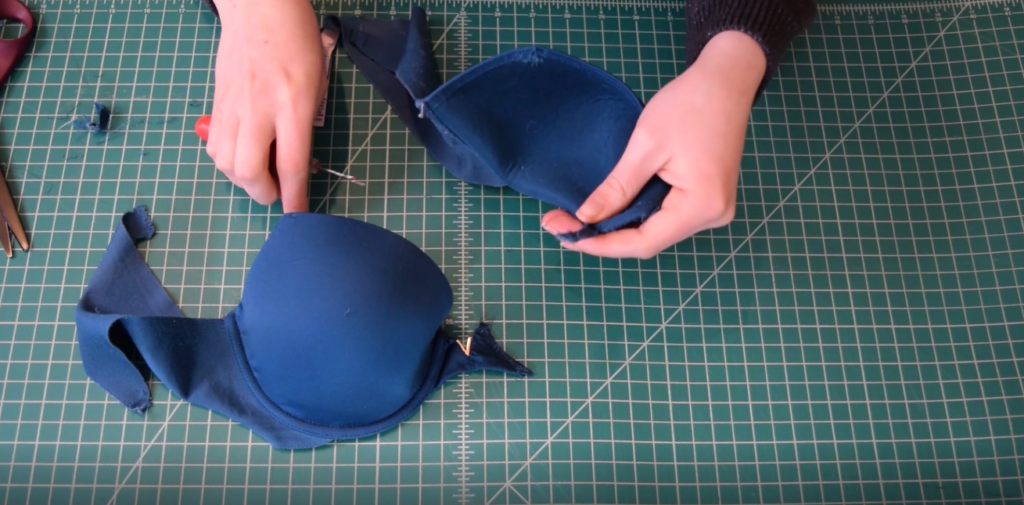
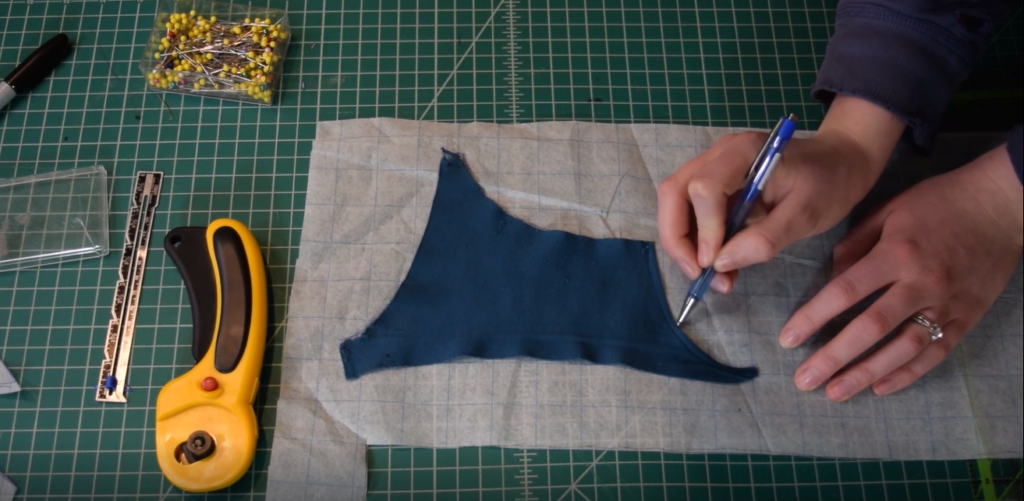
Next, we need to add a seam to our foam cup pattern. This is because my original bra was made with preformed foam cups (with no seam), but I will be using cut-and-sew foam. I don’t know where to source a preformed cup in this exact shape (and I love the fit of this cup!), so I want to add a seam and sew my own cups to this shape.
So to do that, I tried the cup on and marked the bust apex (the most prominent point of the bust). Then I drew in the shape of a nice curved vertical seam going through the apex. You can totally play with this and draw in whatever type of seam you like. I would suggest looking at photos of bras that you like that have seams in the cups to get an idea of where you want the seam to be.

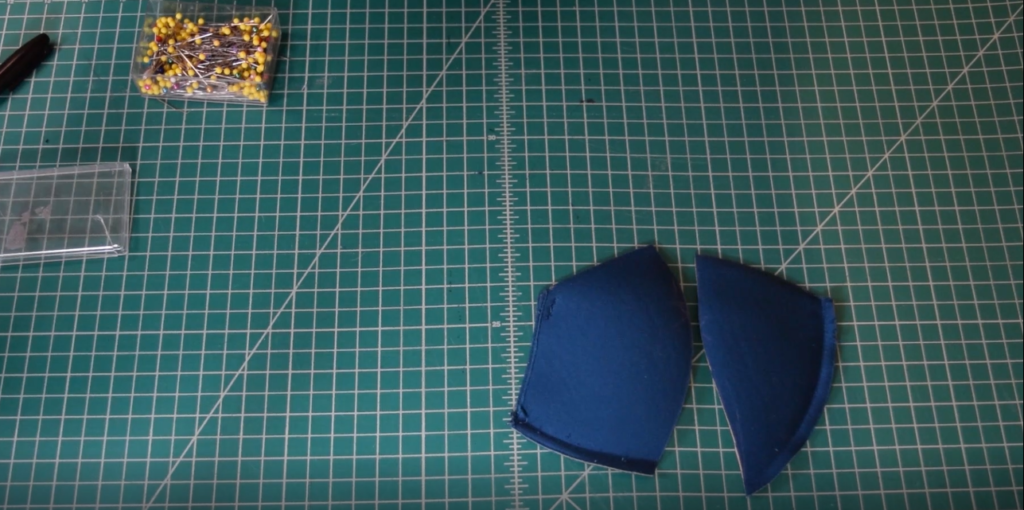
Then just grab your scissors and cut the cup apart at the seam line you drew.
Tracing off the Pattern
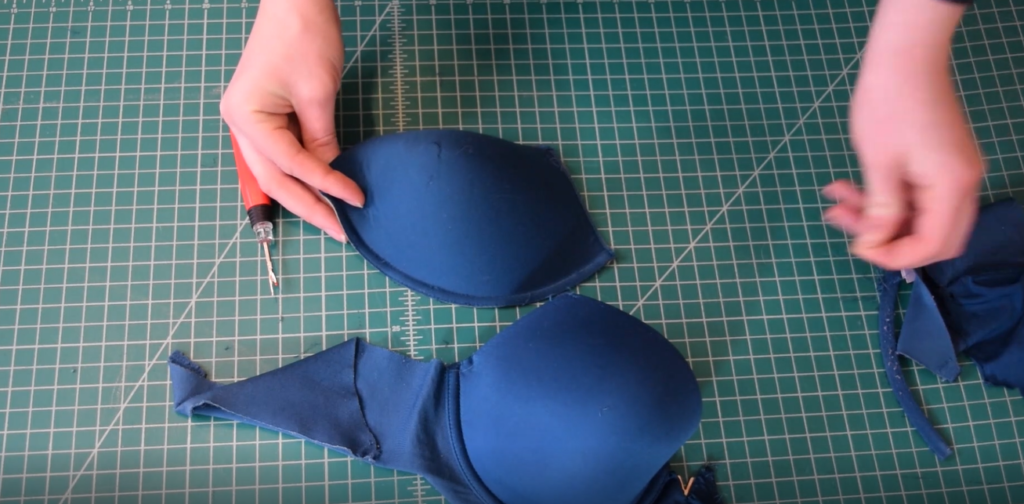
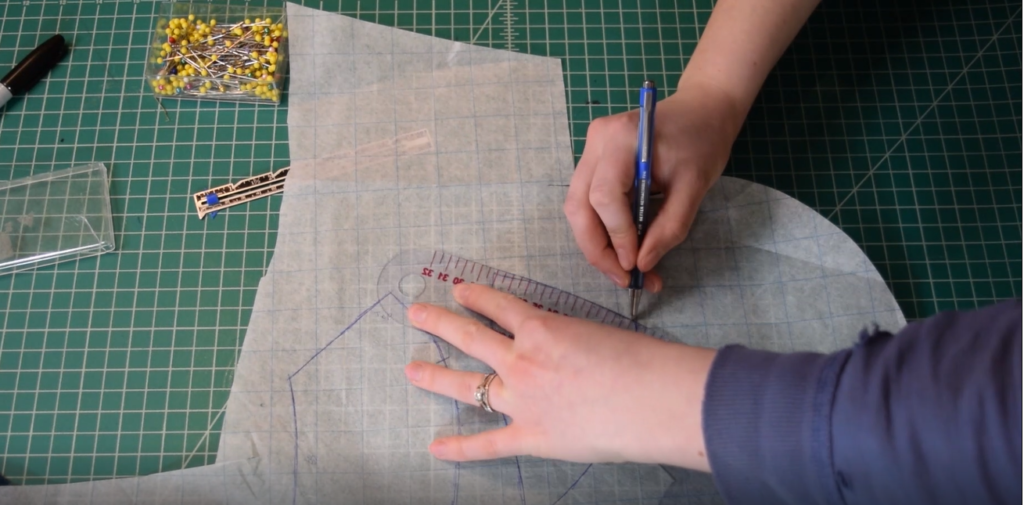
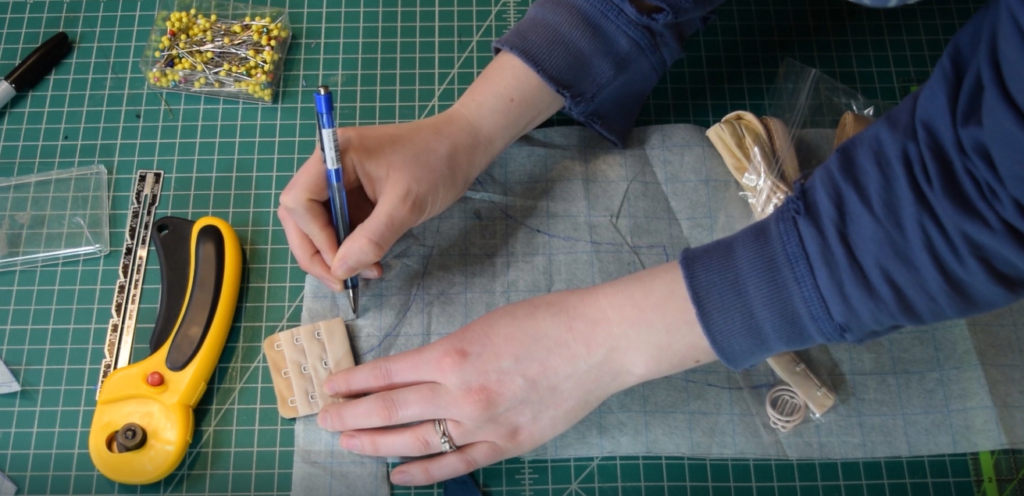
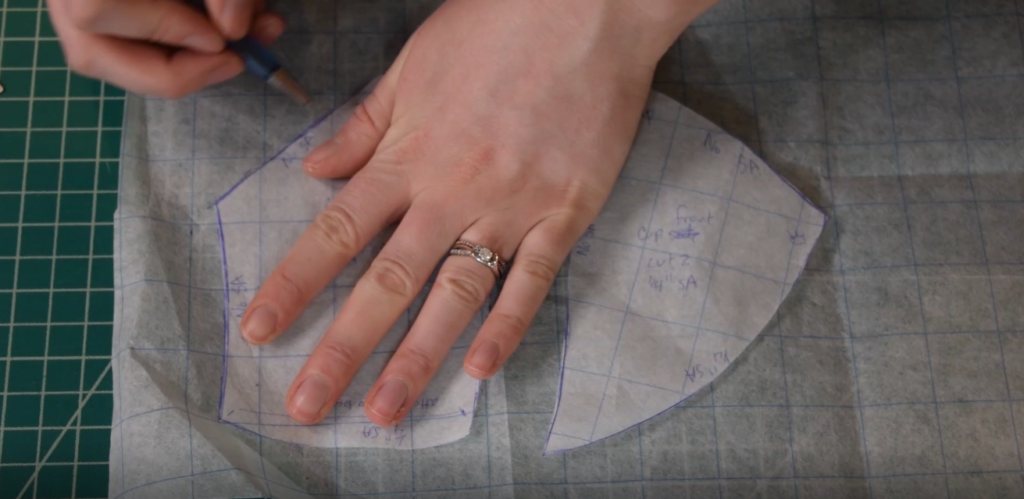
Now we’re ready to start putting together the pattern! Grab some pattern paper and place the two cup pieces on it. Trace off both cup pieces. I also marked the apex point on each piece.
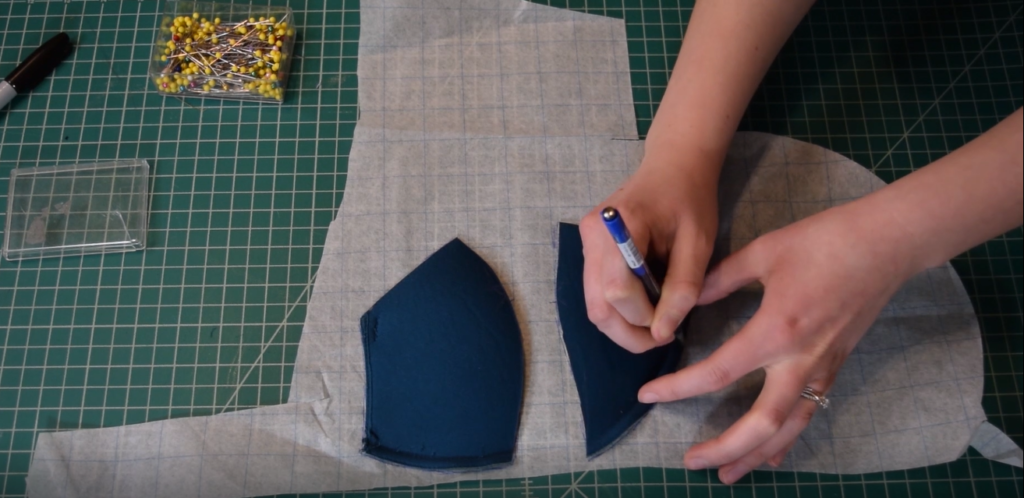
Next, I smoothed out my curves with a french curve ruler. I also marked the top and bottom of each piece for future reference. These cup pieces are weird shapes, so it’s good to leave notes for yourself to help orient yourself while you’re sewing.
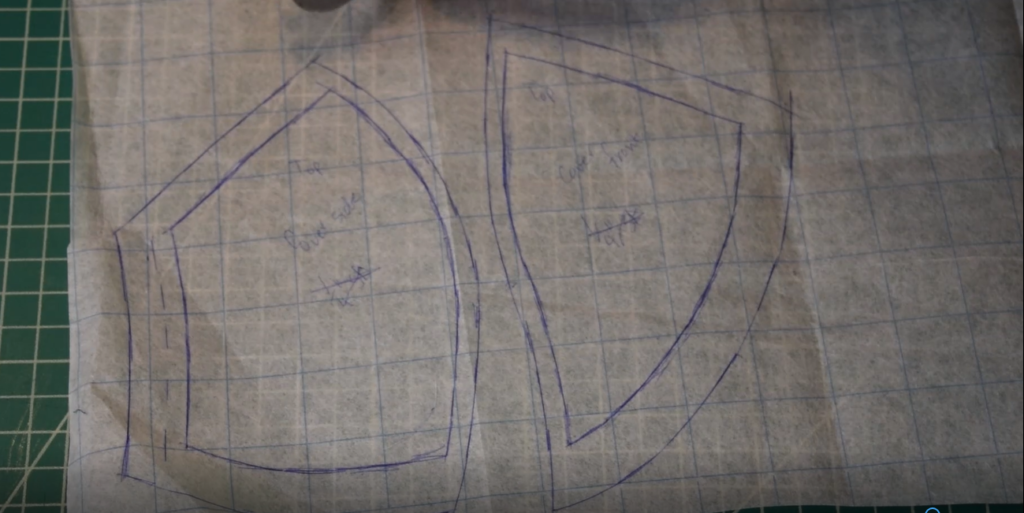
Then cut those pieces out and your foam cup pattern is done. We don’t need to add any seam allowance because the underarm and bottom edge has it already included – since we seam ripped rather than cut the bra apart. The top edge and center seam don’t need seam allowance because of the construction methods we use to put the cups together.
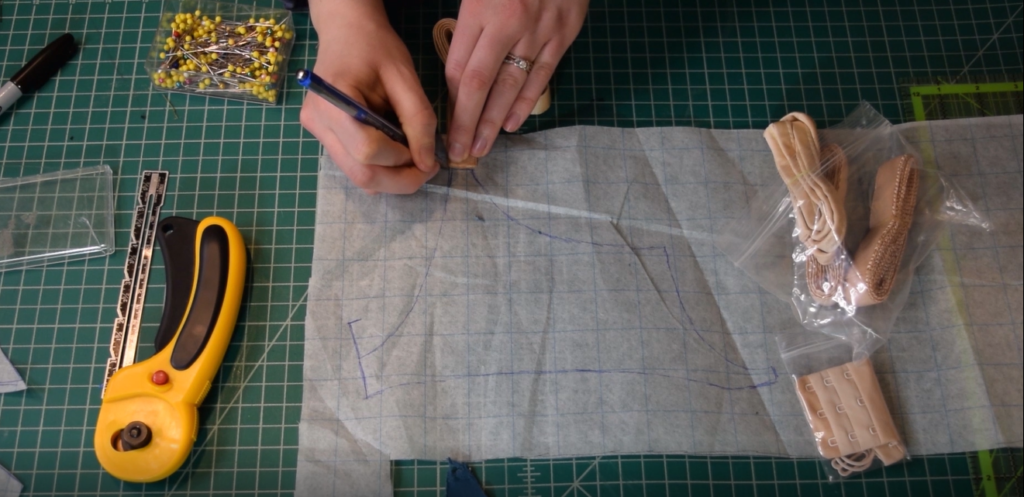
Next, trace off the bridge piece.
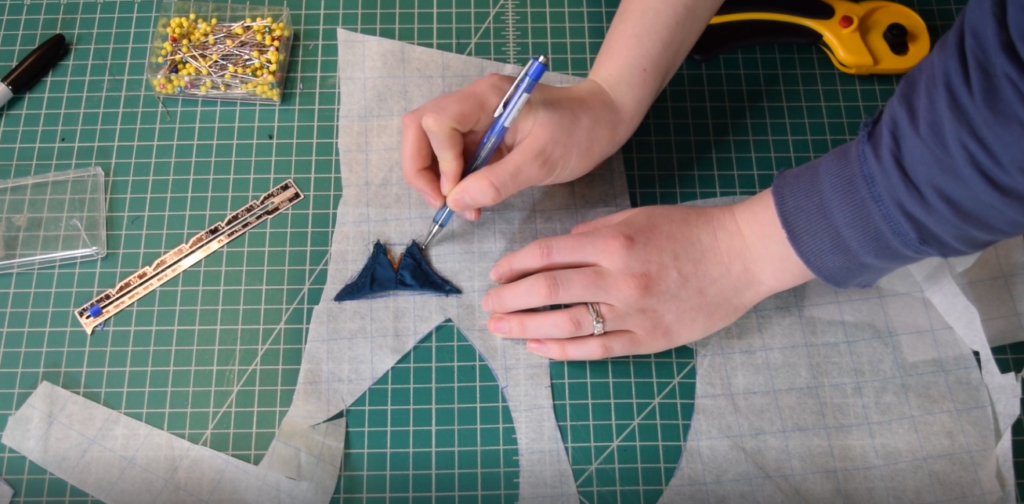
Add seam allowance (I added 1/4 inch allowances) to the top and bottom of the piece. The sides don’t need it because it’s already built in from where we seam ripped. Cut that piece out and let’s go on to the next one.
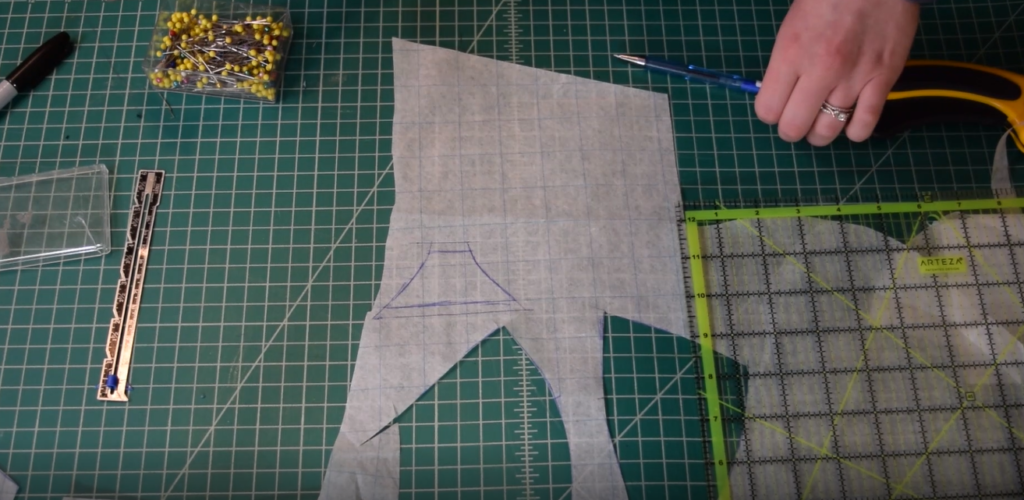
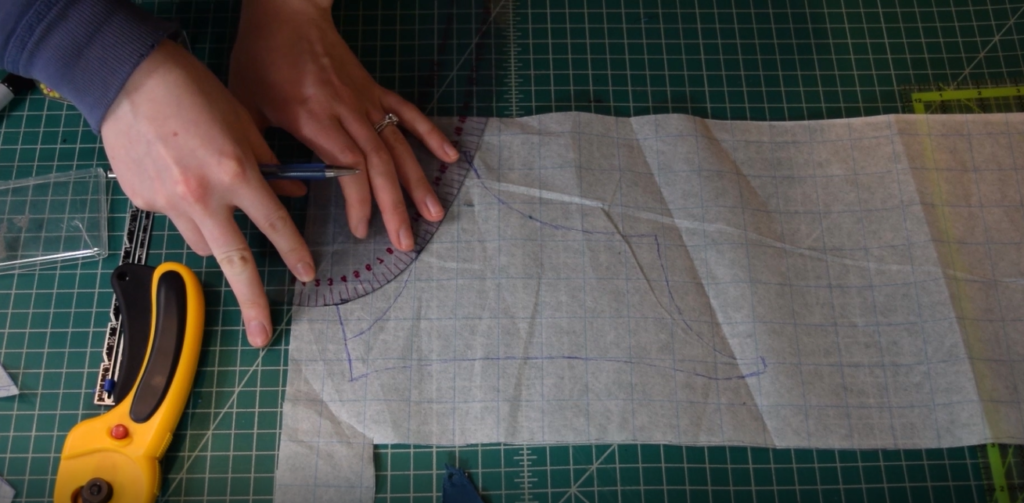
Trace off the back band piece.
Next, the clasp I got for my new bra is wider than the one on the original bra. So I need to adjust the pattern piece to accommodate it. So just line up the new clasp next to your pattern piece where the clasp will be attached and make a mark where you need to extend the pattern to.
Then I did the same for the strap elastic, since it was also wider than the original straps.
Next, I used my french curve ruler to smooth my new widened clasp attachment point into the original pattern.
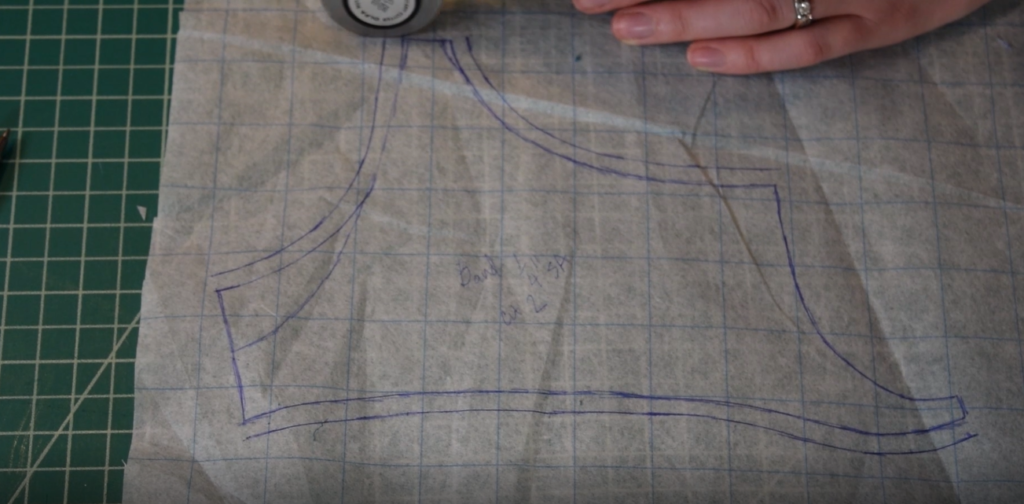
Then I did the same with my adjusted elastic attachment area. I also smoothed out the rest of the curves for good measure. Seam allowances also needed to be added along the top and bottom edges. This was because my original bra had raw edges in these areas. But I didn’t want raw edges in my new bra, so I added seam allowances (1/4 inch).
Cut that out and your back band is drafted.
The final pieces we need to make are for the fabric covering over the foam cups. So to start, I traced off my already made foam cup pieces onto new pattern paper.
Then I added seam allowances, which for the fabric cover are a bit different than usual. I added 1/4 inch to the center cup seam, 1/2 inch to the top edges of both pieces, and 3/4 inch to the bottom edges as well as the underarm edge of the side cup piece.
Now our bra pattern is done! So if you’re ready to get started sewing it up – head to my next tutorial HERE. Where I show you how to sew the bra!
I hope you found this tutorial helpful! If you want more sewing and DIY tips, tricks, and tutorials I would love to have you sign up for my email newsletter. I’ll even send you a free circle purse sewing pattern as a thank-you for subscribing!


[…] Previous […]
Great article. Thanks. I have artificial shoulders and can’t wear back-hook bras and can’t find more front hook ones I can afford. I did a variation of this after reading this great article. I bought some back-hook bras on a sale rack (correct cup size), cut off the cups to use, and used an old bra for a pattern for the rest of the bra, sewed a new band to the new cups, attached hook and eye in front, and now I have new bras!
That’s awesome! I’m so glad you were able to make yourself some bras that work for you 🙂
I like what you did I hope I can make it
I also have artificial shoulders.and have had to wear front hook bras for 30 years. They’re expensive and hard to find.. I also bought some bras on clearance for $3-$6 that have the right CUP size and am using the cups so I don’t have to make them.. That makes the whole project simpler. Thank you for this websie..