
In my last post I showed you how to mend a small rip in your jeans (if you missed that post, you can check it out HERE). And today I’m going to go through how I reinforced the back crotch of those same jeans.
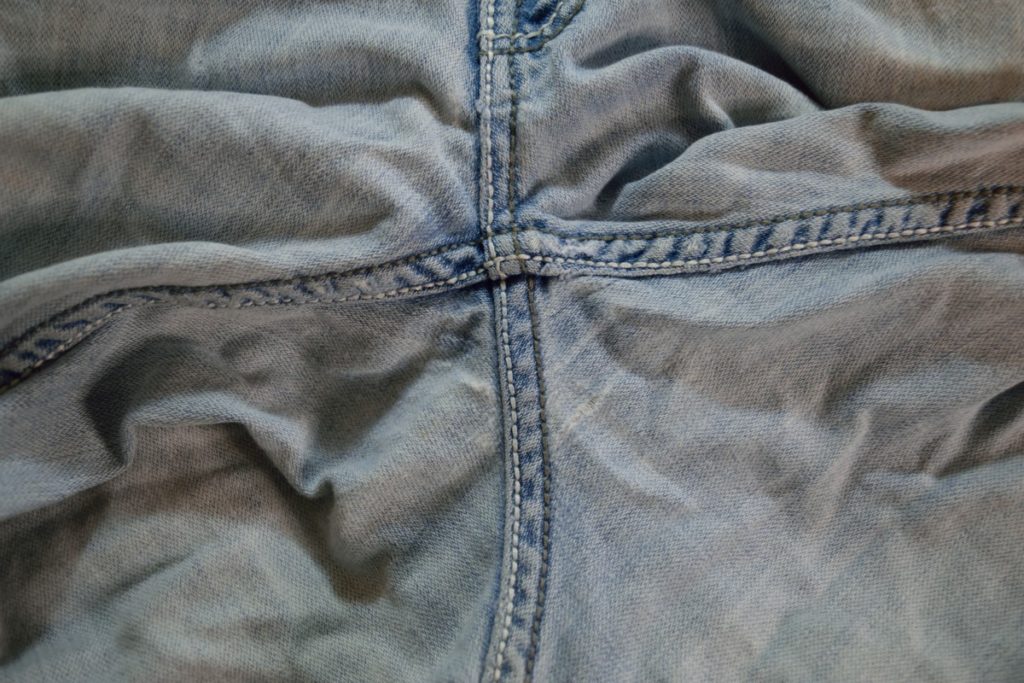
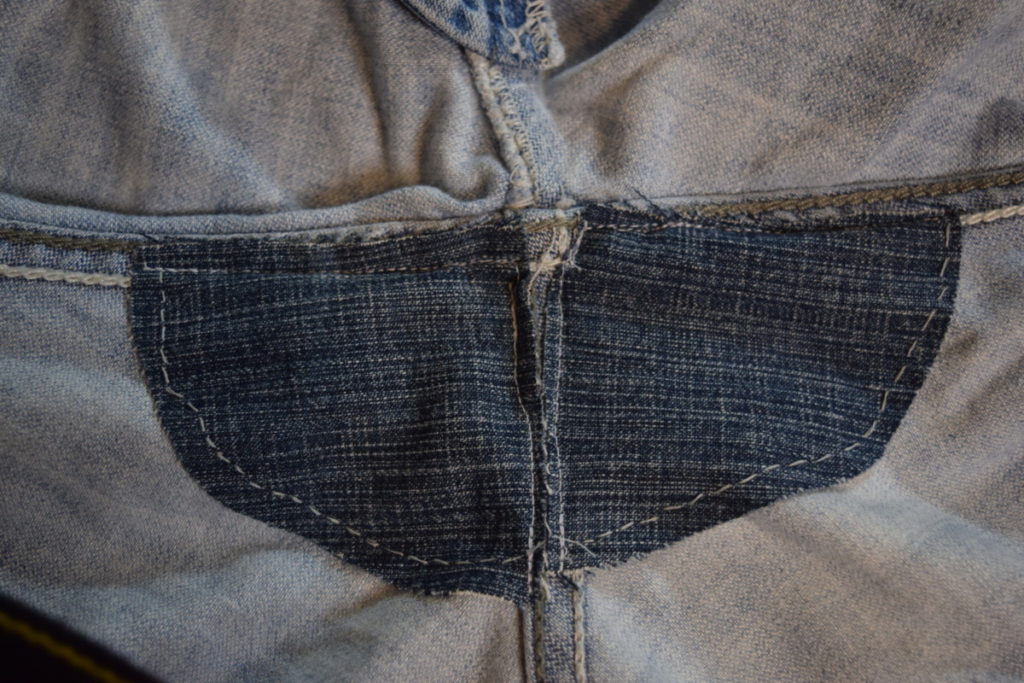
The back crotch of these jeans was starting to wear thin, so I decided to reinforce this area with a couple patches to take the pressure off the area before it becomes a real problem. If your jeans are wearing in the front crotch as well as the back crotch, you can apply this same method. You’ll just need to add two more patches to the front crotch.
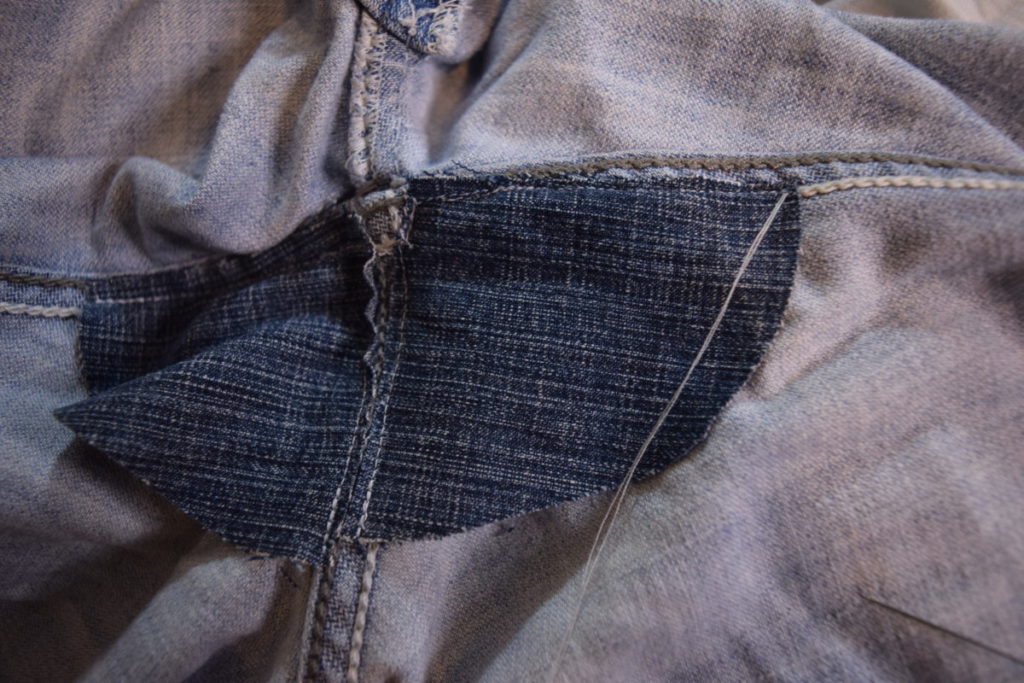
Here’s what it looked like before, you can see the back crotch is really starting to wear thin:
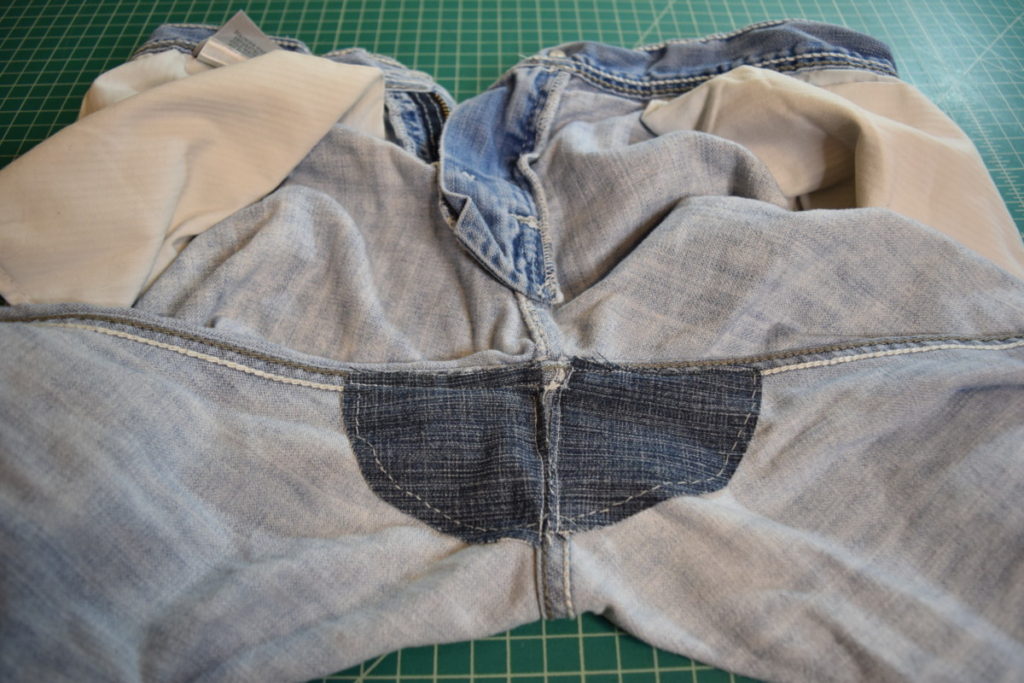
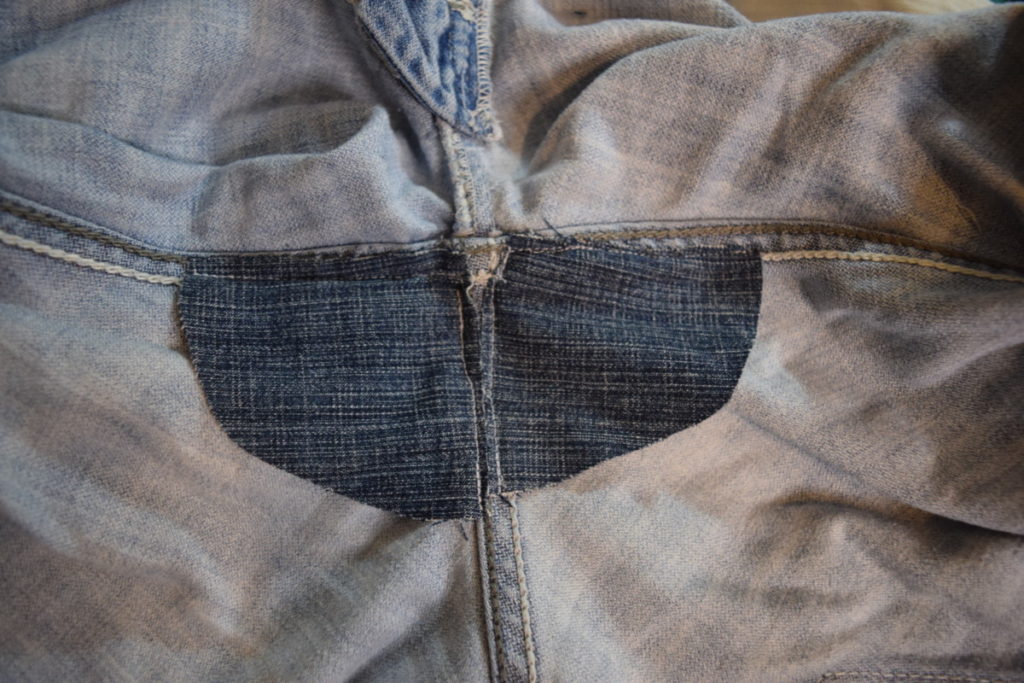
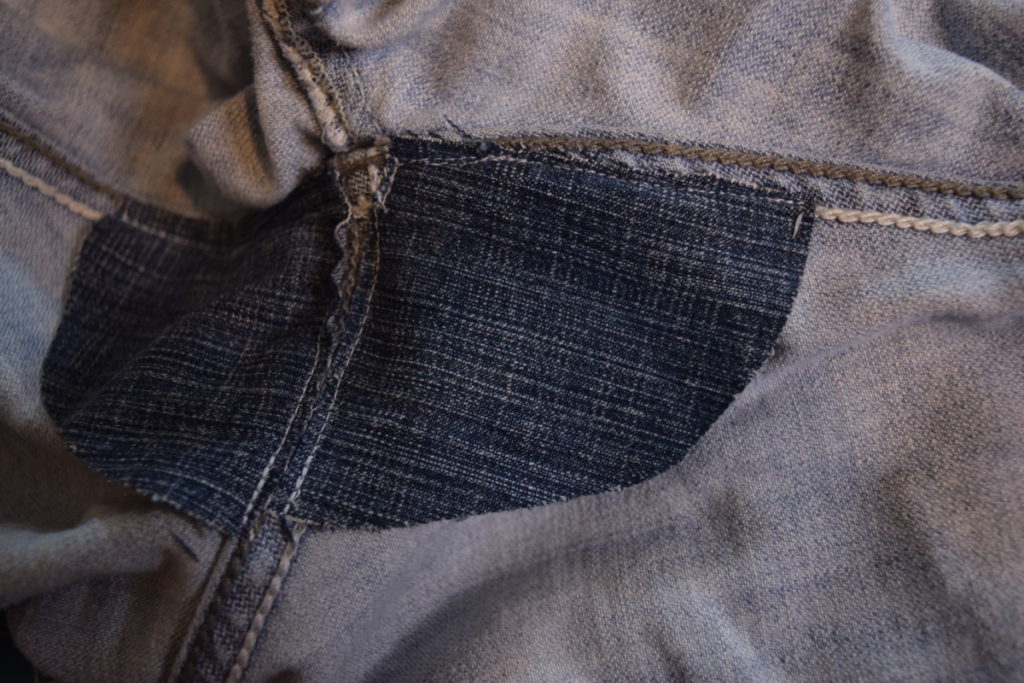
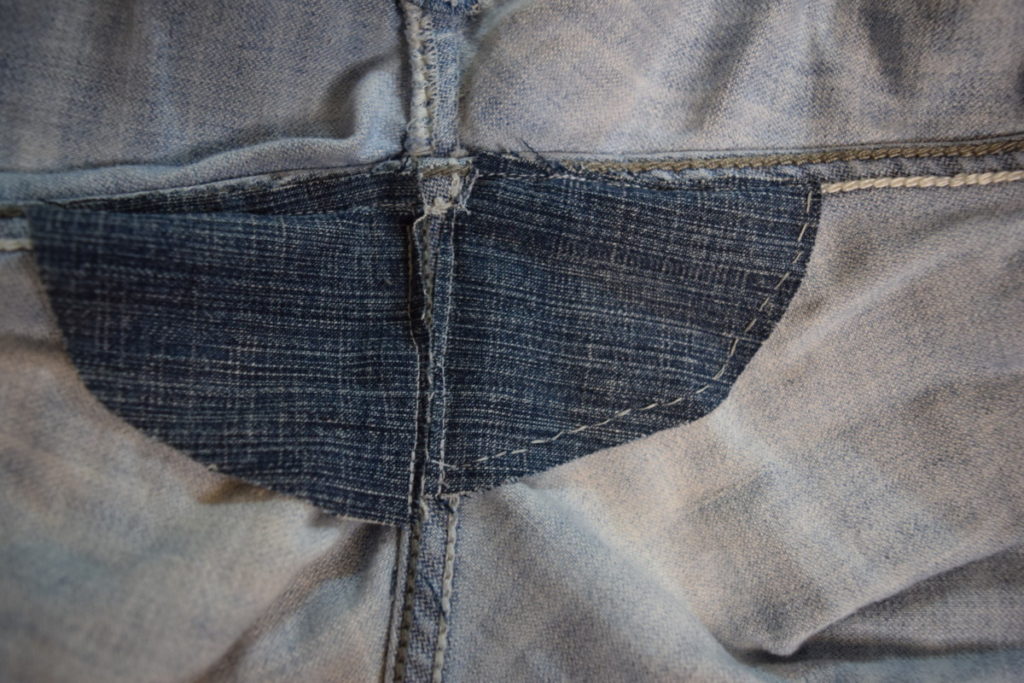
And here’s the inside after I patched it:
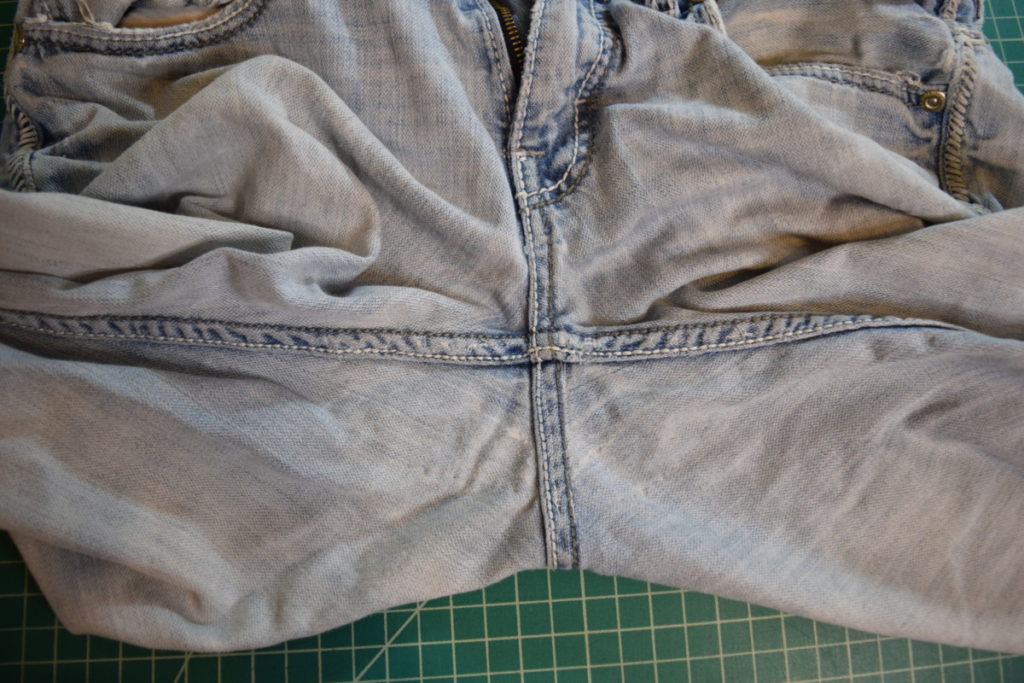
I’m so happy with the results I got using this method to patch the crotch of my husband’s jeans! It’s pretty much invisible from the outside:
Ok, so let’s get into the tutorial!
What you need:
*This list contains affiliate links for your DIYing convenience, so I receive a small commission if you buy something through my links. This really helps to support my site so I can keep creating DIY tutorials to help you create your dream wardrobe.
- jeans you want to patch/reinforce
- extra denim or other cotton fabric to make patches
- thread matching your jeans
- hand sewing needle
- scissors
- sewing machine
Steps:
- Turn jeans inside out and cut patches to fit in within the crotch seams
- Sew the patches to the crotch seams along the straight edges
- Sew the outer edges of the patches to the jeans with a hand sewing needle
- Done!
Instructions:
First, turn your jeans inside out and cut two rounded triangular patches that are the right size to fit between the seams of the back crotch (with some overlap onto the seams) and long enough to cover any signs of wear.
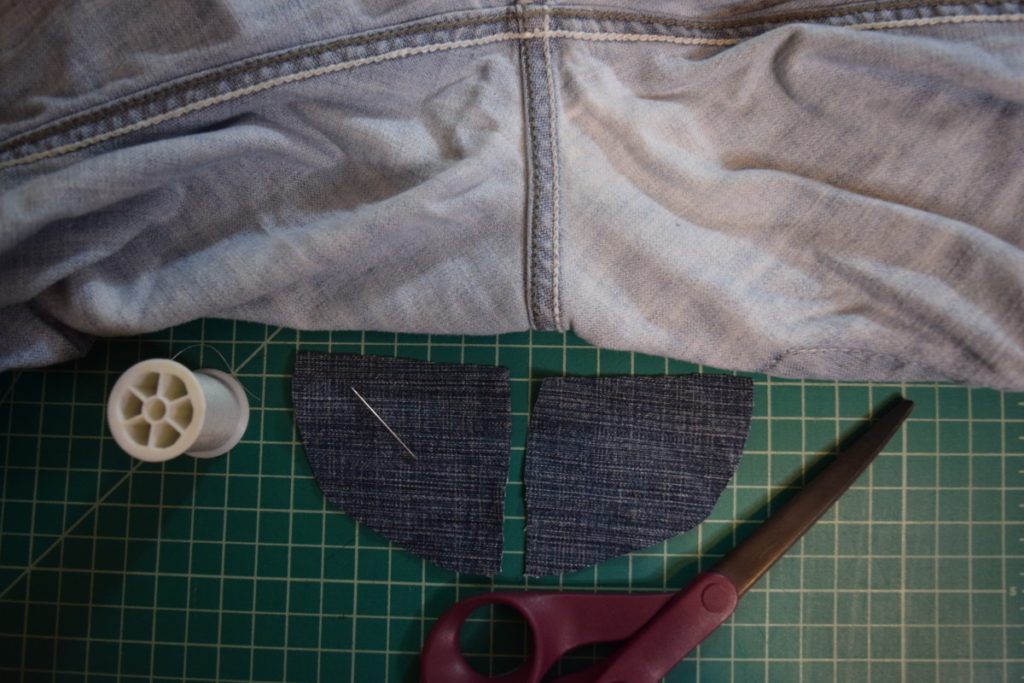
Line up one of the patches over the seams on one side of the back crotch.
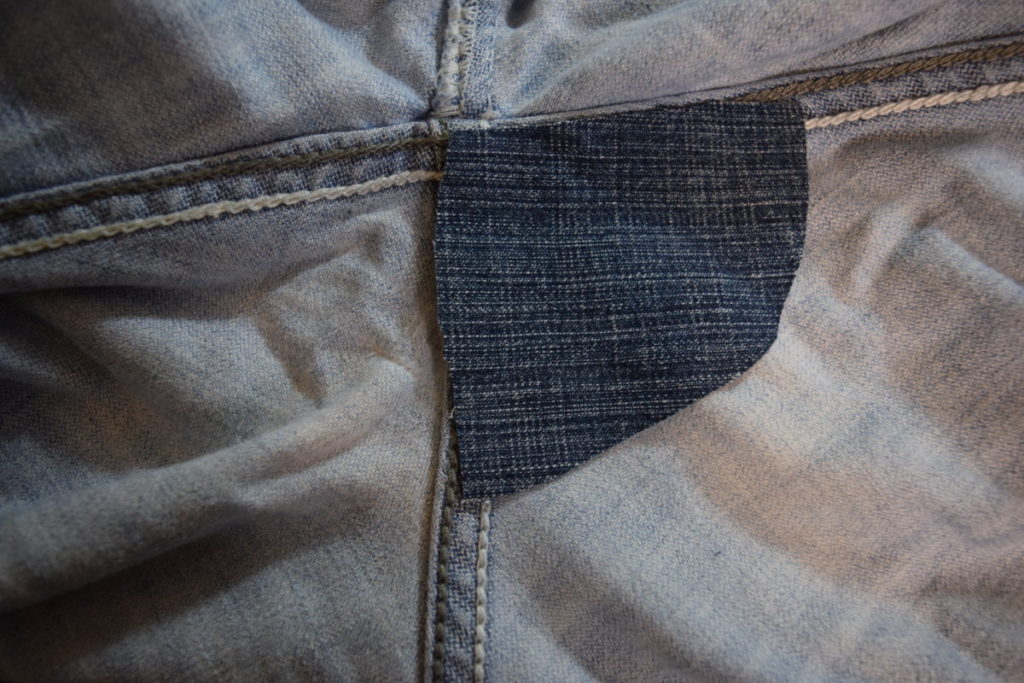
Use your sewing machine (you could also hand sew this if you don’t have a sewing machine) to sew the two straight edges to the jeans. Make sure to only sew within the jean’s seams because it will be less visible from the outside and more sturdy.
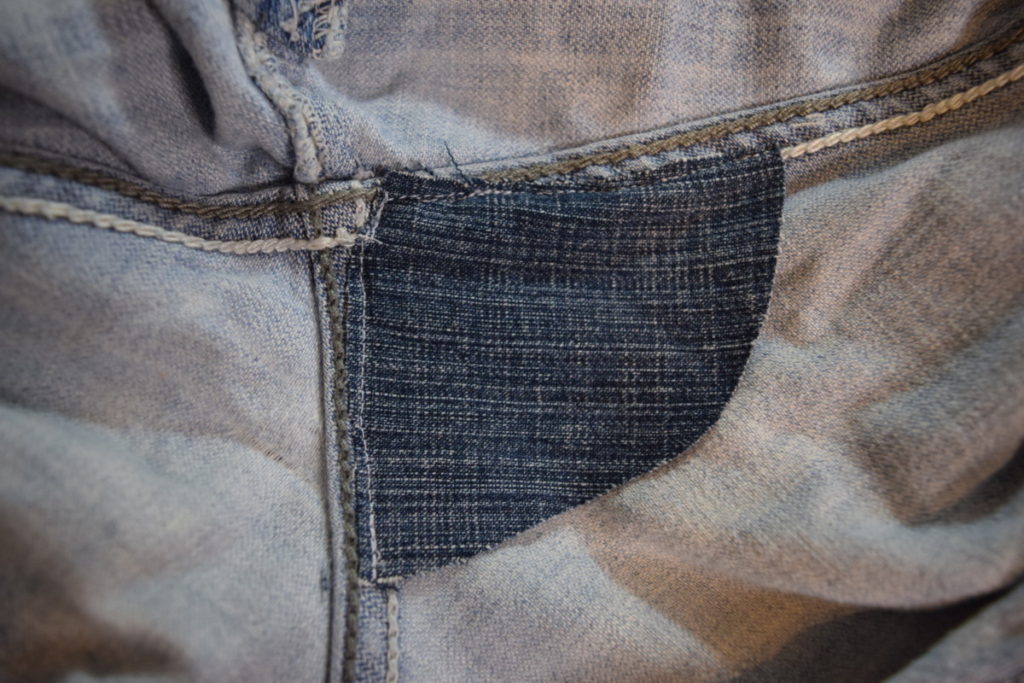
Repeat with the other patch to sew it to the other side of the back crotch of the jeans.
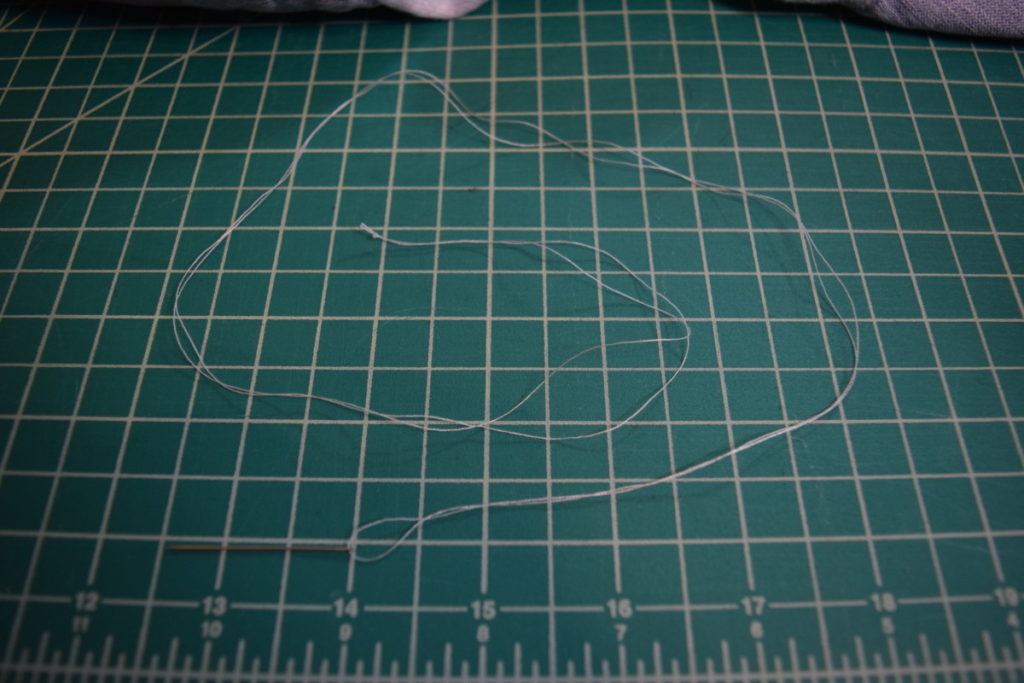
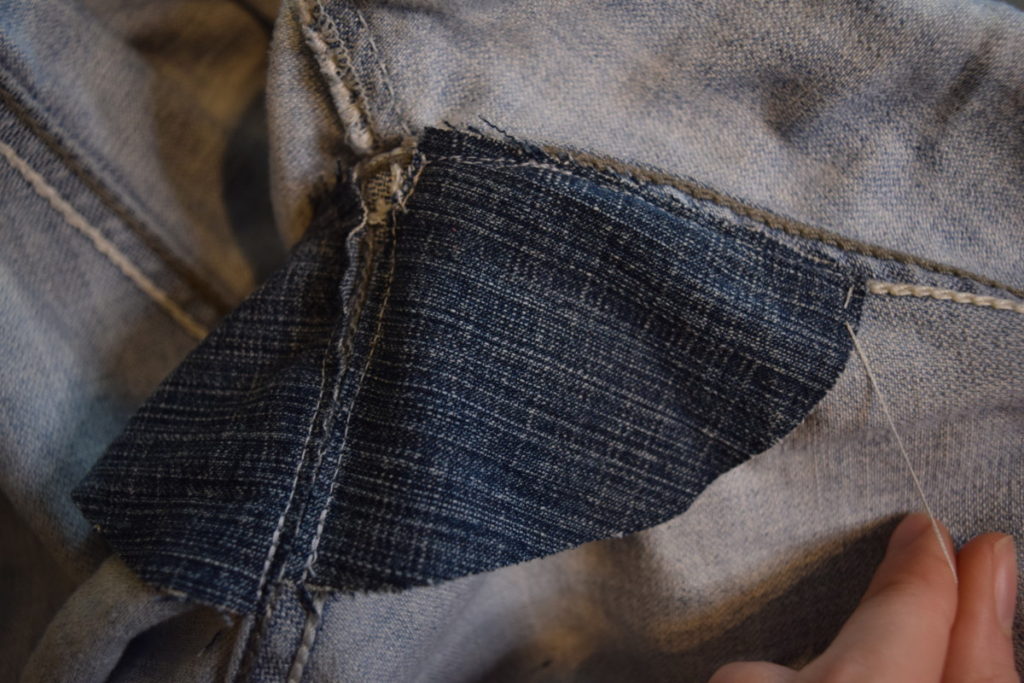
Now we’re going to hand sew the outer curved edges of the patches to fully secure them to the jeans. Start by threading a needle with a double thickness of thread. Knot and trim the ends of the thread tails together.
Start by pushing the needle up through the seam of the pants at one end of the patch, pushing the knotted thread tails against the outside of the pants.
Next, push the needle back down through the patch. You can take a relatively large stitch here; about 1/4 inch.
Then push the needle back up from the outside of the jeans. This time take a much smaller stitch; this will make the stitching practically invisible on the outside because the longer stitches are only on the inside.
Repeat this process all the way around the outside of the patch, continuing to make small stitches on the outside and longer stitches on the inside. Tie off the thread tails and trim.
Now you can repeat this same process to sew the outer edge of the other patch to the jeans.
And that’s it! I think next time I would finish all the edges of the patches with a serger or a zigzag stitch before sewing them into the jeans to keep them from unraveling and looking ragged. But for the most part I’m super happy with how this worked out!
If you enjoyed this tutorial, I would love for you to sign up for my email newsletter for more sewing and DIY tips and tutorials and to make sure you never miss a new blog post!


Wow, thanks a lot. I have been wondering about this for years, this makes so much sense instead of waiting for a crotch blowout. I usually do my own mending so this is a big help.
I’m so glad you found this helpful! 🙂
What do you think of using iron on patch instead? Might lie flatter?
This way you get easy access, just like explorer, to all the files and folders per file system. Instead of being limited to one file system that the OS picks for you, you have access. Access data from older sessions or hidden partitions, access data that your OS (e.g. Windows) does not see or hides from you etc. Combine this all-revealing functionality with far better read and recovery mechanisms, scanning for lost files functionality, workarounds for a wide range of drive and software bugs, limitations or shortcomings and you have an enormously powerful data recovery tool. RepairCdDvD is must-have-software for every PC user and is deliberately kept low priced to be able to offer a solution for everybody.
Before writing to disk, data is encoded in the “8 in 14” standard and stored in the form of land and pits. In the embossed plates, the recesses are 1/4 wavelength deep in the material of the reading laser plate (about 125 nm), as a result of the interference of light reflected from the environment and the recesses, the wave is extinguished. The pits are 500 nm wide and the track spacing is 1.6 mm. The differences in light reflection are used by the lens servo to guide the beam along the path and focus it.
RepairCdDvD is a tool that recovers data from unreadable CD/DVD. It can help you retrieve the files from damaged CD DVD and save them to disk, the clipboard, or even the hard disk. No accumulated cost if you need more than one type media or file system supported. RepairCdDvD is a highly specialized yet easy to use media data recovery tool. It supports all disc formats and all common file systems. Insert a disc, start up RepairCdDvD and select the drive or media (if not selected already) and let RepairCdDvD mount the media. RepairCdDvD immediately shows you all the partitions or tracks and sessions located on the media, combined with all file systems that are present.
Premium Quality: We use only the finest hemp extracts, ensuring a pure and potent CBD product. Delicious Flavours: Indulge in a variety of mouth-watering flavours that make incorporating CBD into your routine a tasty delight.rusted Transparency: With CBD Guru, you can trust the transparency of our products. Our products are third-party lab tested for quality and potency.Wellness Beyond Ordinary: Elevate your well-being with the natural benefits of CBD, known for its potential to support relaxation and balance.Whether you’re a seasoned CBD enthusiast or just beginning your wellness journey, CBD Guru’s CBD Gummies are the perfect companion. Boost your daily routine with a burst of flavour and the holistic benefits of high-quality CBD. Shop with confidence, knowing you’re choosing a product that’s crafted with expertise and a commitment to your well-being.
Getting your daily dose of CBD has just got even easier with SupremeCBD thanks to our range of mouth watering CBD Gummies. Our CBD Gummies are designed to be easy to take, easy to store, and easy to have while you’re out and about. All you have to do is simply pop your grab bag or tub in your bag for easy reach when you need them most. And because our gummies are the size of most jelly sweets, they’re the perfect addition to your morning routine and easy to take. CBD Gummies are also one of the best ways to take your CBD safe in the knowledge that they’ll be working their magic and providing beneficial goodness for hours. Our Grab Bags Are Perfect For Taking CBD Gummies On The Go If you have a busy lifestyle – family, work, kids – it’s easy to forget about taking your CBD when you need it, which is why we have you covered. To make it easy to get your regular dose of CBD you can now buy our CBD gummies in handy grab-bags, as well as our recyclable tubs. And not only that, we now offer an amazing variety of delicious flavours and shapes, ranging from worms and strawberries, to our mouth watering cherries and bears. So now you never need a reason to miss your CBD, all you have to do is pop them in your hand bag, gym bag, or even pop them in your pocket and you’ll always have them within reach, ensuring you never miss your dose. How Many Gummies Can You Take? This is a question we get asked a lot. Understanding the right amount of CBD gummies you should take depends on a couple of factors, 1) Your desired effect 2) your individual tolerance and body weight. At SupremeCBD we understand that everyone’s needs and preferences are unique which is why we put together this handy blog: “how many gummies should I eat?”. But if you’re looking for a quick answer, we recommend starting with one gummy and waiting for about an hour to see how it affects you. If you feel the need to increase your dosage try taking another edible until you find an amount that works for you. One thing you can be sure of is that each of our CBD gummies are carefully made to offer you a delicious, and enjoyable way to maintain your overall physical and mental well-being. If you have any questions feel fee to contact our team. Alternatively you can always consult with a healthcare professional if you have any concerns or are unsure about the right dosage for you. 100 Gluten Free and Vegan CBD Gummies Did we forget to mention that our CBD edibles can be enjoyed by all? Whether you have an intolerance to gluten or you are vegan, we have made sure you can still enjoy our delicious range of CBD gummies. All of our gummies are 100 gluten-free and vegan, making them a perfect choice if you have specific dietary requirements. Looking after all of our customers is important to us which is why we have meticulously crafted our edibles to provide you with a guilt-free way to enjoy the benefits of CBD everyday. Our Customers and Ambassadors Love Our CBD Gummies
Every brand is different but dosages can range from 5mg to 50mg CBD per serving. Our CBD Dark Chocolate Balls contain 50mg CBD per pack and can be consumed in one sitting, while our CBD Plus Gummies are formulated for daily use with 10mg CBD per gummy. Our best-selling CBD Jelly Domes are available in two options – a 50mg travel pack with 5mg CBD per sweet and a 600mg jar with 20mg CBD per sweet. If you’re new to CBD, we recommend starting with a low dose of 10mg then increase dosage as required.CBD edibles taste like the type of edible they are. All of our CBD edibles have been carefully curated to deliver great authentic taste, so it is unsurprising that our velvety smooth CBD Dark Chocolate Balls taste exactly like chocolate! This is what makes our CBD edibles so popular, providing users with a simple, convenient way to try CBD without the distinctive taste.Remember, CBD is a supplement so it can take up to 4 weeks of regular use to notice a significant change, the key is to remain consistent and don’t be afraid to experiment with dosage and strength. However, the Food Standards Agency (FSA) advises that healthy adults should not exceed a daily CBD intake of 70mg. You should keep this recommended dosage in mind when you consume our CBD edibles.
RepairCdDvD is a tool that recovers data from unreadable CD/DVD. It can help you retrieve the files from damaged CD DVD and save them to disk, the clipboard, or even the hard disk. No accumulated cost if you need more than one type media or file system supported. RepairCdDvD is a highly specialized yet easy to use media data recovery tool. It supports all disc formats and all common file systems. Insert a disc, start up RepairCdDvD and select the drive or media (if not selected already) and let RepairCdDvD mount the media. RepairCdDvD immediately shows you all the partitions or tracks and sessions located on the media, combined with all file systems that are present.
RepairCdDvD is a tool that recovers data from unreadable CD/DVD. It can help you retrieve the files from damaged CD DVD and save them to disk, the clipboard, or even the hard disk. No accumulated cost if you need more than one type media or file system supported. RepairCdDvD is a highly specialized yet easy to use media data recovery tool. It supports all disc formats and all common file systems. Insert a disc, start up RepairCdDvD and select the drive or media (if not selected already) and let RepairCdDvD mount the media. RepairCdDvD immediately shows you all the partitions or tracks and sessions located on the media, combined with all file systems that are present.
This way you get easy access, just like explorer, to all the files and folders per file system. Instead of being limited to one file system that the OS picks for you, you have access. Access data from older sessions or hidden partitions, access data that your OS (e.g. Windows) does not see or hides from you etc. Combine this all-revealing functionality with far better read and recovery mechanisms, scanning for lost files functionality, workarounds for a wide range of drive and software bugs, limitations or shortcomings and you have an enormously powerful data recovery tool. RepairCdDvD is must-have-software for every PC user and is deliberately kept low priced to be able to offer a solution for everybody.
After that, you may choose to utilize the Repair function, which is the bread and butter feature of the software. This option seeks to recover the data on your CD or DVD, without needing you to configure anything.
Structure of the medium, data recording Micrograph of recesses and fields Diagram of a cross-section of a pressed plate A standard compact disc, often referred to as an audio CD, stores the digital audio record in a “red book” standard to distinguish it from later variants. Compact discs are made of a 1.2 mm thick polycarbonate plate with a diameter of 12 cm, covered with a thin layer of aluminum (aluminum), in which information is contained (in the form of a combination of micro-grooves and places without them). They are read with a semiconductor laser (AlGaAs) with a wavelength of about 780 nm. The recording creates a spiral path from the center to the edge of the record.
Good day! This is kind of off topic but I need some
help from an established blog. Is it tough to set
up your own blog? I’m not very techincal but I can figure things
out pretty quick. I’m thinking about setting up my own but I’m not sure where to begin. Do you have any points or suggestions?
With thanks
After that, you may choose to utilize the Repair function, which is the bread and butter feature of the software. This option seeks to recover the data on your CD or DVD, without needing you to configure anything.
Structure of the medium, data recording Micrograph of recesses and fields Diagram of a cross-section of a pressed plate A standard compact disc, often referred to as an audio CD, stores the digital audio record in a “red book” standard to distinguish it from later variants. Compact discs are made of a 1.2 mm thick polycarbonate plate with a diameter of 12 cm, covered with a thin layer of aluminum (aluminum), in which information is contained (in the form of a combination of micro-grooves and places without them). They are read with a semiconductor laser (AlGaAs) with a wavelength of about 780 nm. The recording creates a spiral path from the center to the edge of the record.