
I do love button up shirts, I find they’re an easy and comfortable way to pull together an outfit. And when I started seeing the Kalle shirt and shirtdress pop up over and over in my instagram feed, I just had to try the pattern out myself. And I was not disappointed! Somehow Closet Case Patterns made sewing a button down shirt pretty easy.
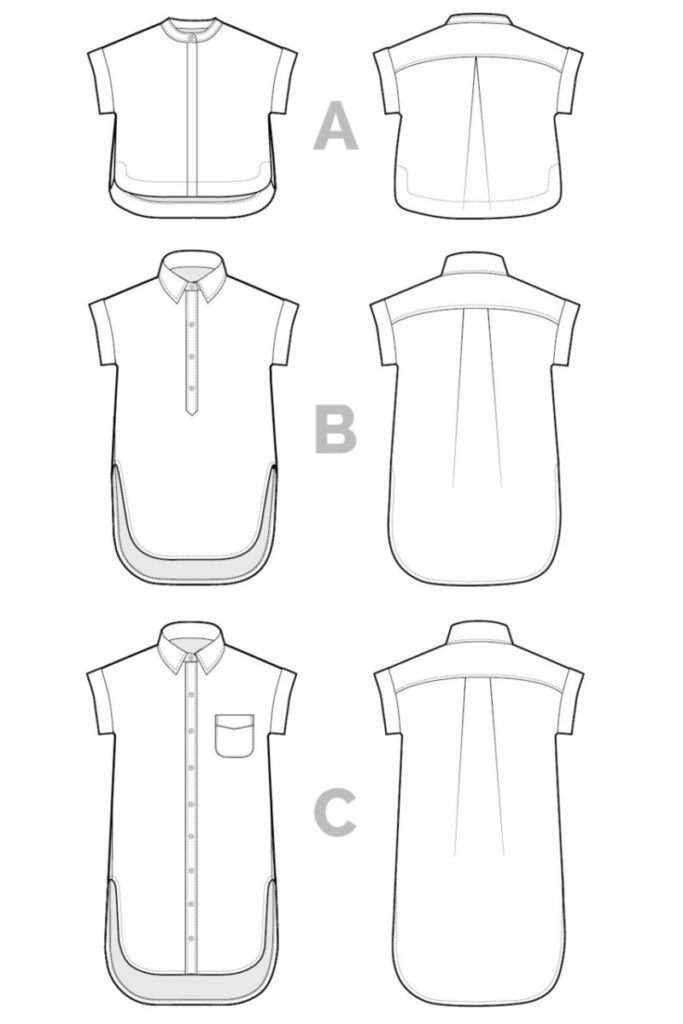
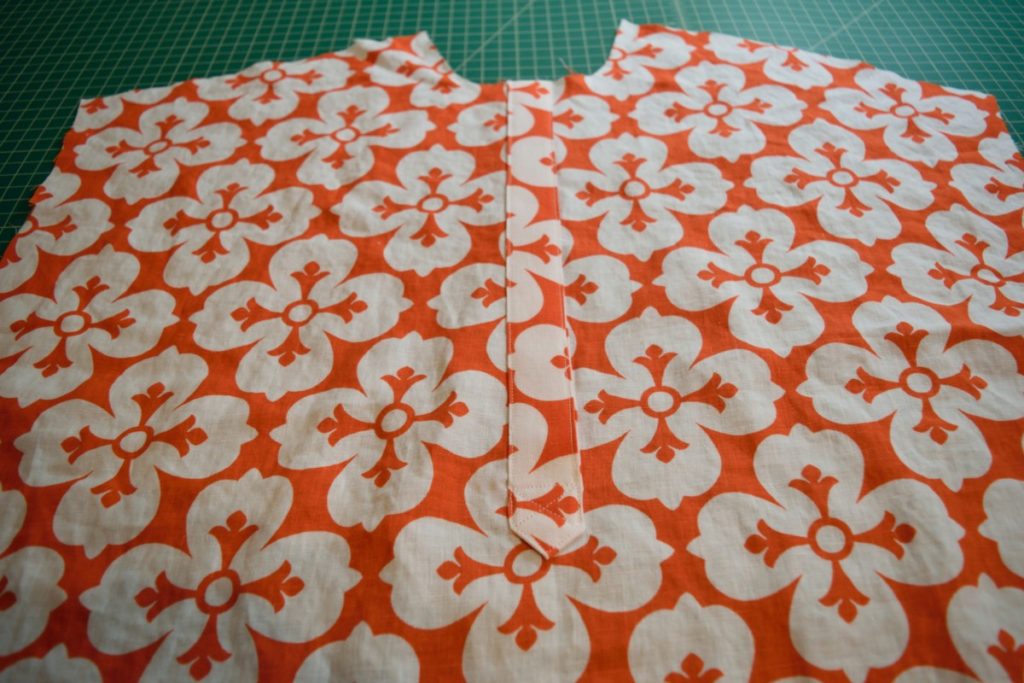
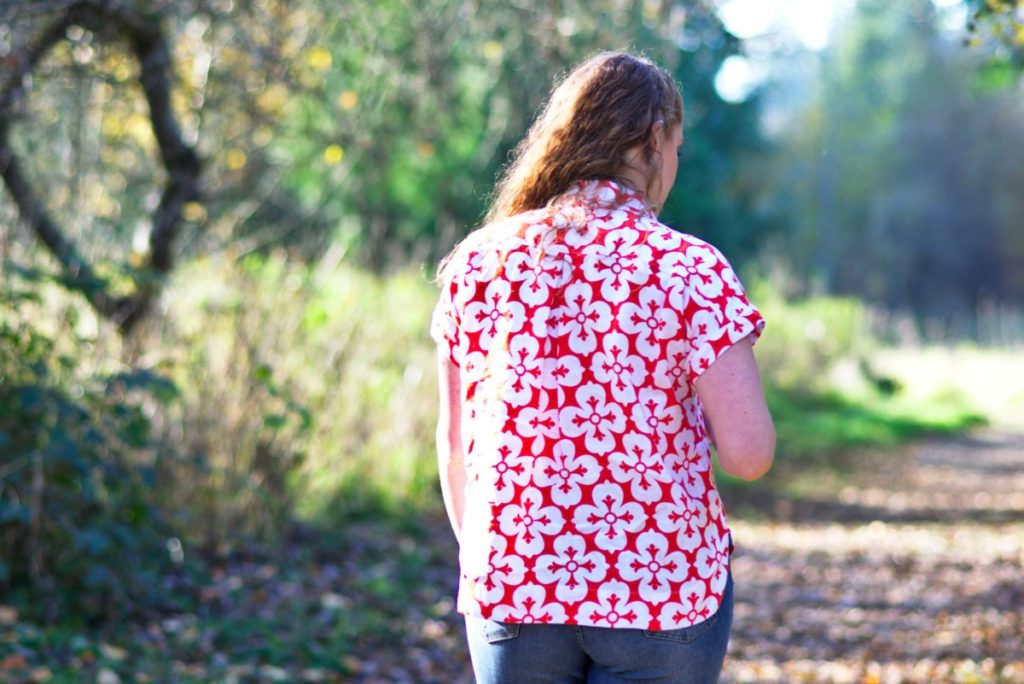
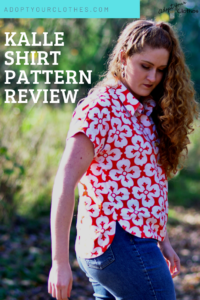
I decided to make the cropped (view A) version of the shirt and used the popover button placket. There are lots of different options included in this pattern for the silhouette, the back pleat, the button placket, and the collar. I used this gorgeous soft linen fabric from JoAnn Fabrics for this shirt; available here: 100% Linen Fabric – Orange and White (affiliate link, thanks for your support!). I just love the color and the drape is gorgeous! I also paired it with these beautiful vintage buttons that I found at the thrift store. It’s kind of hard to tell in the photo, but those are tiny adorable horse heads on the buttons!

Sizing
I cut a straight size 12 on this pattern and I think the fit is really great. The only adjustment I made was to add 3 inches to the length of both the front and back. I added the length because I wasn’t sure I wanted a super cropped version, but I’ll probably make it again without the added 3 inches. I just like this pattern that much!
Here’s how I added the 3 inches:
First, I cut across both the front and back pattern pieces along the lengthen/shorten lines.
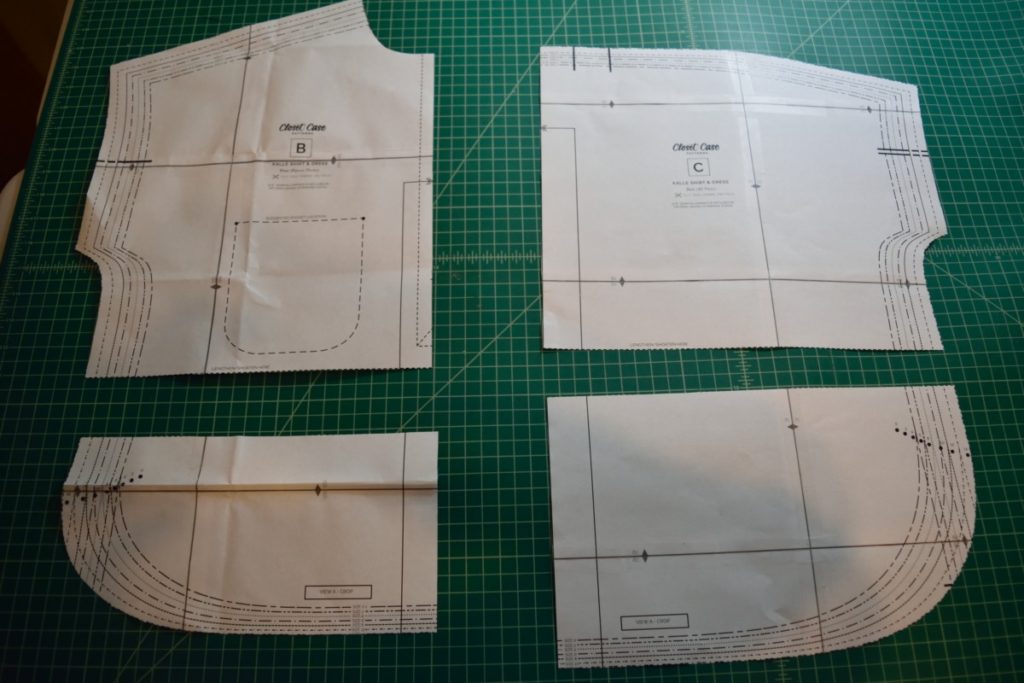
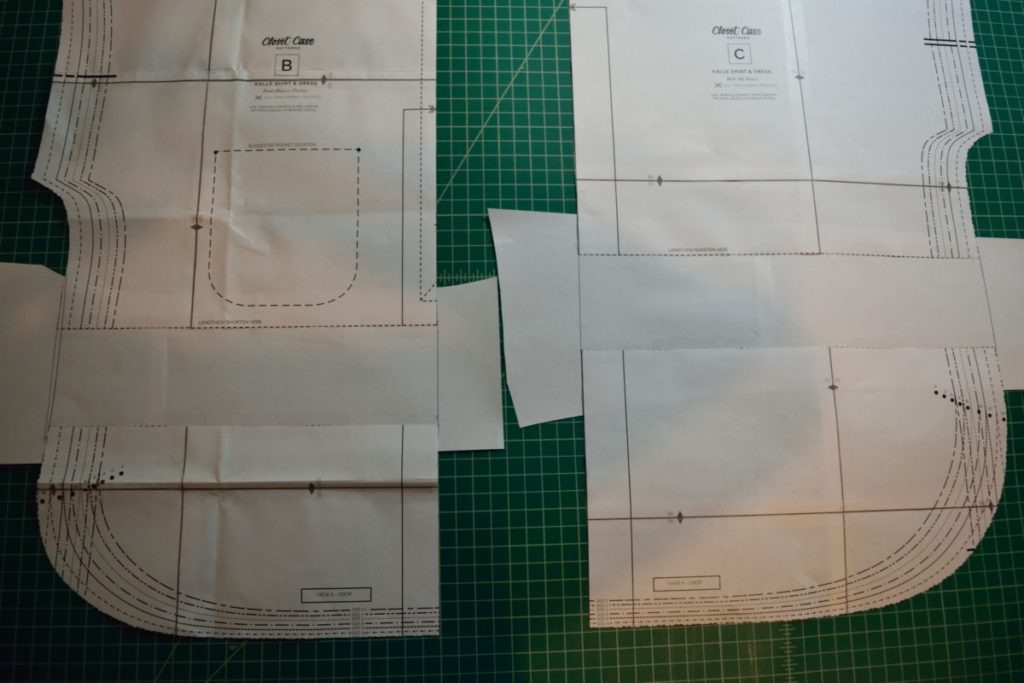
Then I put paper (I used leftovers from cutting out my pattern pieces) behind each of the slashed pattern pieces. I measured to make sure the opening in each piece was exactly 3 inches, making sure the straight edges of each of the pieces lined up, then I carefully taped the pieces to the paper below. Next, I drew lines to connect the top of each piece to the bottom at each side, as shown below.
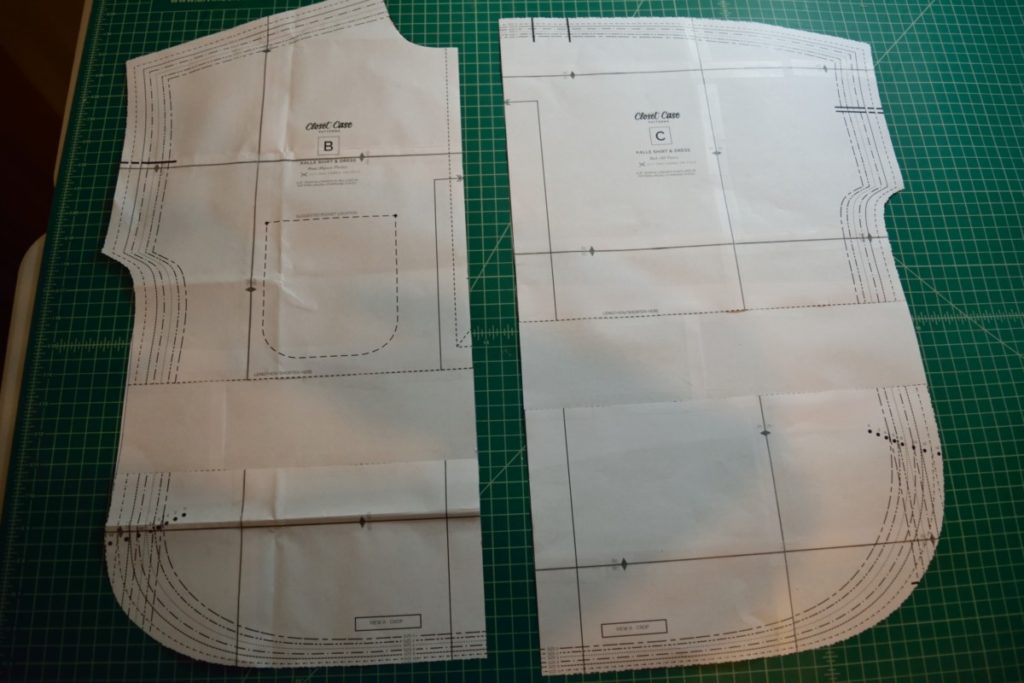
Finally, I just cut along the lines I had drawn and… DONE! Three inches added!
Sewing it up
I thoroughly enjoyed sewing this shirt up. It was a really good experience with shirtmaking; if you’re new to shirtmaking this pattern is for you. The instructions are really easy to follow, and if you have trouble with a step, Closet Case Patterns has a really detailed sewalong series that will definitely help you out. Also, the way everything is finished just by following the instructions is gorgeous. The inside looks almost as nice as the outside!
Putting together the popover placket was such a fun experience… I’m not sure why but I just think it’s adorable!
Also, I loved the way the collar is constructed on this shirt. It was way easier than I expected. It’s not perfect, but I’m really happy with how it turned out.

The part of constructing the shirt that I found the most challenging was the hem facings. First, I want to say that if you do the popover placket, CUT THE FRONT FACING ON THE FOLD, taking out the seam allowance at the center front edge! I did not think about this and the instructions didn’t mention it, so I followed what was written on the pattern piece, which was to cut two front facing pieces. So I had to sew them together before attaching them to the shirt, which worked fine but I would have preferred if they were cut in one piece.
Also, the construction of the hem facings is a bit confusing to follow in the instructions, which I totally understand because it’s kind of hard to explain. But, the sewalong for the hem facings is very easy to understand, which is what I used while I sewed mine.
Anyways, I’m super happy with how it turned out.


Ok, let’s wrap it up with some concluding thoughts here.
Conclusions
Did it turn out as expected based on the pattern envelope?
Yes, it looked 100% like I expected. Even the fit was spot on to what I expected without any adjustments (other than length).
How challenging is it to sew?
Ok, this is definitely not an easy project. But for a button down shirt, the construction was pretty easy! I would say that this would be a great project for an intermediate sewist.
Would I sew it again?
Ummm…..YES! In fact, I already have……..
Overall rating
Ok, I have to go 5/5 on this one. I’ve already made 2 and I’m thinking about making a third one… soooo I feel TNT pattern status may be coming for the Kalle.
I hope you enjoyed this review of the Kalle shirt and shirtdress pattern. I hope you’ll take the plunge and try the pattern out for yourself! If you want to hear more from me and never miss a review, tutorial, or tip again… I would love for you to sign up for my weekly newsletter! My email subscribers even get first dibs on any PDF patterns (free or otherwise) that I release!


Thanks for the note on the facing with the popover placket! I was just getting to the stage of cutting out my facings and the front facing piece is way longer than the width of the front piece! I’m not sure whether to add length to the cropped version but yours looks really nice, might have to give it a try!