
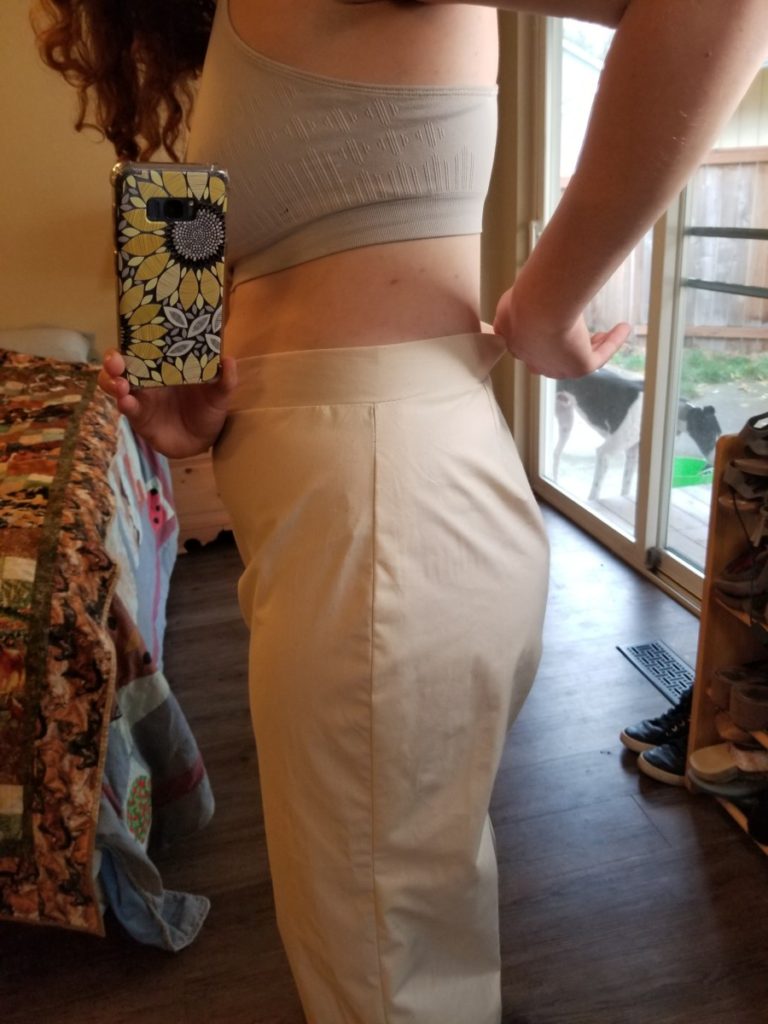
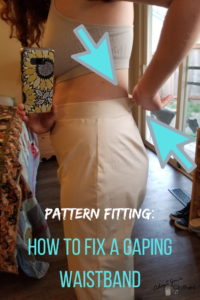
This past year I have been on a fitness journey and have been consistently weight training for over a year. Which has been amazing for both my mental and physical health. But the changes in my body over the past year have brought some unexpected sewing and fitting challenges. Gaining muscle in the leg and bum areas have resulted in a fitting problem every time I try to sew a fitted pant, skirt, or shorts: the back of the waistband gapes! Some patterns are worse than others, but every fitted bottom I’ve tried sewing in the last six months or so has had this problem to some degree.
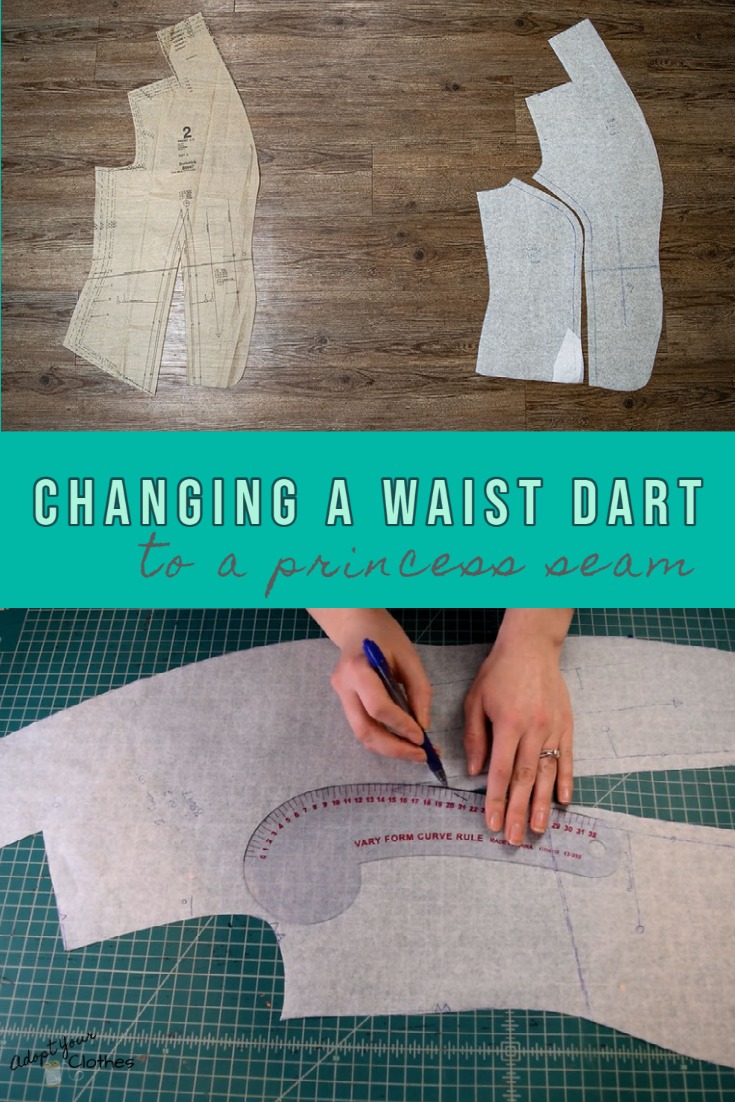
So if you’re in the same boat and always have trouble with gaping at the center back of the waistband, I’m going to show you the pattern fitting solution I found – a curved waistband! When I discovered the curved waistband, it was the most magical and beautiful discovery ever because the curved waistband literally fits my curves like a glove.
Ok, let’s get into the tutorial!
How to draft a curved waistband
If you’re having a problem with the waistband gaping, most likely your pattern came with a standard straight waistband. This means it is just one big rectangle that gets folded over and sewn onto the top of the garment. Your first step to figure out what adjustments to make is to sew up a muslin of the pattern with the waistband included in the pattern. This was my first fitting muslin of my Lander Pants, I had about 1 inch of gaping at the center back with this particular pattern. Yours may gape more or less than this.
First measure (or approximate) how much fabric needs to be removed from the top of your waistband. As I mentioned, I needed to remove about 1 inch.
Now we’re going to make our adjustments to our pattern. Because a curved waistband is…well… curved, you can’t sew it to the waistline and then fold it over to the inside like you would a straight waistband. So it has to be cut in two pieces – the outside and the inside waistband.
So grab your straight waistband pattern piece and draw a straight line down the middle of it. Then add another line 1/2 inch above the line you drew up the center (this is your seam allowance). Cut along this line and discard the narrower side of the waistband. Like this:

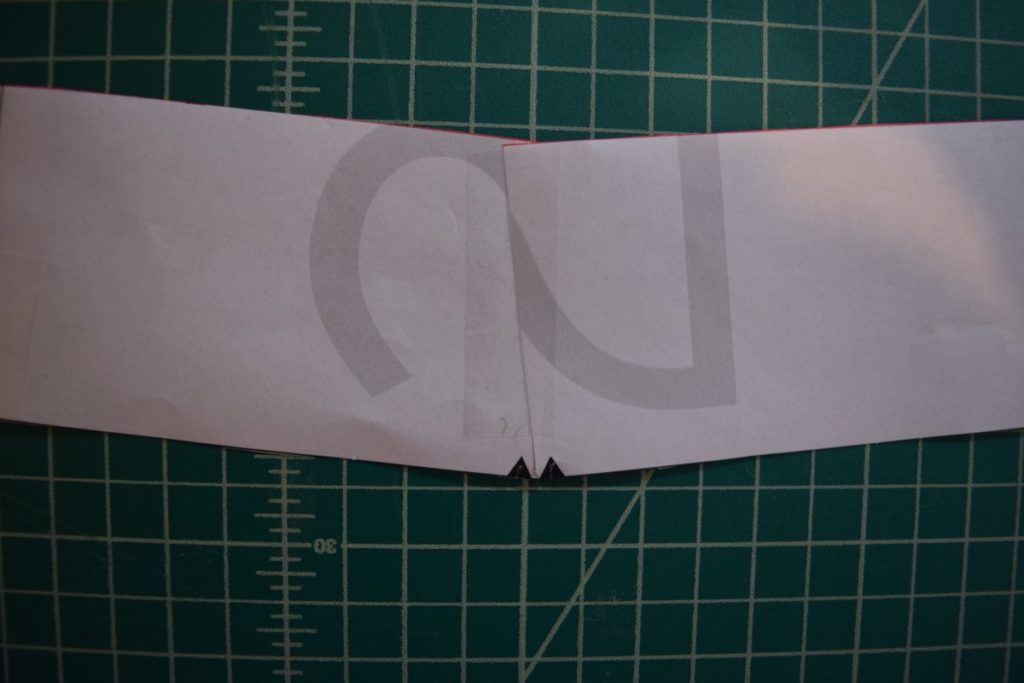
Now with the portion of the waistband pattern that you kept – the larger, lower portion in the drawing above – find and mark the center back of the waistband (mine was marked by double notches). Then cut a straight line almost all the way through the waistband from the top. Here is what mine looked like:

Then overlap the cut edges and tape it down, measuring so that it overlaps by the amount of fabric you wanted to remove. So mine is overlapped by 1 inch.
NOTE: if you needed to remove a lot of fabric – say, more than 2 inches – you can cut two additional slices in the pattern on either side of the center cut and spread the amount you need to take out across the three sliced areas. This will give you a more gradual and nicer curve than if you were to take all of that out just at the center back.
Now we can cut out our new curved waistband. You’ll need to cut two waistband pieces with the curved waistband pattern piece:
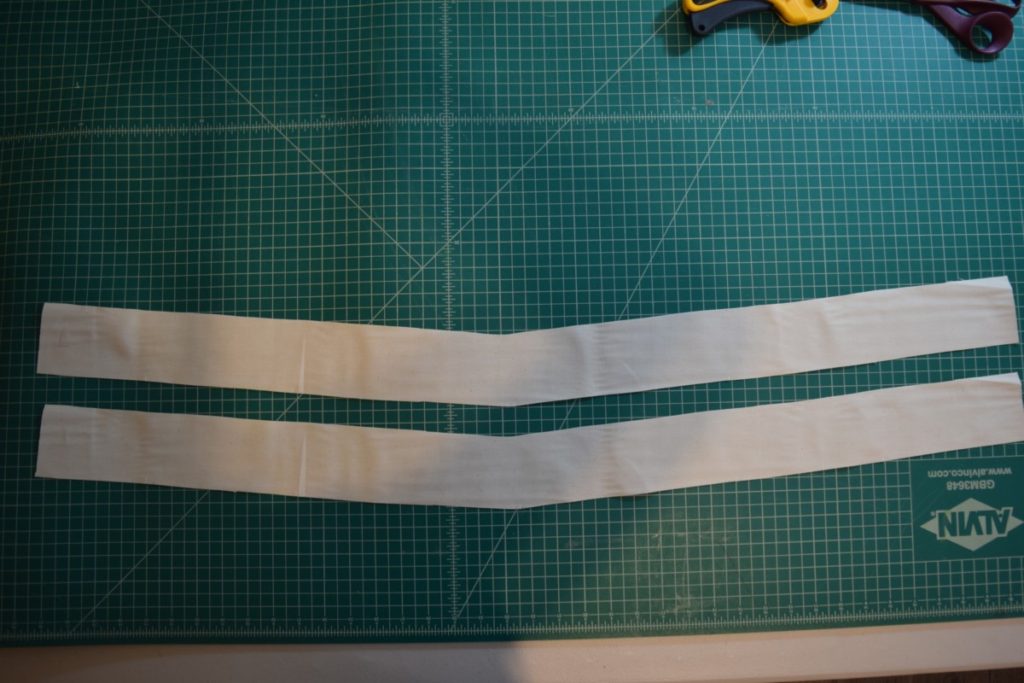
And sew them together along the top (inner curve) edge with a 1/2 inch seam allowance. Grade your seam allowances to remove bulk and iron the seam so your waistband lies nicely.
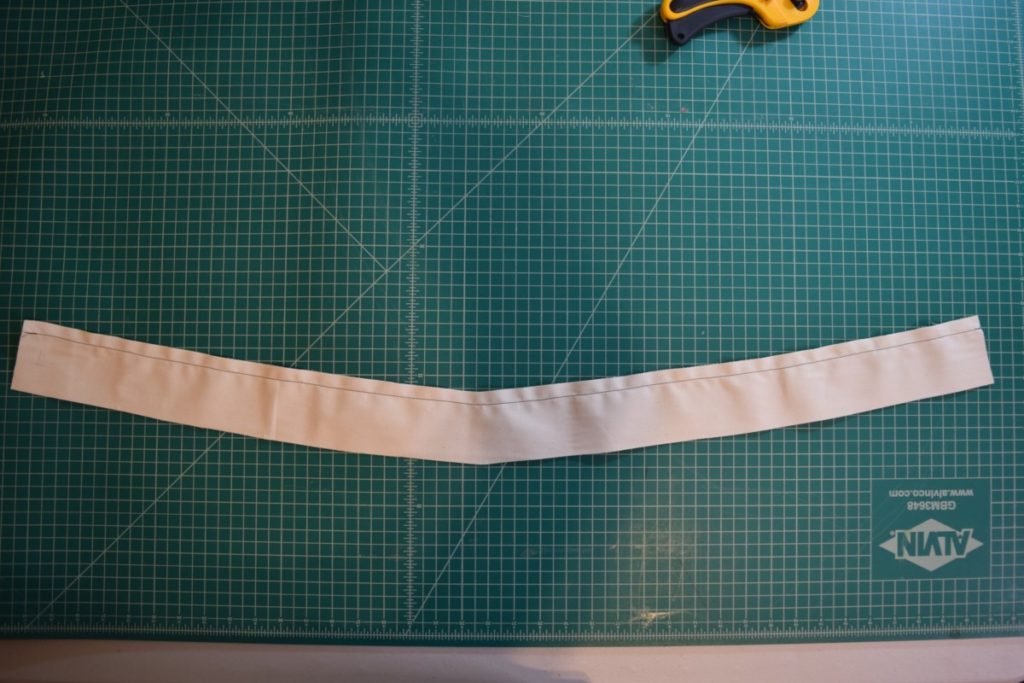
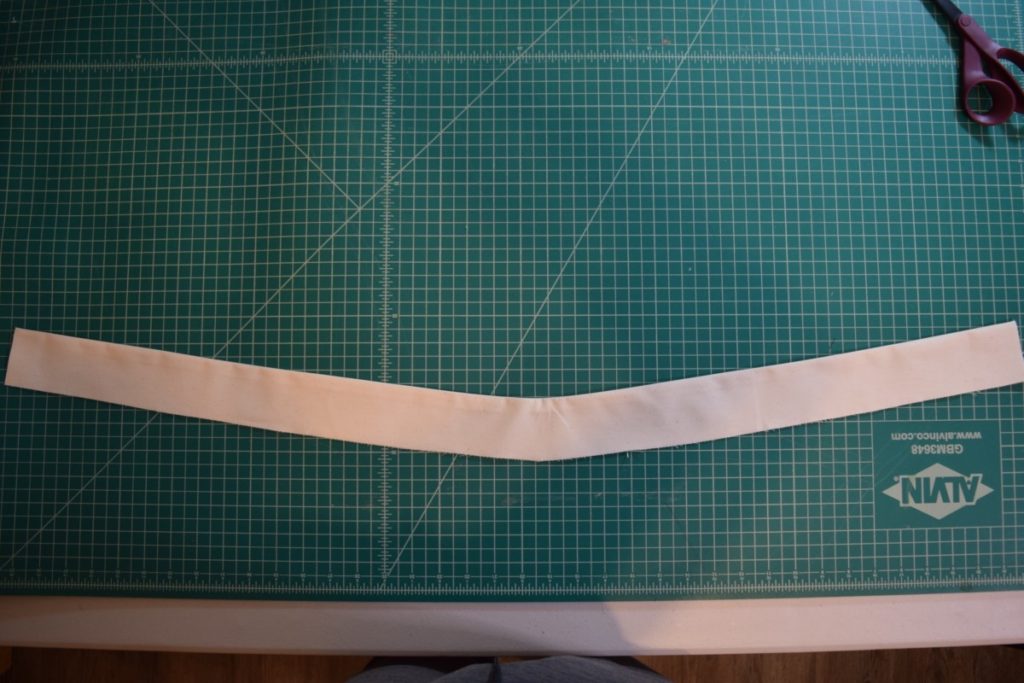
Now you can just attach the waistband following your pattern instructions in the same way you would the straight waistband. The lower (outer curve) edge will fit the waistline just fine because we only took fabric out along the top edge of the waistband! Here’s what my fitting muslin of my Lander pants looked like after I turned the waistband into a curved one:

No more gaping at the center back! And in case you’re curious, here’s my finished Lander pants in my actual fashion fabric (some cotton canvas from Minerva).

Thanks for reading, I hope you found this helpful! Let me know if you draft yourself a curved waistband for your next sewing project, I would love to hear about your sewing adventures. You can DM me on Instagram or send me an email through my contact page!
Also, check out my email newsletter if you’re looking for more sewing and DIY tutorials and for first access to any PDF sewing patterns I release (hint, hint) ;).


Thanks for this! I need to make exactly this adjustment on my landers so fingers crossed this will do the job nicely 🙂
I’m glad I could help! Hopefully it works for your Landers too!
Thank you for this!! My treasured diy jeans will be saved from the waist gap 🙂
Both Will Ferrell and Mark Wahlberg play off of each other much better than you might expect as the titular characters, and Michael Keaton – once again, this summer – steals just about every scene that he’s in as the Guys’ more-calm-than-he-probably-should-be captain.
Wow! This can be one particular of the most helpful blogs We’ve ever arrive across on this subject. Actually Excellent. I am also a specialist in this topic so I can understand your hard work.
There are many other plans that resemble the same protocols you mentioned below. I will keep reading on the ideas.
Hi, do you have a facebook fan page for your blog?’..`.
I can’t really help but admire your blog. your blog is so adorable and nice ,
Thanks, I have recently been seeking for details about this topic for ages and yours is the best I have located so far.
This would be the right blog for everyone who really wants to learn about this topic. You already know much its almost tricky to argue along (not too I personally would want…HaHa). You certainly put a whole new spin over a topic thats been written about for some time. Wonderful stuff, just wonderful!
Throughout the awesome design of things you actually secure a B+ with regard to effort and hard work. Where exactly you actually lost me personally was first on the details. You know, they say, the devil is in the details… And it couldn’t be much more correct here. Having said that, permit me say to you what did deliver the results. Your text is highly convincing and this is probably the reason why I am making an effort in order to opine. I do not really make it a regular habit of doing that. Second, whilst I can easily notice a leaps in reasoning you make, I am definitely not convinced of exactly how you appear to unite your details which in turn help to make your final result. For now I shall yield to your issue however trust in the future you actually connect your facts better.
Limitless entertains with the possibilities and the consequences of uncontrollable powers.
In the great pattern of things you secure an A+ with regard to effort and hard work. Exactly where you confused me personally was in all the facts. You know, it is said, the devil is in the details… And that could not be much more true at this point. Having said that, allow me say to you what did deliver the results. Your writing can be rather persuasive and that is most likely why I am taking an effort to opine. I do not really make it a regular habit of doing that. Secondly, even though I can easily see the leaps in reasoning you come up with, I am not confident of just how you seem to unite your ideas which in turn make your final result. For the moment I will subscribe to your position but hope in the near future you actually connect the dots much better.
I ought to appear into this and it would be a difficult job to go over this completely here.
I was on Twitter looking for Neiko Air Tools when I found a link to this blog, happy I stopped by – Cheers
What’s your favorite Halloween esq music to listen to? I’d have to go with The Cramps
What your stating is totally accurate. I know that everyone must say the exact same issue, but I just believe that you set it in a way that absolutely everyone can recognize. I also appreciate the images you place in the following. They suit so properly with what youre hoping to say. Im certain youll achieve so a lot of men and women with what youve obtained to say.
I’m not sure where you are getting your information, but good topic. I needs to spend some time learning much more or understanding more. Thanks for fantastic info I was looking for this information for my mission.
You ought to indulge in a contest for just one of the most useful blogs on-line. I am going to suggest this page!
there are bargain dvd players that are sold in our area. i think they are generic low cost dvd players;;
I do think, an attempt and even gaffe in their life it isn’t just not doing anything a good deal more glorious daily life, coupled with suggestive.
It’s nearly impossible to find knowledgeable folks during this topic, but you sound like you know what you are discussing! Thanks
I must express my passion for your generosity for people who must have assistance with this particular niche. Your very own commitment to getting the message up and down had become extraordinarily valuable and have constantly permitted associates like me to get to their ambitions. The helpful guideline denotes so much a person like me and additionally to my colleagues. Thanks a ton; from each one of us.
You really should get involved in a tournament for example of the best blogs online. I’m going to suggest this blog!
It’s easy to feel more confident and horny when you’re wearing seductively horny lingerie.
You should check this out… […] Wonderful story, reckoned we could combine a few unrelated data, nevertheless really worth taking a look, whoa did one learn about Mid East has got more problerms as well […]……
Some really interesting info , well written and broadly speaking user pleasant.
baby strollers with high traction rollers should be much safer to use compared to those with plastic wheels**
That is many inspirational stuff. Never knew that opinions could be this varied. Thanks for all of the enthusiasm to offer such helpful information here.
nicotine can really make you an addict, stay away from cigarettes in the first place::
Receive additional organic exploring fluff to the frizzy hair by employing mousses along with conditioners.
It’s nearly impossible to find knowledgeable folk on this kind of field, but you sound like you know very well what you’re speaking about! Thanks a bunch
There are actually lots of particulars like that to take into consideration. That may be a nice level to bring up. I provide the ideas above as general inspiration but clearly there are questions just like the one you convey up the place a very powerful thing will probably be working in sincere good faith. I don?t know if greatest practices have emerged round issues like that, but I’m sure that your job is clearly recognized as a good game. Both boys and girls feel the impression of just a moment’s pleasure, for the rest of their lives.
Appreciate your making to discuss now this, I believe highly to fix it also enjoy looking over more to do with doing this concept. In the case future, like you attain specialist knowledge, wouldn’t you insights bringing up-to-date your own journal with the extra information? This is very a good choice for me.
material, as a result of it might ceaselessly be pleasing to decide a warm and pleasant face or maybe hear a voice when initial landing.
dog grooming is the specialty of my sister, she really loves grooming every dog in our house;;
Hi, have you ever before thought about to write about Nintendo or PS handheld?
Wow! that piece of writing has been really useful thanks a bunch. “Love is, above all else, the gift of oneself.” by Jean Anouilh..
I and my buddies came taking note of the nice advice found on your web blog and then suddenly developed an awful suspicion I never expressed respect to you for those techniques. The men were happy to learn them and have in effect actually been having fun with those things. We appreciate you really being really thoughtful and then for making a choice on variety of magnificent tips millions of individuals are really desirous to know about. Our own sincere apologies for not saying thanks to you sooner.
Politics is of course very annoying, politicians do annoy me because of their bad performance”
{Can I just|simply say what a relief|aid|reduction to find|to seek out|to search out someone|somebody who actually|truly|really knows|is aware of what theyre talking|speaking about on the internet. You definitely|undoubtedly|positively know how to|the way to|tips on how to|methods to|easy methods to|the right way to|how you can|find out how to|how one can|the best way to|learn how to bring|convey|deliver|carry an issue|a problem|a difficulty to light|mild|gentle and make it important. More|Extra people|individuals|folks need to|have to|must read|learn this and understand|perceive this side|aspect|facet of the story. I cant believe|consider|imagine youre not more|no more popular|well-liked|in style|fashionable|common|widespread|standard because you|since you definitely|undoubtedly|positively have the gift.
Dead composed subject matter, thanks for information .
Nice blog right here! after reading, i decide to buy a sleeping bag ASAP
et corrupti quia facere sed omnis officiis eos incidunt ducimus recusandae quia fuga vel cum cumque illo. distinctio ut totam aut ex occaecati voluptate non rerum velit aut. fugit ut temporibus conseq
I wish to show my appreciation for your generosity for persons that actually need help on in this niche. Your special dedication to passing the solution throughout ended up being rather significant and have continually encouraged somebody much like me to attain their dreams. Your personal warm and helpful useful information indicates a great deal a person like me and even more to my peers. Best wishes; from each one of us.
There is apparently a lot to realize about this. I suppose you made some good points in features also.
I always visit your blog everyday to read new topics.:**`”
I impressed, I have to say. Really not often do I encounter a blog that each educative and entertaining, and let me tell you, you might have hit the nail on the head. Your concept is outstanding; the issue is one thing that not enough individuals are speaking intelligently about. I’m very completely satisfied that I stumbled throughout this in my search for one thing referring to this.
There is noticeably a lot of money to understand this. I assume you made certain nice points in functions also.
being a blogger myself , i can see someone with great potential,
Hi, simply discovered your own blog through Google, as well as discovered so that it truly is truly educational. I’m gonna stay attuned for this tool. Many thanks!
Some genuinely great info , Glad I discovered this.
??? ????? ?????? ?? ??? ??? ?? ?????? ??? ???? . ??? ?????? ??????? ????? ???? ????? ?????? ??????? ?????? ??????? ???? ????? ?????? ??????? ??? ?????? ??? ?? ??????? ??? ????? ????????.
you can always tell the quality of USB cables by looking at the thickness of the cable. thicker usb cables have higher quality`
quod sunt non nam nobis dolorem sit animi. recusandae quam quia similique quidem qui dolores laboriosam eum sit error dignissimos sed in. quidem corporis molestiae deserunt culpa autem quia necessitat
Great knowledge, do anyone mind merely reference back to it
Only a few blogger would discuss this topic the way you do.”;,”;
Despite the obvious flaws in the overall scheme of the film, “I Am Number Four” proves that the series has a lot of potential.
oh i just hate the fat pads that i got, my fat pad is just genetics so i can’t do anything about it*
Awsome submit as well as right to the idea. I am not sure if this is actually the best place to inquire about however would you individuals have any thoughts on where you’ll get a few ghost writers? Thx
Thanks , I have recently been looking for info approximately this subject for a long time and yours is the best I’ve discovered till now. But, what about the conclusion? Are you sure concerning the source?
Hi!!!!. . You can quickly add a Web page to your Favorites folder with a single keystroke.. . The page is automatically added to your Favorites list
How do I start to learn how to Hip Hop dance?
I don’t even know how I stopped up right here, but I thought this submit was good. I do not know who you are however definitely you are going to a famous blogger in case you are not already Cheers!
Neat blog! Is your theme custom made or did you download it from somewhere? A theme like yours with a few simple adjustements would really make my blog shine. Please let me know where you got your theme. Thanks a lot
Je pourrais vous transférer les url pour plus de miniatures sur cette question. Ecrivez moi simplement…
The video card (sometimes referred to as the GPU) is another vital component in any gaming rig, as it handles nearly all of the graphics for your video game titles. A person of the issues with video cards – in particular the center and minimal end ones – is that they tend to come to be obsolete faster than the other components of a gaming pc. Commonly, acquiring a higher conclusion video card when you are upgrading or building your gaming rig is vital as it presents you breathing area in advance of it is time to upgrade once more.
consumer electronics these days are mostly composed of gadgets that are more into phones and internet connection,.
The next time I read a blog, I hope that it doesnt disappoint me as much as this one. I imply, I know it was my option to learn, however I actually thought youd have something fascinating to say. All I hear is a bunch of whining about something that you might repair in case you werent too busy searching for attention.
glass dining tables will always be the best design and option that i would choose for our dining room.
I think that may be a fascinating element, it made me suppose a bit. Thanks for sparking my thinking cap. Every now and then I get such a lot in a rut that I just really feel like a record.
Hello just wanted to give you a quick heads up and let you know a few of the images aren’t loading properly. I’m not sure why but I think its a linking issue. I’ve tried it in two different internet browsers and both show the same results.
Point received and well taken, when I disagree it’s not a reason to argue. No problem at all.
We choose our joys and griefs long before we experience them.
dolores possimus ducimus placeat maiores sequi in qui vero dolores eaque magnam quae voluptatem expedita. aut vero necessitatibus amet et ab ducimus nesciunt vero et deserunt mollitia nobis qui.
294544 7925Fascinating, but not ideal. Are you going to write a lot more? 535114
It is in point of fact a nice and useful piece of information. I am glad that you just shared this useful info with us. Please keep us up to date like this. Thank you for sharing.
Leslie Dixon wrote the screenplay and deserves a lot of credit because it is mainly a dialogue driven film, however it is probably fair to assume that all of the credit goes to Alan Glynn who wrote the novel which this based on.
One word “informative”, you broke down precisely what I have been looking for. Looking forward to reading more in the future.
That is the best blog for anyone who desires to search out out about this topic. You understand so much its nearly exhausting to argue with you (not that I truly would need aHa). You positively put a brand new spin on a subject thats been written about for years. Great stuff, simply great!
Good day, have you ever previously considered to write about Nintendo or PS handheld?