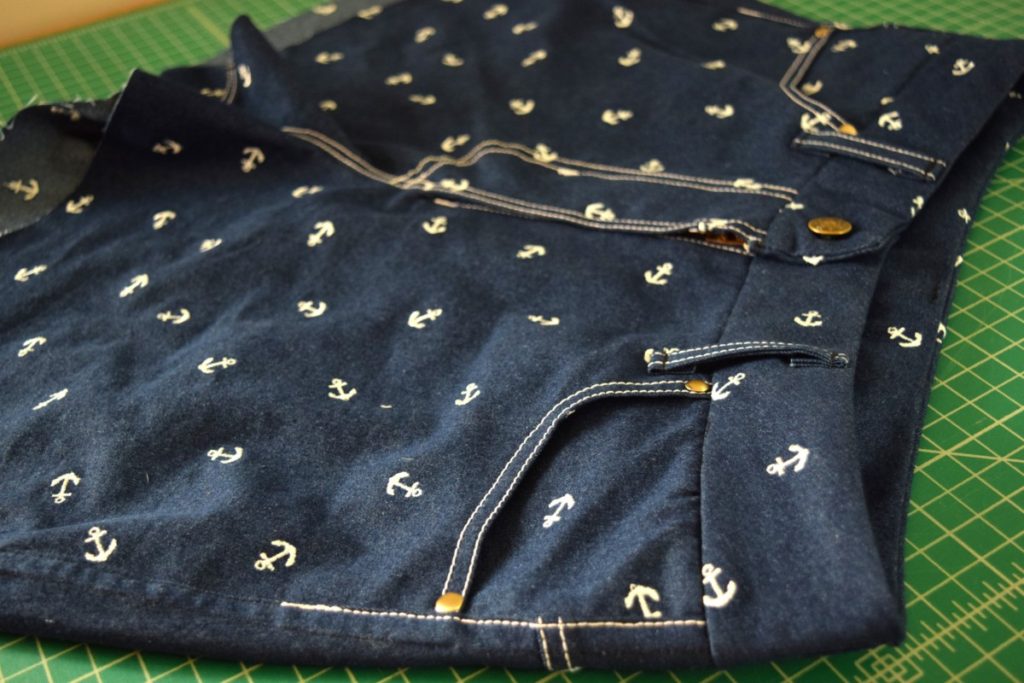
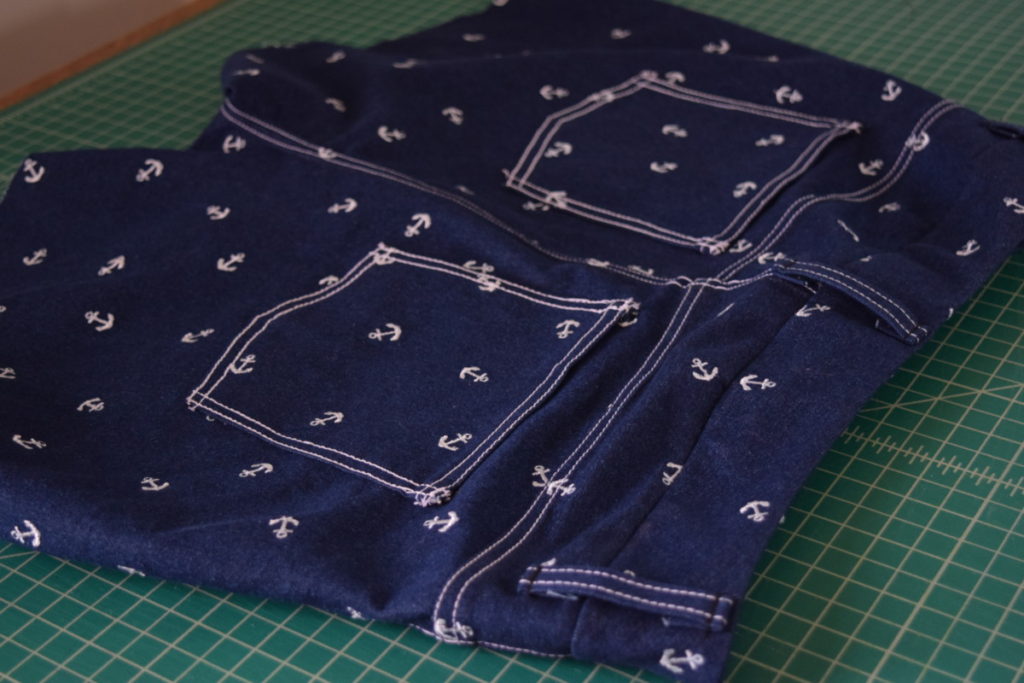
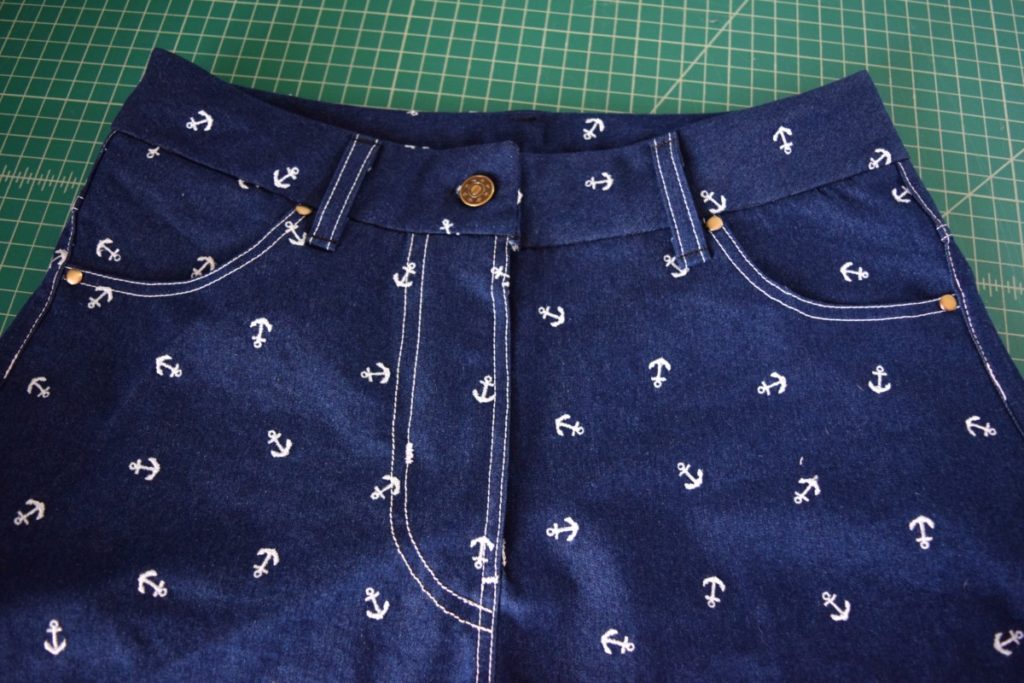
So this project was pretty spur-of-the moment for me. I had just a tad of this anchor print denim from JoAnns left over from my Peppermint Ruffle Sleeve Top (see that post HERE). It had been sitting around for several weeks and this past week I decided to try to squeeze a pair of jean shorts out of it. Since I had just fitted a high waisted pants pattern (post HERE), I decided to chop the pattern into shorts and give it a try in denim!
I barely had enough fabric, but with a little pattern piece tetris I got my shorts cut out! So I thought you guys might find it helpful to read some of the things I learned about sewing jeans.
This post contains affiliate links for products I use. I receive a small commission at no extra cost to you if you purchase through my links. This really helps support my site so I can continue to create DIY and sewing tutorials for you!
Supplies
To sew your jeans and make them sturdy and look like ready to wear jeans, you’ll need some supplies! Besides your basic sewing supplies, here are the other things you’ll need:
- Denim
- Your favorite jeans pattern
- All purpose thread (in a color matching the denim)
- Topstitching thread
- Denim needle
- Topstitching needle
- Jeans rivets and supplies for inserting them
- Jeans buttons
Tips
Topstitching
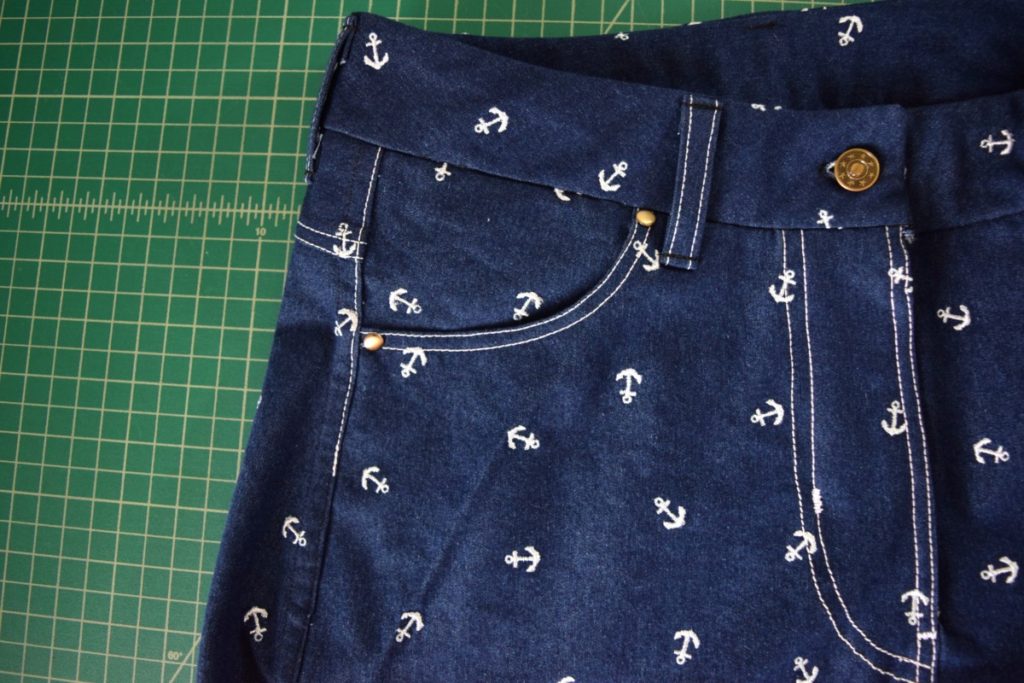
First, let’s talk topstitching! Good topstitching is one of the things that really makes jeans look authentic. Here are some tips for getting perfect jeans topstitching:
- Start with good topstitching thread. I used the Guttermann heavy duty polyester topstitch thread in white. They also have thread available in that great gold color you see in lots of ready to wear jeans.
- Use a topstitching needle. I used a denim needle for all the seams and a topstitch needle for all the topstitching (which meant lots of annoying switching of needles and thread), but it really did help. The topstitching needle has a wider eye for easier threading of that thick thread. I also found that it just sewed better.
- Only thread the topstitching thread in the NEEDLE, use regular thread in the bobbin. Using topstitching thread in the bobbin will probably not make your sewing machine happy…
- Play with the tension on some scrap denim fabric. I found that to get nice topstitching I needed to up my machine’s tension quite a bit.
- And lastly…. Lengthen your stitch length. If you look at ready to wear jeans, the topstitching is usually done with quite a long stitch. I used a 3mm stitch, but I think anywhere between 3 and 3.5 could be great! My machine also sewed that thick thread better with a longer stitch.
Hardware
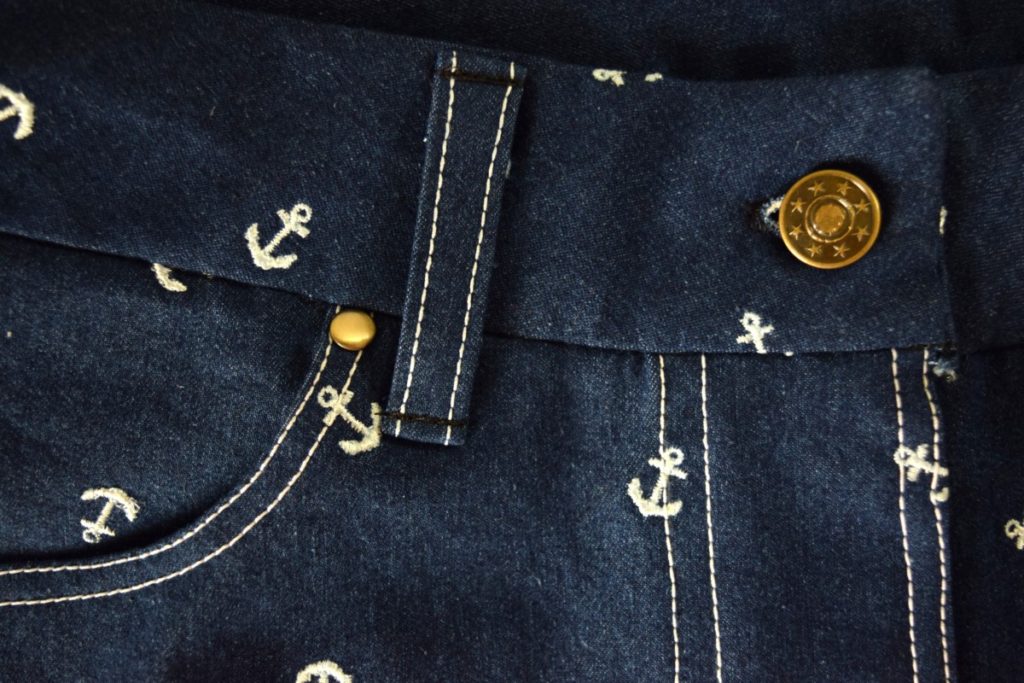
Jeans have some special elements that aren’t in a lot of other clothes that really give them a unique look and make them hold up to some major wear and tear: hardware! This would be rivets and jeans-specific metal buttons.
- Get jeans-specific rivets if you can. I was in a rush on this project and my local JoAnn’s didn’t have jean rivets, so I just used regular rivets.
- Use an awl or other sharp object to poke a hole where you want your rivets and then hammer them into place. Sometimes you can carefully cut the hole with your scissors (I may have done this…) but you really risk cutting too large of a hole, so do that at your own risk!
- Place the rivets at the edges of the front pockets and the corners of the coin pocket if your jeans have one. This really makes your pockets sturdy so they’ll hold up to lots of use.
- Get jeans-specific buttons; get at least two if you can and practice on some scrap fabric first.
- I found that using vice grips/pliers to attach the front to the back of the button worked better than the hammer method. It did slightly scrape up the front of the button but not enough to be super noticeable. I tried the hammer method described on the button package, but kept bending the back piece of the button.
Bartacks
Ok…. I’m not an expert here. I love my sewing machine, but it’s a very small, almost travel-sized machine (a Pfaff Passport 2.0) and it does not sew through lots of layers very well. So after lots of attempts at bartacks with my machine and some gnarly practice bartacks, I ended up hand sewing them. And they’re just as sturdy, if not more, than they would have been if I’d sewn them on my machine.
Bartacks are another aspect that really makes jeans look like jeans, and they also add some strength to the garment, especially at the fly. So if you’re having trouble sewing them on your machine, I would encourage you to try hand sewing them. It really doesn’t take too long and looks almost as good as machine sewn bartacks.
If you liked this post and want more, check out my email newsletter!
I want to make some high-end professional looking chef aprons out of 10oz denim. I will need to finish the edges of the apron and want it as smooth as possible without the fabric curling. Any suggestion on how to finish the edges? The fabric is 95% cotton and 5% synthetic.
That sounds like a fun project! I think what I would do to hem those would be a double fold hem – so just fold the raw edge to the wrong side, then fold it up again to encase the raw edges, then you can just topstitch along the fold to hold everything in place. You can decide how wide of a hem you want with that method too, sometimes a wider hem (like 1-2 inches wide or so) can look nice and would curl less. If the edges of your aprons are curved, it will be a little harder, but I find doing something like in this tutorial usually works well: https://www.youtube.com/watch?v=yFhj5Uhpu-E
Hope this helps!
Hey there would you mind letting me know which hosting company you’re utilizing? I’ve loaded your blog in 3 completely different web browsers and I must say this blog loads a lot faster then most Can you recommend a good web hosting provider at a fair price? Thanks, I appreciate it!