
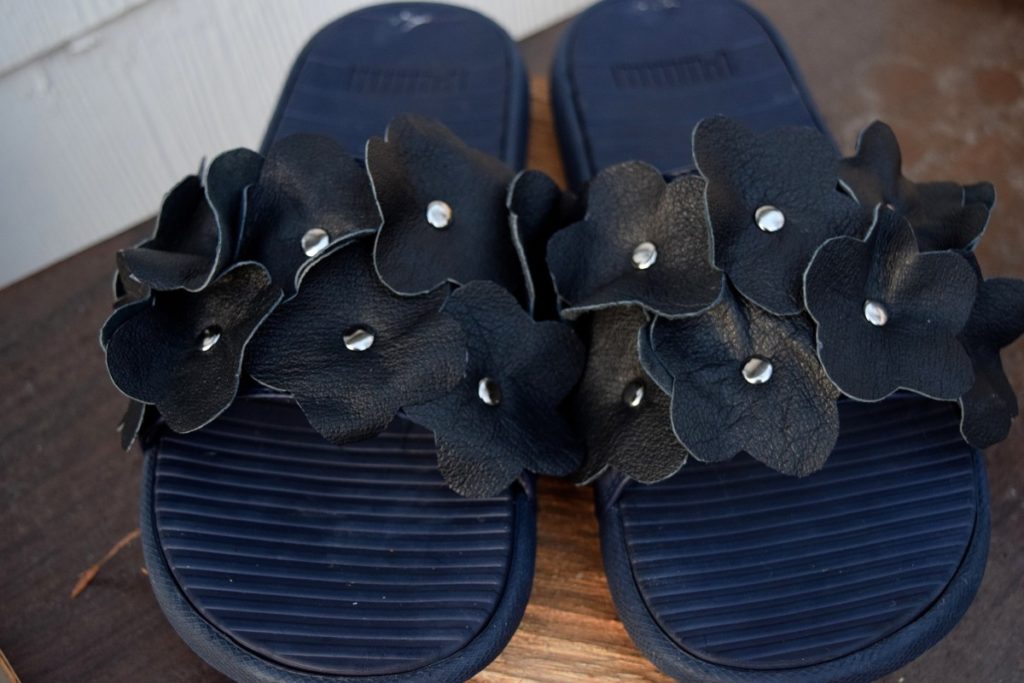
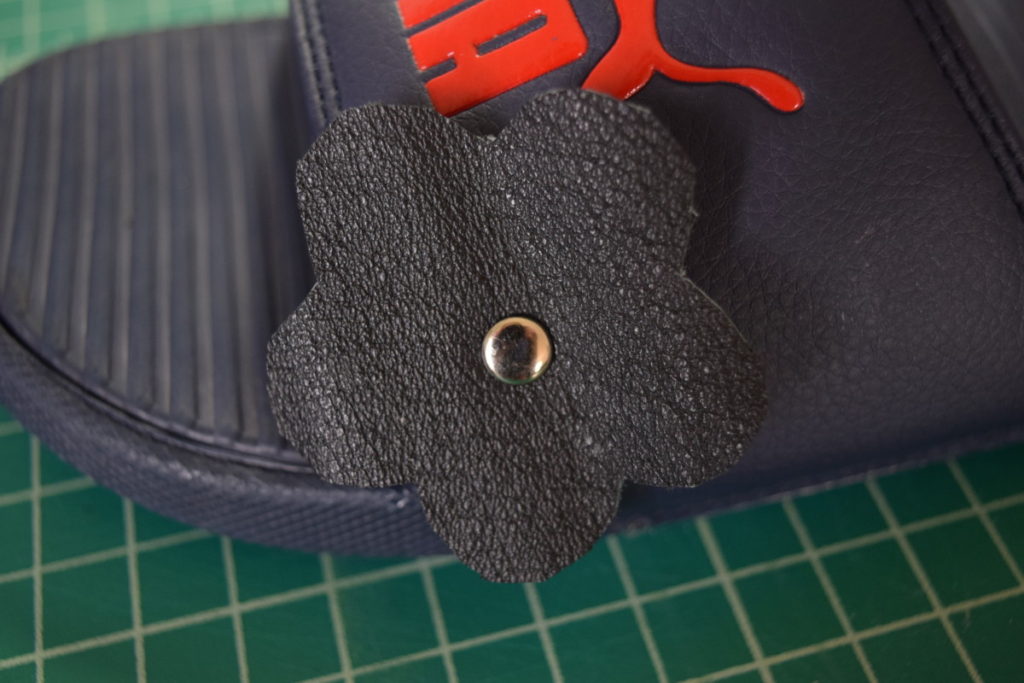
Slides are literally the most comfortable shoes that exist, am I right? But they can be a bit boring and maybe a little too casual to wear out. So I decided to try to embellish my slide sandals to make them a little more glam! And it was super easy! And don’t they just look adorable?
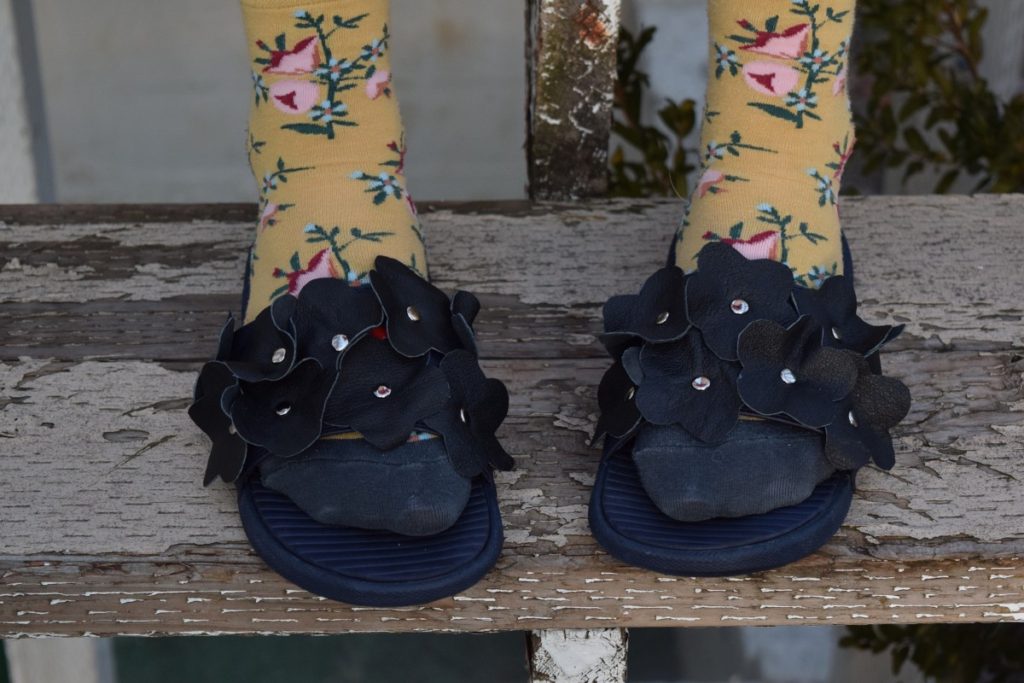
If you want to try this out with your slides, I’ve got a full tutorial below. And if you do try it, I would love for you to tag me on instagram or add a photo to the comments so I can see what you made!
*This post contains affiliate links to Amazon for some of the products I used in this DIY. This means if you purchase through my link, I receive a small commission at no extra cost to you. This helps to support my blog and help me to keep making content, and of course, I only link to products I actually use and love!
What you need:
- slide sandals
- about 1/8 yard of leather
- Paper
- Card stock or cardboard
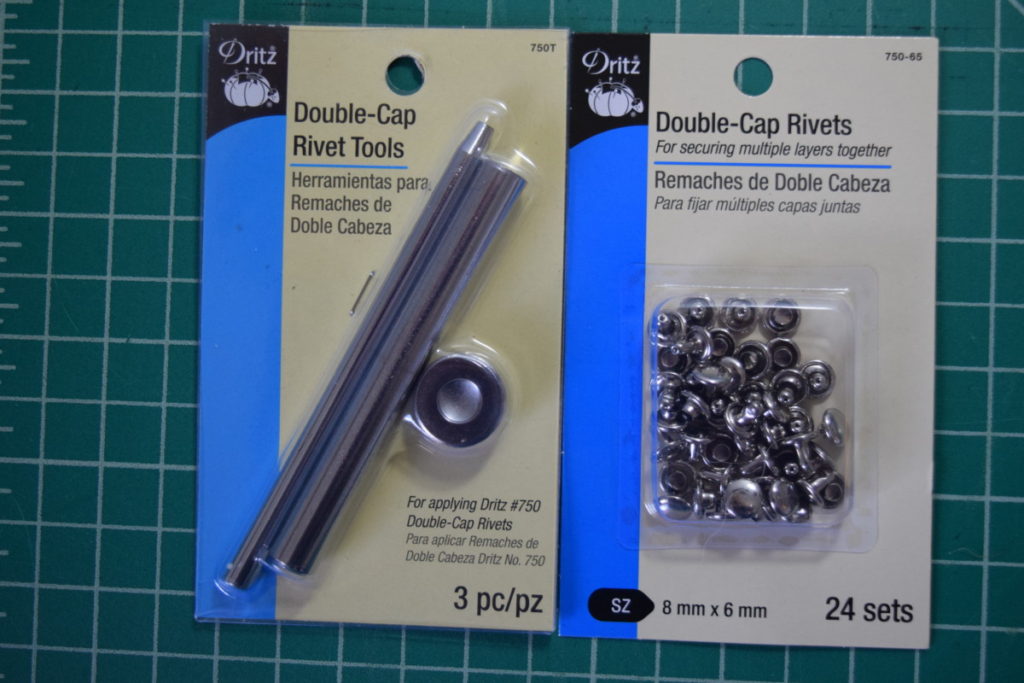
- rivets
- rivet applicator tool
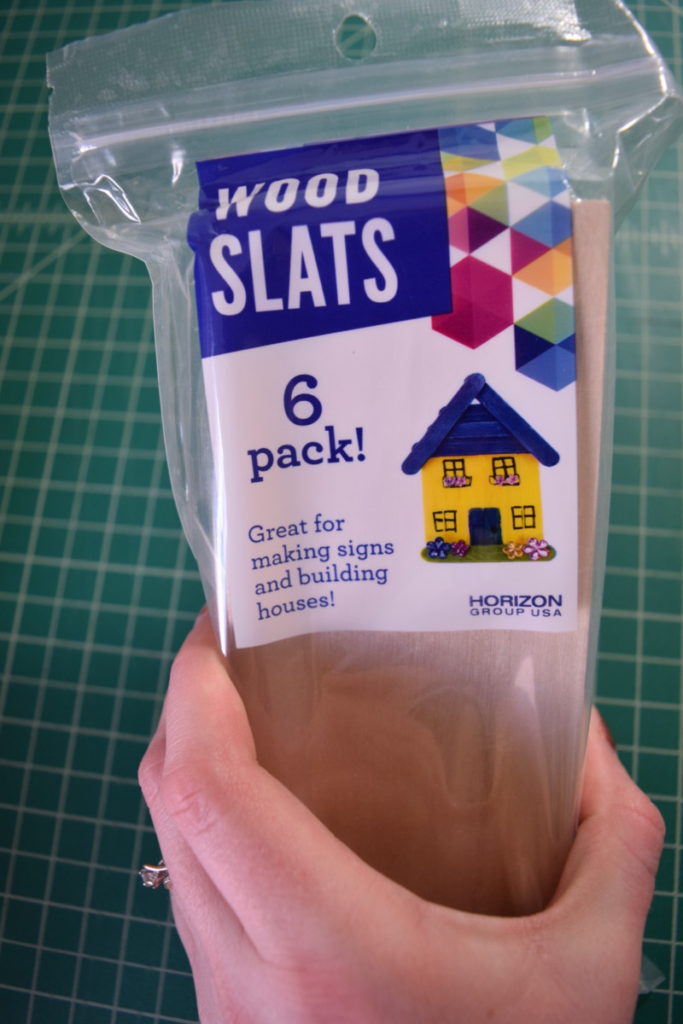
- small piece of plywood or other hard, thin object to put inside the shoe while you hammer the rivets in: I used these from Walmart
Steps:
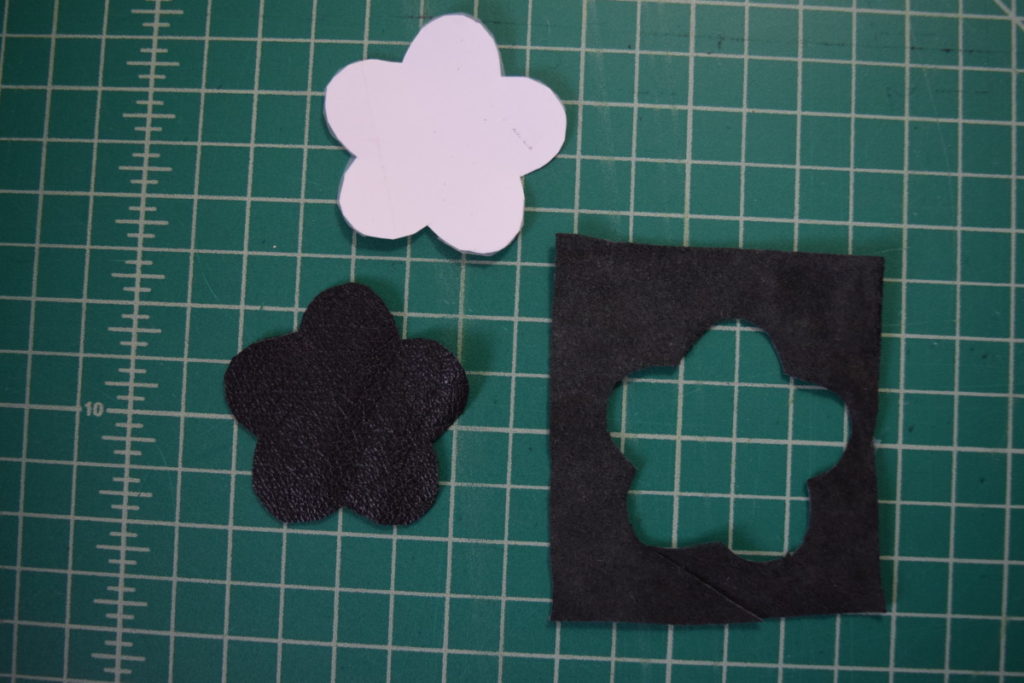
- Make a card stock flower cutout as your pattern to cut flowers from your leather
- Cut a flower from the leather
- Use rivet hole punch to punch a hole in the shoe
- Use rivet hole punch to punch a hole in the flower
- Place the flower on the shoe, lining up the holes, and insert the front rivet
- Snap the back rivet onto the front from the inside of the shoe
- Sandwich the rivet between the anvil and the setting tool
- Hammer the setting tool to secure the rivet
- Repeat to add as many flowers as you want!
Instructions:
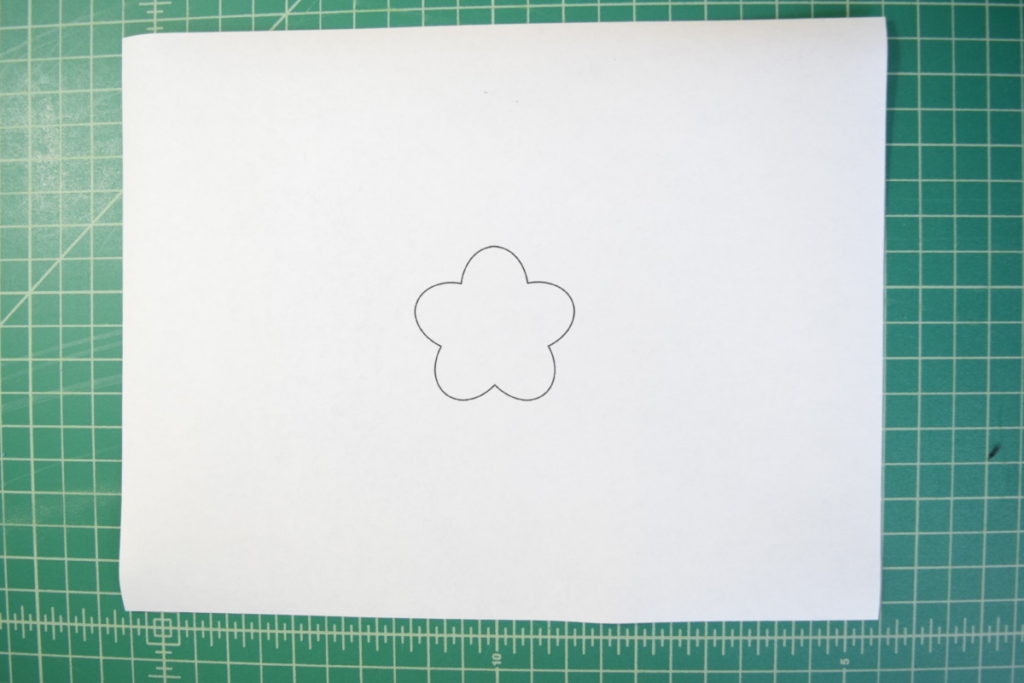
First, I printed out a flower outline that I found online in the size I wanted my leather flowers to be.
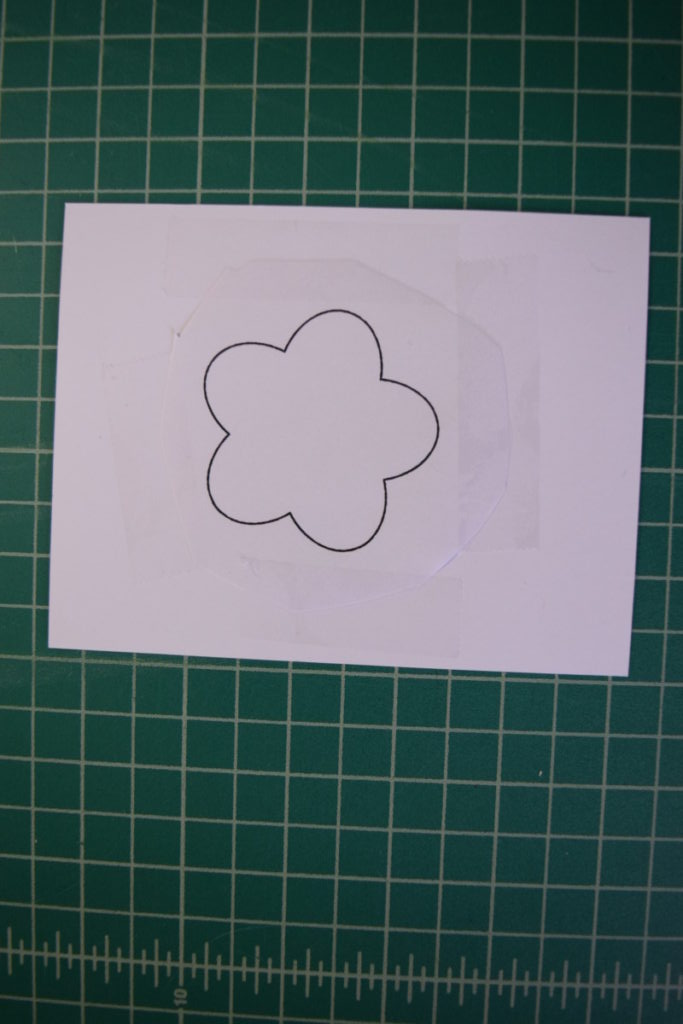
Then, I cut the flower out loosely; just to get rid of the excess paper, and taped it to a piece of card stock (you could use thin cardboard too). You could also draw the design if you want.
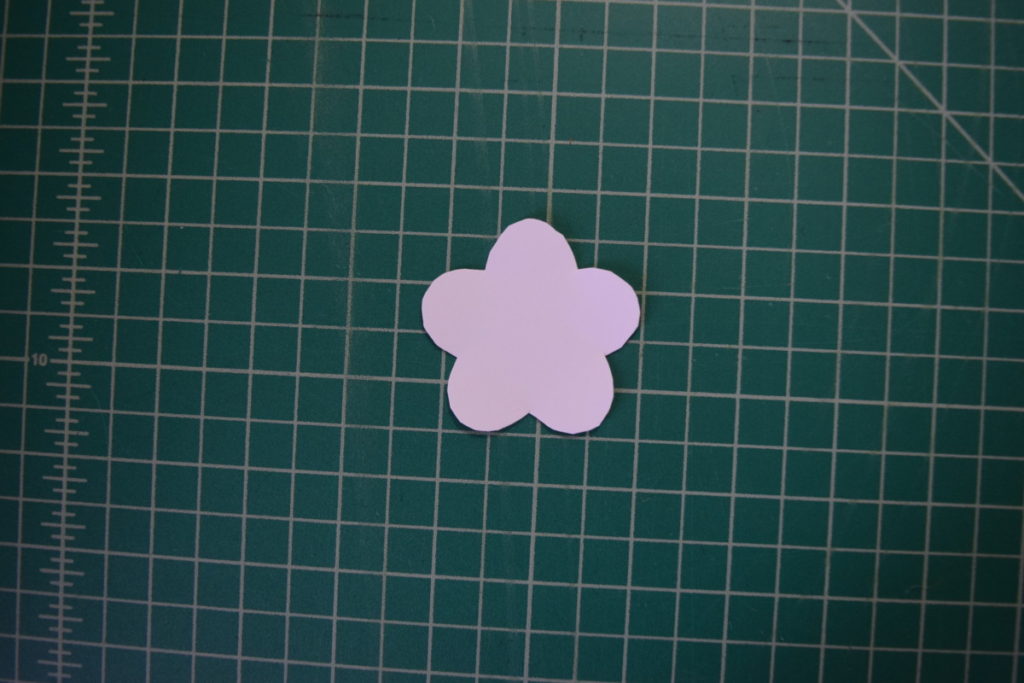
Then I just cut out the shape of my flower from the card stock. This will be my guide for cutting the leather so every flower looks the same.
Next, I grabbed a piece of my leather (I used scraps from an old project) and taped my cardstock flower to the leather.
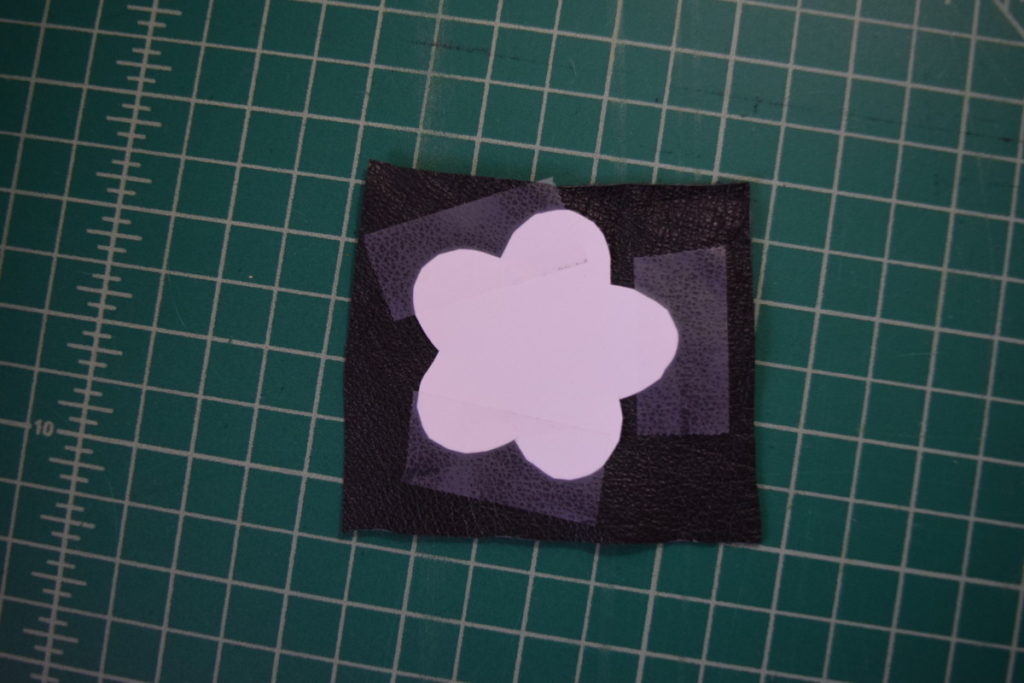
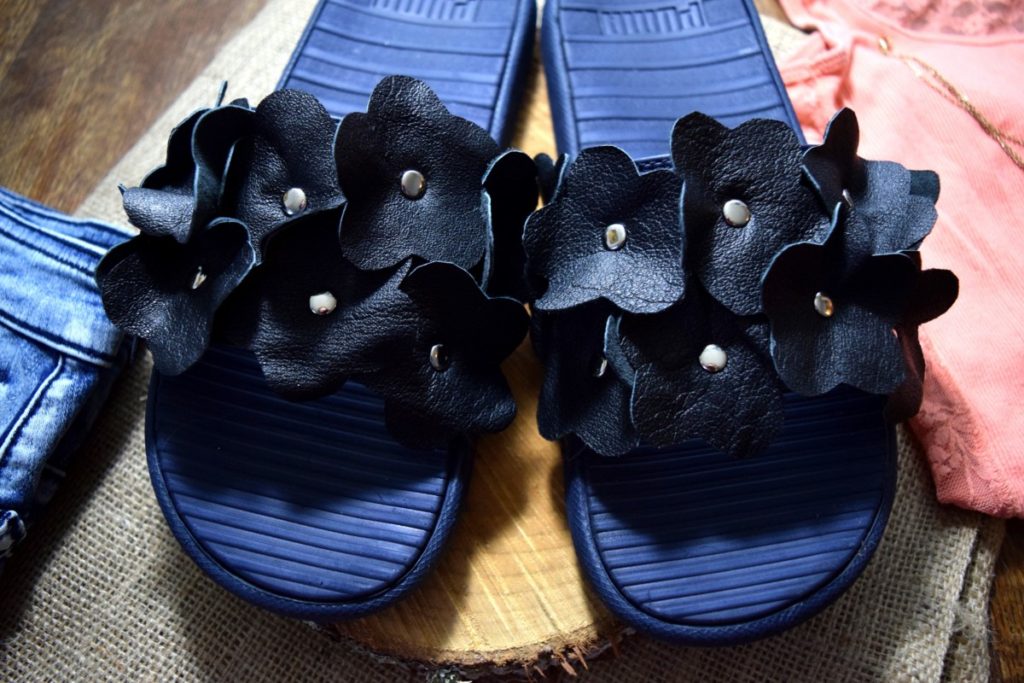
Then I just cut around the cardstock and I ended up with a cute leather flower!
Now we need to attach the flower to the slide. To attach the flowers I used Dritz rivets and rivet tool. I’ve linked them on Amazon to make things easy for you, but you can also find them at your local craft store.
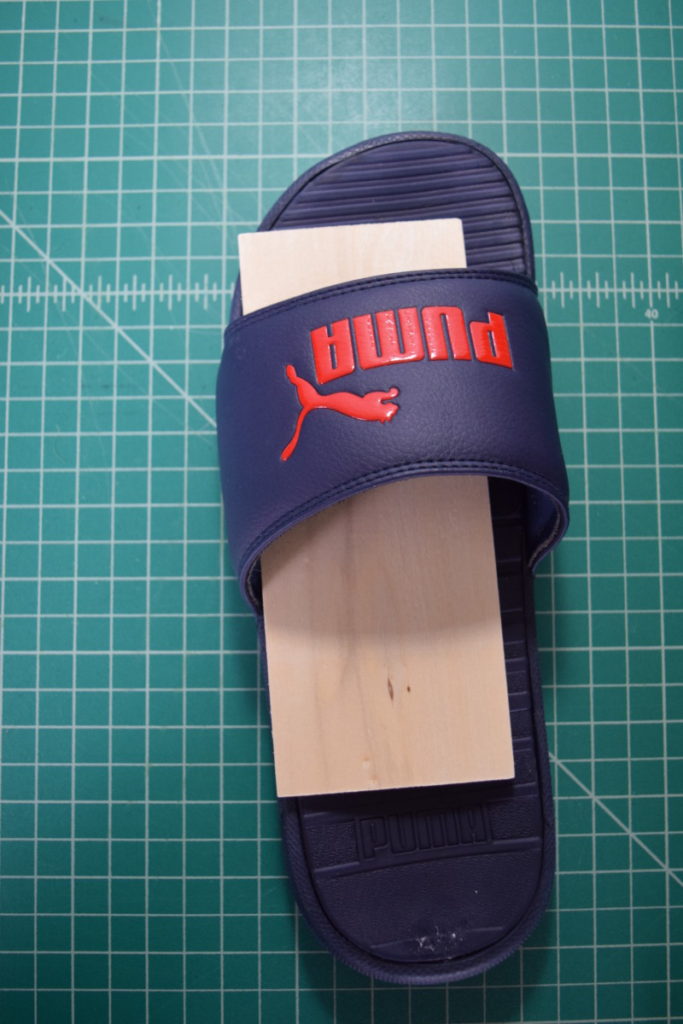
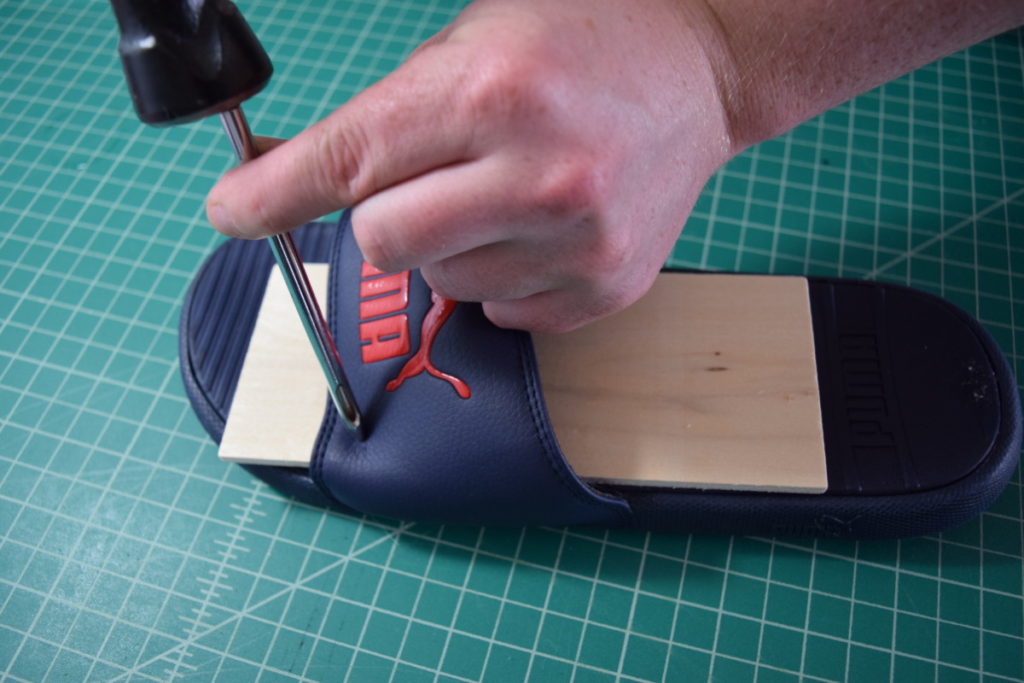
First, I put a flat piece of wood inside the shoe so that when I hammered a hole in the shoe it didn’t go through to the bottom of the shoe. I used these from Walmart. When I first practiced using the rivet hole punch on some scrap fabric I tried using cardboard behind the fabric instead of wood… and ended up with a hole in my cutting mat… so whatever you use just make sure it’s sturdy!
Next, grab the hole puncher from the rivet tool kit.
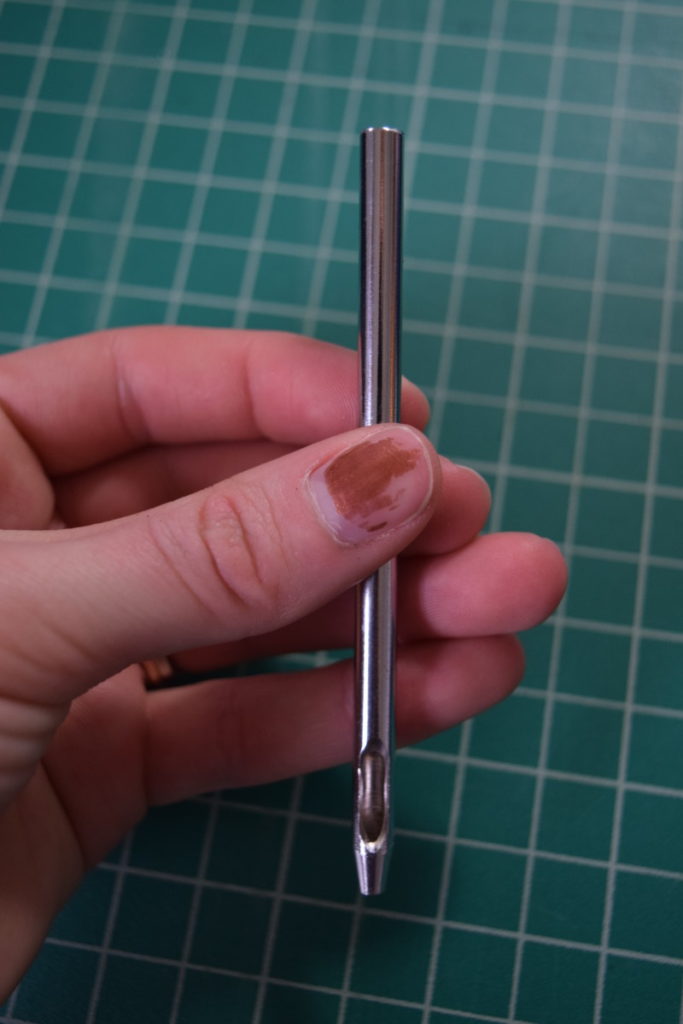
Now place the sharp end of the hole punch against the shoe where you want the center of your first flower to be placed.
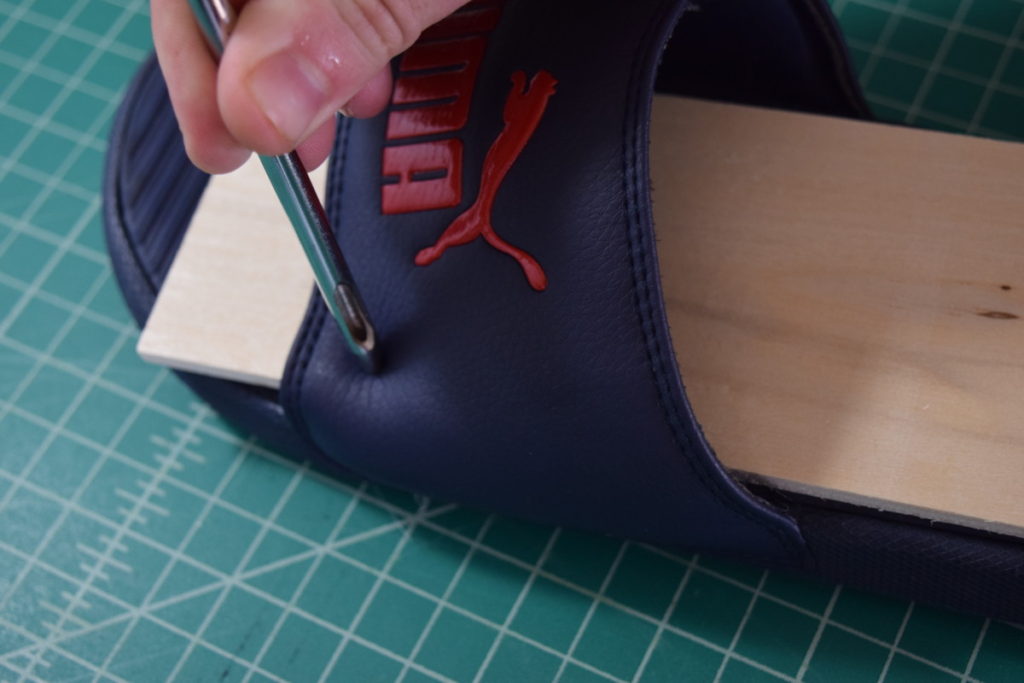
Then use a hammer to hit the end of the hole punch to make a hole in the shoe… you’ll have to hit HARD and it might take more than one hit, my husband had to help me with this at first because I wasn’t hammering it hard enough to make a hole.
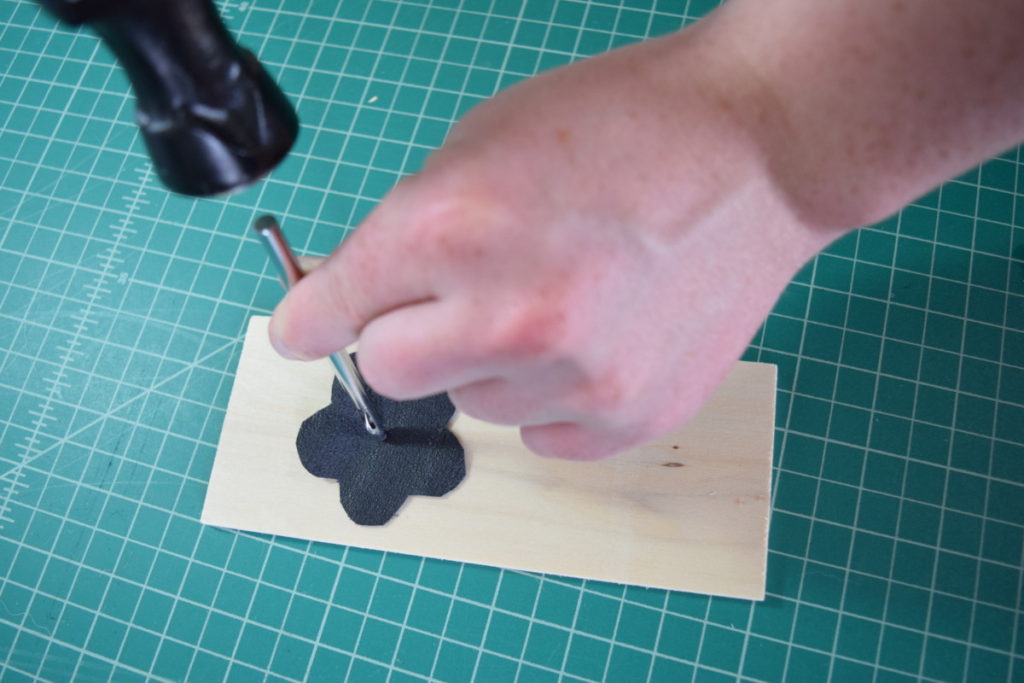
Next, I used the same method to punch a hole in the center of my leather flower. I made sure to lay the flower on the wood slat before punching the hole.
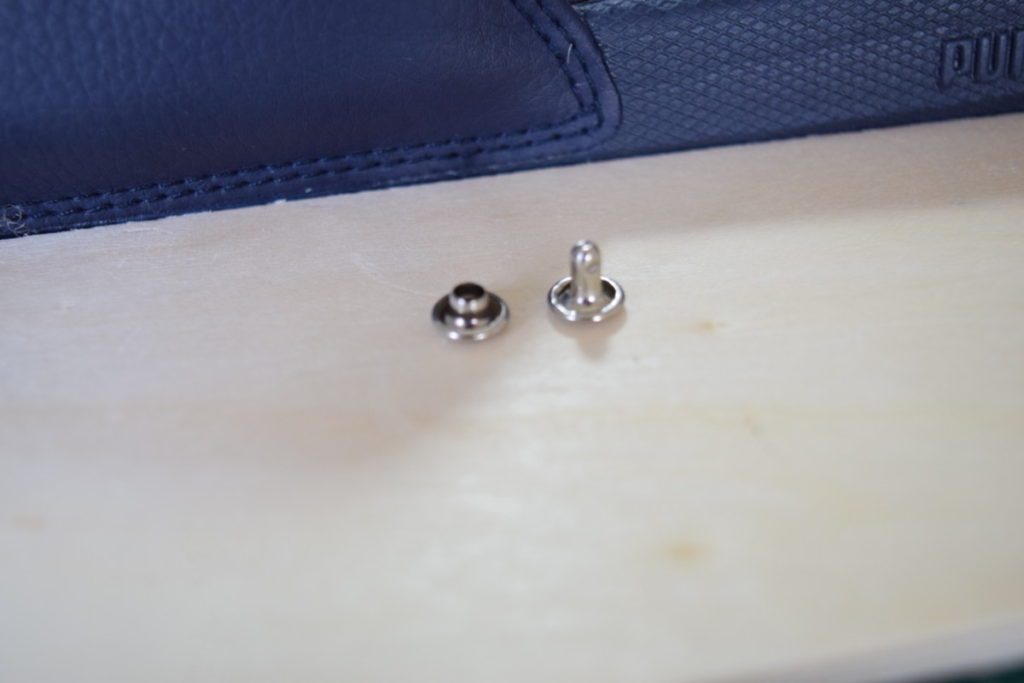
Now grab a front and a back rivet piece. The front is the longer piece on the right.
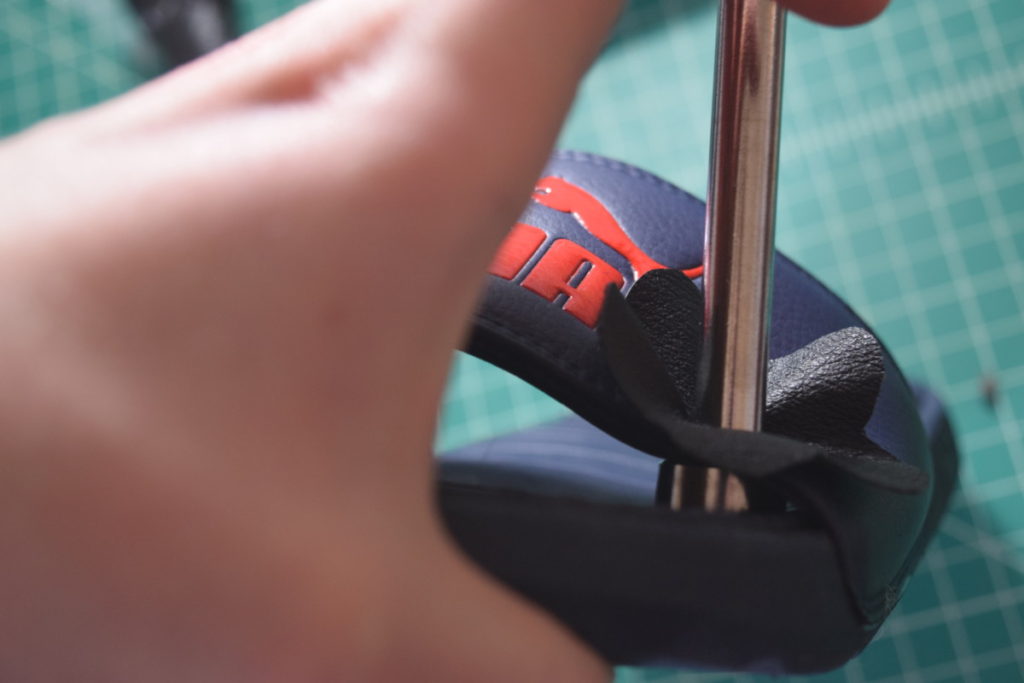
Hold the flower on the shoe, lining up the holes, and press the front rivet piece through the holes from top to bottom.
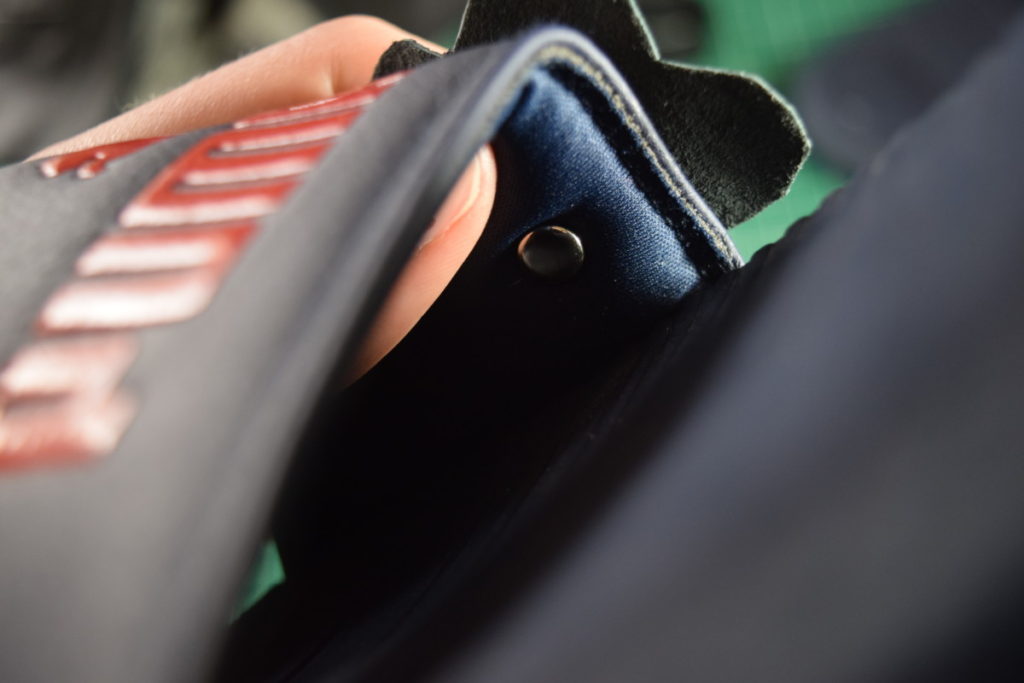
Next, snap the back rivet piece onto the front rivet from the inside of the shoe. It should snap into place easily, but will be a bit loose.
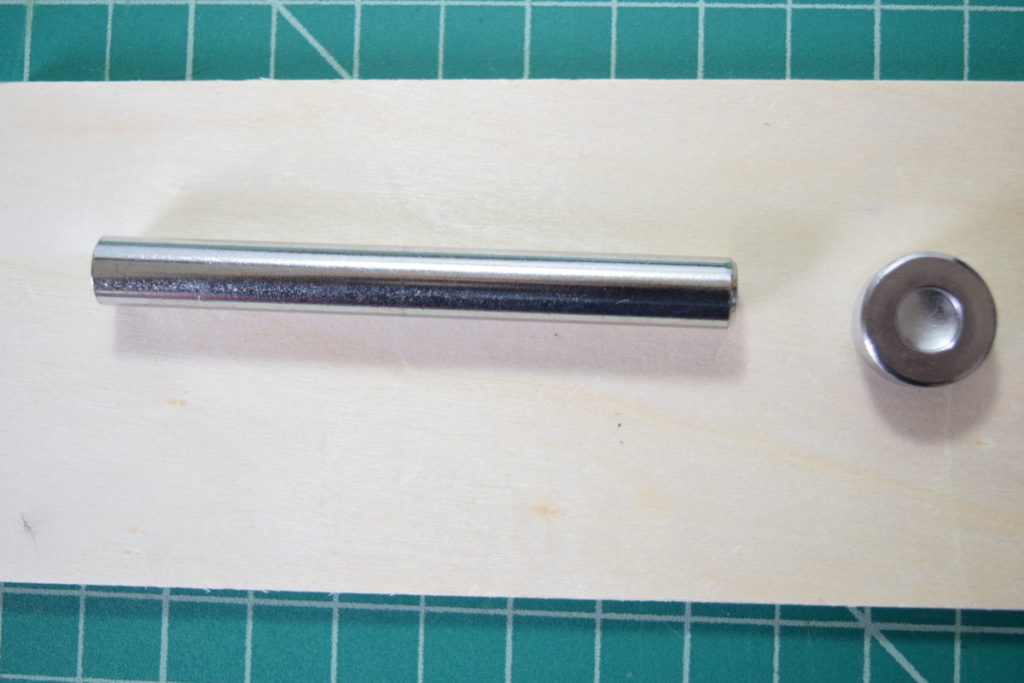
Now to secure the rivet in place, grab the other two pieces from the rivet attaching tool kit. These are the anvil (small round piece) and the setting tool (long cylinder).
Next, take the anvil and place the curved side against the rivet back (inside the shoe).
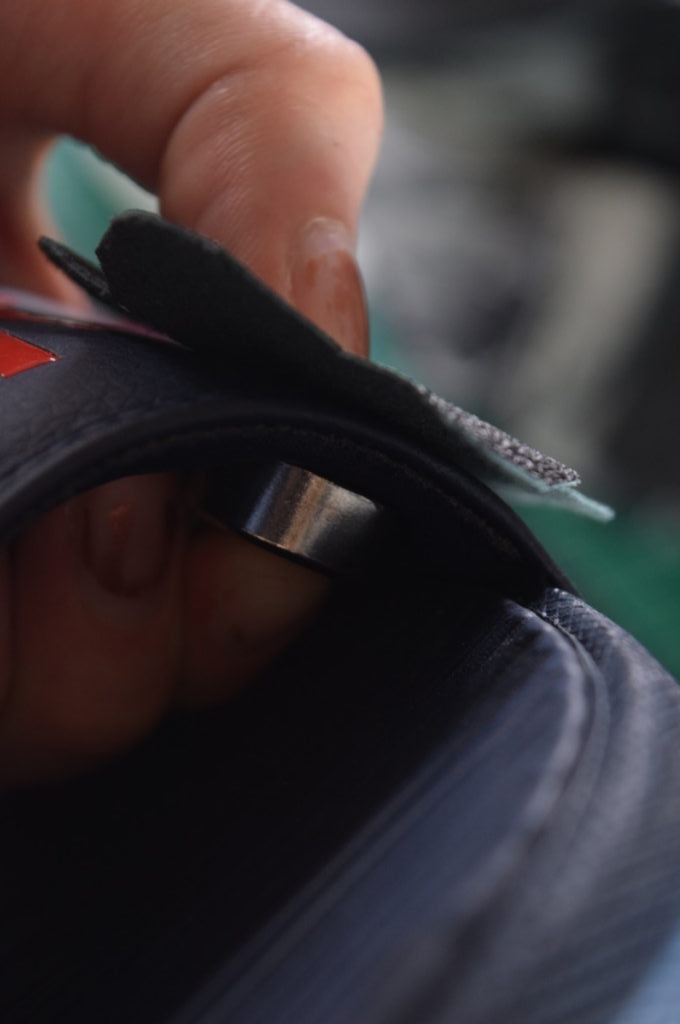
Then place the curved side of the setting tool against the rivet front, sandwiching the rivet between the two pieces.
Hold this in place while hammering the end of the setting tool to secure the rivet. Once you’ve hammered it hard enough, the rivet will be tight and secure.

Now just repeat this process until your slides are covered with as many flowers as you want!
If you loved this DIY and want to stay up to date with my projects, you can subscribe to my newsletter to get a weekly update on new blog posts, as well as sneak peeks, and exclusive content!


It?s actually a nice and useful piece of info. I?m glad that you shared this useful info with us. Please keep us informed like this. Thanks for sharing.
Hello! This is kind of off topic but I need some guidance from an established blog. Is it difficult to set up your own blog? I’m not very techincal but I can figure things out pretty quick. I’m thinking about creating my own but I’m not sure where to start. Do you have any tips or suggestions? Appreciate it
Thank you, I have recently been searching for info about this topic for ages and yours is the best I’ve discovered till now. But, what about the bottom line? Are you sure about the source?
Its like you read my mind! You appear to know a lot about this, like you wrote the book in it or something. I think that you could do with a few pics to drive the message home a bit, but instead of that, this is magnificent blog. A fantastic read. I’ll certainly be back.
What i do not understood is actually how you are not really much more well-liked than you may be right now. You are very intelligent. You realize therefore significantly relating to this subject, made me personally consider it from a lot of varied angles. Its like women and men aren’t fascinated unless it is one thing to accomplish with Lady gaga! Your own stuffs outstanding. Always maintain it up!
Thanks for your write-up. My spouse and i have always noticed that a majority of people are wanting to lose weight as they wish to show up slim as well as attractive. Nevertheless, they do not often realize that there are other benefits for losing weight additionally. Doctors claim that over weight people suffer from a variety of ailments that can be instantly attributed to their particular excess weight. The good thing is that people who definitely are overweight along with suffering from various diseases can help to eliminate the severity of their own illnesses by way of losing weight. It’s possible to see a steady but notable improvement in health whenever even a small amount of weight reduction is attained.
I additionally believe that mesothelioma cancer is a rare form of cancers that is often found in those people previously exposed to asbestos. Cancerous cells form while in the mesothelium, which is a protective lining which covers the vast majority of body’s body organs. These cells normally form while in the lining of the lungs, mid-section, or the sac which actually encircles the heart. Thanks for revealing your ideas.
There are actually lots of particulars like that to take into consideration. That could be a great point to bring up. I supply the ideas above as normal inspiration however clearly there are questions like the one you carry up where a very powerful factor can be working in trustworthy good faith. I don?t know if greatest practices have emerged around things like that, however I am certain that your job is clearly recognized as a good game. Each boys and girls feel the affect of just a second?s pleasure, for the rest of their lives.
I’m truly impressed by the way you effortlessly distill intricate concepts into easily digestible information. Your writing style not only imparts knowledge but also engages the reader, making the learning experience both enjoyable and memorable. Your passion for sharing your expertise is unmistakable, and for that, I am deeply grateful.
I’m genuinely impressed by how effortlessly you distill intricate concepts into easily digestible information. Your writing style not only imparts knowledge but also engages the reader, making the learning experience both enjoyable and memorable. Your passion for sharing your expertise shines through, and for that, I’m deeply grateful.
I enjoy, result in I found just what I used to be looking for. You’ve ended my four day long hunt! God Bless you man. Have a great day. Bye
I must applaud your talent for simplifying complex topics. Your ability to convey intricate ideas in such a relatable manner is admirable. You’ve made learning enjoyable and accessible for many, and I deeply appreciate that.
Today, while I was at work, my cousin stole my apple ipad and tested to see if it can survive a thirty foot drop, just so she can be a youtube sensation. My iPad is now destroyed and she has 83 views. I know this is totally off topic but I had to share it with someone!
I’ve found a treasure trove of knowledge in your blog. Your dedication to providing trustworthy information is something to admire. Each visit leaves me more enlightened, and I appreciate your consistent reliability.
I must applaud your talent for simplifying complex topics. Your ability to convey intricate ideas in such a relatable manner is admirable. You’ve made learning enjoyable and accessible for many, and I deeply appreciate that.
I’ve found a treasure trove of knowledge in your blog. Your dedication to providing trustworthy information is something to admire. Each visit leaves me more enlightened, and I appreciate your consistent reliability.
I’ve discovered a treasure trove of knowledge in your blog. Your unwavering dedication to offering trustworthy information is truly commendable. Each visit leaves me more enlightened, and I deeply appreciate your consistent reliability.
I’m truly impressed by the way you effortlessly distill intricate concepts into easily digestible information. Your writing style not only imparts knowledge but also engages the reader, making the learning experience both enjoyable and memorable. Your passion for sharing your expertise is unmistakable, and for that, I am deeply grateful.
Awesome blog you have here but I was wanting to know if you knew of any forums that cover the same topics talked about here? I’d really like to be a part of community where I can get opinions from other knowledgeable individuals that share the same interest. If you have any suggestions, please let me know. Thank you!
I’m genuinely impressed by how effortlessly you distill intricate concepts into easily digestible information. Your writing style not only imparts knowledge but also engages the reader, making the learning experience both enjoyable and memorable. Your passion for sharing your expertise is unmistakable, and for that, I am deeply appreciative.
I’m genuinely impressed by how effortlessly you distill intricate concepts into easily digestible information. Your writing style not only imparts knowledge but also engages the reader, making the learning experience both enjoyable and memorable. Your passion for sharing your expertise shines through, and for that, I’m deeply grateful.
I’ve discovered a treasure trove of knowledge in your blog. Your unwavering dedication to offering trustworthy information is truly commendable. Each visit leaves me more enlightened, and I deeply appreciate your consistent reliability.
I must applaud your talent for simplifying complex topics. Your ability to convey intricate ideas in such a relatable manner is admirable. You’ve made learning enjoyable and accessible for many, and I deeply appreciate that.
I’m genuinely impressed by how effortlessly you distill intricate concepts into easily digestible information. Your writing style not only imparts knowledge but also engages the reader, making the learning experience both enjoyable and memorable. Your passion for sharing your expertise shines through, and for that, I’m deeply grateful.
I’m genuinely impressed by how effortlessly you distill intricate concepts into easily digestible information. Your writing style not only imparts knowledge but also engages the reader, making the learning experience both enjoyable and memorable. Your passion for sharing your expertise is unmistakable, and for that, I am deeply appreciative.
I’ve discovered a treasure trove of knowledge in your blog. Your unwavering dedication to offering trustworthy information is truly commendable. Each visit leaves me more enlightened, and I deeply appreciate your consistent reliability.
I must commend your talent for simplifying complex topics. Your ability to convey intricate ideas in such a relatable way is admirable. You’ve made learning enjoyable and accessible for many, and I appreciate that.
I’ve discovered a treasure trove of knowledge in your blog. Your unwavering dedication to offering trustworthy information is truly commendable. Each visit leaves me more enlightened, and I deeply appreciate your consistent reliability.
I do enjoy the manner in which you have framed this particular difficulty and it does indeed supply me a lot of fodder for thought. Nonetheless, because of what precisely I have experienced, I just simply hope when the actual reviews stack on that people today remain on issue and not embark upon a soap box of some other news du jour. Anyway, thank you for this exceptional piece and whilst I do not necessarily go along with this in totality, I respect your perspective.
Almanya’nın en iyi medyumu haluk hoca sayesinde sizlerde güven içerisinde çalışmalar yaptırabilirsiniz, 40 yıllık uzmanlık ve tecrübesi ile sizlere en iyi medyumluk hizmeti sunuyoruz.
I appreciate, cause I found exactly what I was looking for. You have ended my 4 day long hunt! God Bless you man. Have a nice day. Bye
I’ve discovered a treasure trove of knowledge in your blog. Your unwavering dedication to offering trustworthy information is truly commendable. Each visit leaves me more enlightened, and I deeply appreciate your consistent reliability.
Today, while I was at work, my cousin stole my iphone and tested to see if it can survive a 30 foot drop, just so she can be a youtube sensation. My apple ipad is now broken and she has 83 views. I know this is totally off topic but I had to share it with someone!
Thanks for expressing your ideas. Something is that individuals have a selection between federal government student loan as well as a private education loan where it can be easier to select student loan debt consolidation loan than in the federal student loan.
Whoa! This blog looks exactly like my old one! It’s on a totally different topic but it has pretty much the same page layout and design. Superb choice of colors!
I’ve noticed that fixing credit activity ought to be conducted with techniques. If not, it’s possible you’ll find yourself endangering your position. In order to succeed in fixing your credit score you have to take care that from this instant you pay any monthly costs promptly in advance of their booked date. It is really significant on the grounds that by never accomplishing so, all other actions that you will choose to use to improve your credit position will not be efficient. Thanks for expressing your ideas.
I loved as much as you’ll receive performed proper here. The cartoon is tasteful, your authored material stylish. nevertheless, you command get got an edginess over that you wish be turning in the following. sick definitely come more before once more since exactly the same nearly a lot steadily inside case you defend this increase.
I?m impressed, I need to say. Really not often do I encounter a blog that?s both educative and entertaining, and let me let you know, you have hit the nail on the head. Your idea is excellent; the difficulty is one thing that not enough persons are speaking intelligently about. I am very completely satisfied that I stumbled across this in my search for one thing regarding this.
It’s my belief that mesothelioma can be the most dangerous cancer. It contains unusual attributes. The more I look at it the more I am convinced it does not conduct itself like a true solid cells cancer. In the event that mesothelioma is often a rogue virus-like infection, therefore there is the prospects for developing a vaccine plus offering vaccination to asbestos uncovered people who are really at high risk regarding developing foreseeable future asbestos connected malignancies. Thanks for sharing your ideas about this important health issue.
bookdecorfactory.com is a Global Trusted Online Fake Books Decor Store. We sell high quality budget price fake books decoration, Faux Books Decor. We offer FREE shipping across US, UK, AUS, NZ, Russia, Europe, Asia and deliver 100+ countries. Our delivery takes around 12 to 20 Days. We started our online business journey in Sydney, Australia and have been selling all sorts of home decor and art styles since 2008.
I loved as much as you’ll receive carried out right here. The sketch is tasteful, your authored subject matter stylish. nonetheless, you command get bought an impatience over that you wish be delivering the following. unwell unquestionably come further formerly again since exactly the same nearly very often inside case you shield this hike.
I don?t even understand how I stopped up here, however I believed this submit was once good. I don’t realize who you’re however definitely you’re going to a famous blogger if you happen to are not already 😉 Cheers!
Thanks , I’ve just been looking for info about this subject for a while and yours is the best I have discovered till now. But, what in regards to the bottom line? Are you sure concerning the supply?
What i do not realize is actually how you’re not actually much more well-liked than you might be now. You’re so intelligent. You realize thus considerably relating to this subject, made me personally consider it from numerous varied angles. Its like men and women aren’t fascinated unless it?s one thing to do with Lady gaga! Your own stuffs nice. Always maintain it up!
I’ve really noticed that credit improvement activity should be conducted with tactics. If not, you may find yourself endangering your rating. In order to succeed in fixing your credit score you have to verify that from this time you pay any monthly fees promptly in advance of their scheduled date. It really is significant on the grounds that by not necessarily accomplishing so, all other activities that you will decide to try to improve your credit rank will not be efficient. Thanks for revealing your thoughts.
Whoa! This blog looks just like my old one! It’s on a entirely different topic but it has pretty much the same layout and design. Excellent choice of colors!
Another thing I have really noticed is that often for many people, low credit score is the response to circumstances above their control. As an example they may have been saddled through an illness and because of this they have substantial bills going to collections. It can be due to a occupation loss or inability to go to work. Sometimes divorce can send the financial circumstances in a downward direction. Thanks sharing your notions on this blog.
I must applaud your talent for simplifying complex topics. Your ability to convey intricate ideas in such a relatable manner is admirable. You’ve made learning enjoyable and accessible for many, and I deeply appreciate that.
I’m genuinely impressed by how effortlessly you distill intricate concepts into easily digestible information. Your writing style not only imparts knowledge but also engages the reader, making the learning experience both enjoyable and memorable. Your passion for sharing your expertise is unmistakable, and for that, I am deeply appreciative.
What?s Going down i am new to this, I stumbled upon this I have discovered It positively useful and it has aided me out loads. I hope to give a contribution & help other users like its aided me. Good job.
It?s hard to seek out educated people on this subject, however you sound like you recognize what you?re talking about! Thanks
Heya i?m for the primary time here. I found this board and I in finding It truly useful & it helped me out a lot. I hope to give something again and help others such as you aided me.
I can’t help but be impressed by the way you break down complex concepts into easy-to-digest information. Your writing style is not only informative but also engaging, which makes the learning experience enjoyable and memorable. It’s evident that you have a passion for sharing your knowledge, and I’m grateful for that.
This is a terrific web page, might you be interested in doing an interview about how you designed it? If so e-mail me!
Thanks for your suggestions. One thing I have noticed is the fact that banks as well as financial institutions know the spending patterns of consumers while also understand that a lot of people max out and about their cards around the breaks. They properly take advantage of this fact and then start flooding your current inbox and snail-mail box using hundreds of 0 APR credit card offers shortly when the holiday season comes to an end. Knowing that should you be like 98 of the American community, you’ll hop at the possible opportunity to consolidate personal credit card debt and shift balances towards 0 interest rate credit cards.
Hi would you mind letting me know which webhost you’re working with? I’ve loaded your blog in 3 different internet browsers and I must say this blog loads a lot quicker then most. Can you suggest a good internet hosting provider at a reasonable price? Thanks a lot, I appreciate it!
I must applaud your talent for simplifying complex topics. Your ability to convey intricate ideas in such a relatable manner is admirable. You’ve made learning enjoyable and accessible for many, and I deeply appreciate that.
Thanks for expressing your ideas. I might also like to state that video games have been ever evolving. Today’s technology and innovative developments have assisted create authentic and fun games. These kinds of entertainment games were not really sensible when the concept was first being used. Just like other kinds of technological innovation, video games as well have had to advance as a result of many years. This is testimony to the fast development of video games.
It?s actually a nice and useful piece of info. I?m glad that you shared this helpful info with us. Please keep us informed like this. Thanks for sharing.
Güvenilir bir medyum için bizi tercih ediniz, medyum haluk hocamız sizler için elinden geleni yapıyor.
En iyi medyumu arıyorsanız hiç çekinmeden medyum hocamızı ziyaret edebilir ve kendisinden bizzat destek alabilirsiniz.
There is noticeably a bundle to know about this. I assume you made certain nice points in options also.
I’ve discovered a treasure trove of knowledge in your blog. Your unwavering dedication to offering trustworthy information is truly commendable. Each visit leaves me more enlightened, and I deeply appreciate your consistent reliability.
Almanya köln medyumu haluk yıldız hoca sizlere ne iyi medyum hizmeti veriyor…
I’m genuinely impressed by how effortlessly you distill intricate concepts into easily digestible information. Your writing style not only imparts knowledge but also engages the reader, making the learning experience both enjoyable and memorable. Your passion for sharing your expertise is unmistakable, and for that, I am deeply appreciative.
I’m genuinely impressed by how effortlessly you distill intricate concepts into easily digestible information. Your writing style not only imparts knowledge but also engages the reader, making the learning experience both enjoyable and memorable. Your passion for sharing your expertise is unmistakable, and for that, I am deeply appreciative.
I’ve discovered a treasure trove of knowledge in your blog. Your unwavering dedication to offering trustworthy information is truly commendable. Each visit leaves me more enlightened, and I deeply appreciate your consistent reliability.
Avrupa’nın en güvenilir medyum hocalarından medyum haluk yıldız hocamız siz değerli kardeşlerimize yardım eli uzatıyor.
Avrupa’nın en iyi tanınan medyum hocalarından medyum haluk yıldız hocamız siz değerli kardeşlerimize yardım eli uzatıyor.
Tütsüler hakkında bilinmeyen ne varsa sizlerle en güzel yorumları tütsü çeşitleri sizlerle.
I’ve discovered a treasure trove of knowledge in your blog. Your unwavering dedication to offering trustworthy information is truly commendable. Each visit leaves me more enlightened, and I deeply appreciate your consistent reliability.
I must applaud your talent for simplifying complex topics. Your ability to convey intricate ideas in such a relatable manner is admirable. You’ve made learning enjoyable and accessible for many, and I deeply appreciate that.
What i do not realize is actually how you are not actually much more well-liked than you may be right now. You are so intelligent. You realize thus considerably relating to this subject, made me personally consider it from so many varied angles. Its like women and men aren’t fascinated unless it?s one thing to do with Lady gaga! Your own stuffs nice. Always maintain it up!
I’m genuinely impressed by how effortlessly you distill intricate concepts into easily digestible information. Your writing style not only imparts knowledge but also engages the reader, making the learning experience both enjoyable and memorable. Your passion for sharing your expertise shines through, and for that, I’m deeply grateful.
I’m genuinely impressed by how effortlessly you distill intricate concepts into easily digestible information. Your writing style not only imparts knowledge but also engages the reader, making the learning experience both enjoyable and memorable. Your passion for sharing your expertise shines through, and for that, I’m deeply grateful.
I’m genuinely impressed by how effortlessly you distill intricate concepts into easily digestible information. Your writing style not only imparts knowledge but also engages the reader, making the learning experience both enjoyable and memorable. Your passion for sharing your expertise shines through, and for that, I’m deeply grateful.
I’ve discovered a treasure trove of knowledge in your blog. Your unwavering dedication to offering trustworthy information is truly commendable. Each visit leaves me more enlightened, and I deeply appreciate your consistent reliability.
I’ve discovered a treasure trove of knowledge in your blog. Your unwavering dedication to offering trustworthy information is truly commendable. Each visit leaves me more enlightened, and I deeply appreciate your consistent reliability.
I can’t help but be impressed by the way you break down complex concepts into easy-to-digest information. Your writing style is not only informative but also engaging, which makes the learning experience enjoyable and memorable. It’s evident that you have a passion for sharing your knowledge, and I’m grateful for that.
İletişim: +49 157 59456087 Aşk büyüsü, Bağlama büyüsü, Gideni geri getirme büyüsü gibi çalışmalar hakkında en iyi medyum hoca.
I’m genuinely impressed by how effortlessly you distill intricate concepts into easily digestible information. Your writing style not only imparts knowledge but also engages the reader, making the learning experience both enjoyable and memorable. Your passion for sharing your expertise shines through, and for that, I’m deeply grateful.
great publish, very informative. I ponder why the other specialists of this sector don’t understand this. You should continue your writing. I am sure, you have a great readers’ base already!
Almanya’nın en iyi medyumu halu hoca ile sizlerde çalışınız. İletişim: +49 157 59456087 Aşık Etme Büyüsü, Bağlama Büyüsü gibi çalışmaları sizlerde yaptırabilirsiniz.
I’m truly impressed by the way you effortlessly distill intricate concepts into easily digestible information. Your writing style not only imparts knowledge but also engages the reader, making the learning experience both enjoyable and memorable. Your passion for sharing your expertise is unmistakable, and for that, I am deeply grateful.
Almanya’nın en iyi medyumu halu hoca ile sizlerde çalışınız. İletişim: +49 157 59456087 Aşık Etme Büyüsü, Bağlama Büyüsü gibi çalışmaları sizlerde yaptırabilirsiniz.
I really like it when folks come together and share opinions. Great blog, stick with it.
I’ve discovered a treasure trove of knowledge in your blog. Your unwavering dedication to offering trustworthy information is truly commendable. Each visit leaves me more enlightened, and I deeply appreciate your consistent reliability.
There is certainly a lot to know about this subject. I love all of the points you’ve made.
I am really impressed with your writing skills as well as with the layout on your blog. Is this a paid theme or did you customize it yourself? Either way keep up the excellent quality writing, it is rare to see a nice blog like this one nowadays..
Almanya’nın en iyi medyumu halu hoca ile sizlerde çalışınız. İletişim: +49 157 59456087 Aşık Etme Büyüsü, Bağlama Büyüsü gibi çalışmaları sizlerde yaptırabilirsiniz.
An outstanding share! I have just forwarded this onto a friend who had been doing a little homework on this. And he actually ordered me breakfast simply because I discovered it for him… lol. So let me reword this…. Thanks for the meal!! But yeah, thanx for spending the time to talk about this issue here on your web page.
This is a topic that’s close to my heart… Take care! Where can I find the contact details for questions?
Güven veren en iyi medyumu halu hoca ile sizlerde çalışınız. İletişim: +49 157 59456087 Aşık Etme Büyüsü, Bağlama Büyüsü gibi çalışmaları sizlerde yaptırabilirsiniz.
I’ve discovered a treasure trove of knowledge in your blog. Your unwavering dedication to offering trustworthy information is truly commendable. Each visit leaves me more enlightened, and I deeply appreciate your consistent reliability.
I’ve discovered a treasure trove of knowledge in your blog. Your unwavering dedication to offering trustworthy information is truly commendable. Each visit leaves me more enlightened, and I deeply appreciate your consistent reliability.
Berlin’de Gerçek bir sonuç veren en iyi medyumu halu hoca ile sizlerde çalışınız. İletişim: +49 157 59456087 Aşık Etme Büyüsü, Bağlama Büyüsü gibi çalışmaları sizlerde yaptırabilirsiniz.
I’ve discovered a treasure trove of knowledge in your blog. Your unwavering dedication to offering trustworthy information is truly commendable. Each visit leaves me more enlightened, and I deeply appreciate your consistent reliability.
Its such as you read my thoughts! You seem to grasp so much about this, like you wrote the ebook in it or something. I think that you just can do with some p.c. to drive the message home a bit, however other than that, this is magnificent blog. A fantastic read. I’ll definitely be back.
Köln’de Gerçek bir sonuç veren en iyi medyumu halu hoca ile sizlerde çalışınız. İletişim: +49 157 59456087 Aşık Etme Büyüsü, Bağlama Büyüsü gibi çalışmaları sizlerde yaptırabilirsiniz.
I’m genuinely impressed by how effortlessly you distill intricate concepts into easily digestible information. Your writing style not only imparts knowledge but also engages the reader, making the learning experience both enjoyable and memorable. Your passion for sharing your expertise shines through, and for that, I’m deeply grateful.
May I just say what a relief to discover an individual who genuinely knows what they’re talking about on the internet. You definitely realize how to bring an issue to light and make it important. More and more people need to look at this and understand this side of the story. It’s surprising you’re not more popular given that you surely possess the gift.
It is really a nice and helpful piece of information. I am glad that you shared this useful info with us. Please keep us up to date like this. Thank you for sharing.
I’ve discovered a treasure trove of knowledge in your blog. Your unwavering dedication to offering trustworthy information is truly commendable. Each visit leaves me more enlightened, and I deeply appreciate your consistent reliability.
This is the right webpage for anybody who really wants to understand this topic. You understand a whole lot its almost tough to argue with you (not that I actually will need to…HaHa). You definitely put a new spin on a subject which has been discussed for a long time. Great stuff, just great.
Almanya’da Güven veren Gerçek bir sonuç veren en iyi medyumu halu hoca ile sizlerde çalışınız. İletişim: +49 157 59456087 Aşık Etme Büyüsü, Bağlama Büyüsü gibi çalışmaları sizlerde yaptırabilirsiniz.
Almanya berlinde Güven veren Gerçek bir sonuç veren en iyi medyumu halu hoca ile sizlerde çalışınız. İletişim: +49 157 59456087 Aşık Etme Büyüsü, Bağlama Büyüsü gibi çalışmaları sizlerde yaptırabilirsiniz.
Wow! This blog looks exactly like my old one! It’s on a completely different topic but it has pretty much the same page layout and design. Great choice of colors!
Güvenilir en iyi Gerçek bir sonuç veren en iyi medyumu halu hoca ile sizlerde çalışınız. İletişim: +49 157 59456087 Aşık Etme Büyüsü, Bağlama Büyüsü gibi çalışmaları sizlerde yaptırabilirsiniz.
Güvenilir en iyi Gerçek bir sonuç veren en iyi medyumu halu hoca ile sizlerde çalışınız. İletişim: +49 157 59456087 Aşık Etme Büyüsü, Bağlama Büyüsü gibi çalışmaları sizlerde yaptırabilirsiniz.
The next time I read a blog, I hope that it won’t fail me just as much as this one. After all, I know it was my choice to read, however I truly thought you’d have something useful to talk about. All I hear is a bunch of moaning about something you could fix if you were not too busy looking for attention.
What i don’t realize is actually how you’re not really much more well-liked than you may be right now. You’re very intelligent. You realize therefore significantly relating to this subject, produced me personally consider it from so many varied angles. Its like men and women aren’t fascinated unless it?s one thing to accomplish with Lady gaga! Your own stuffs nice. Always maintain it up!
I can’t help but be impressed by the way you break down complex concepts into easy-to-digest information. Your writing style is not only informative but also engaging, which makes the learning experience enjoyable and memorable. It’s evident that you have a passion for sharing your knowledge, and I’m grateful for that.
Güvenilir en iyi Gerçek bir sonuç veren en iyi medyumu halu hoca ile sizlerde çalışınız. İletişim: +49 157 59456087 Aşık Etme Büyüsü, Bağlama Büyüsü gibi çalışmaları sizlerde yaptırabilirsiniz.
I’m so happy to read this. This is the kind of manual that needs to be given and not the accidental misinformation that is at the other blogs. Appreciate your sharing this best doc.
Güvenilir en iyi Gerçek bir sonuç veren en iyi medyumu halu hoca ile sizlerde çalışınız. İletişim: +49 157 59456087 Aşık Etme Büyüsü, Bağlama Büyüsü gibi çalışmaları sizlerde yaptırabilirsiniz.
I’m truly impressed by the way you effortlessly distill intricate concepts into easily digestible information. Your writing style not only imparts knowledge but also engages the reader, making the learning experience both enjoyable and memorable. Your passion for sharing your expertise is unmistakable, and for that, I am deeply grateful.
I’m genuinely impressed by how effortlessly you distill intricate concepts into easily digestible information. Your writing style not only imparts knowledge but also engages the reader, making the learning experience both enjoyable and memorable. Your passion for sharing your expertise is unmistakable, and for that, I am deeply appreciative.
Thanks for the complete information. You helped me.
I’ve discovered a treasure trove of knowledge in your blog. Your unwavering dedication to offering trustworthy information is truly commendable. Each visit leaves me more enlightened, and I deeply appreciate your consistent reliability.
Undeniably believe that which you said. Your favorite reason seemed to be on the net the simplest thing to be aware of. I say to you, I certainly get annoyed while people think about worries that they just don’t know about. You managed to hit the nail upon the top as well as defined out the whole thing without having side effect , people could take a signal. Will probably be back to get more. Thanks
72841 721345His or her shape of unrealistic tats were initially threatening. Lindsay utilized gun first basic, whereas this girl snuck outside by printer ink dog pen. I used definitely positive the all truly on the shade, with the tattoo can be taken from the body shape. make an own temporary tattoo 768821
I have learned some new things by means of your blog. One other thing I would like to say is the fact that newer laptop or computer operating systems tend to allow a lot more memory for use, but they additionally demand more memory space simply to perform. If someone’s computer could not handle additional memory and also the newest software program requires that memory space increase, it can be the time to buy a new Computer system. Thanks
Would you be inquisitive about exchanging links?
I’m amazed, I must say. Rarely do I encounter a blog that’s both equally educative and entertaining, and without a doubt, you’ve hit the nail on the head. The issue is something which too few people are speaking intelligently about. I am very happy that I came across this in my hunt for something relating to this.
Thanks for the helpful write-up. It is also my opinion that mesothelioma cancer has an incredibly long latency phase, which means that signs of the disease would possibly not emerge until 30 to 50 years after the original exposure to asbestos. Pleural mesothelioma, that is certainly the most common sort and affects the area round the lungs, will cause shortness of breath, upper body pains, including a persistent coughing, which may bring on coughing up bloodstream.
I’m genuinely impressed by how effortlessly you distill intricate concepts into easily digestible information. Your writing style not only imparts knowledge but also engages the reader, making the learning experience both enjoyable and memorable. Your passion for sharing your expertise shines through, and for that, I’m deeply grateful.
I have noticed that online education is getting favorite because getting your degree online has developed into popular selection for many people. A lot of people have certainly not had a chance to attend an established college or university nonetheless seek the raised earning potential and a better job that a Bachelor Degree gives. Still others might have a diploma in one field but would like to pursue a thing they already have an interest in.
I’ve discovered a treasure trove of knowledge in your blog. Your unwavering dedication to offering trustworthy information is truly commendable. Each visit leaves me more enlightened, and I deeply appreciate your consistent reliability.
Whoa! This blog looks exactly like my old one! It’s on a entirely different topic but it has pretty much the same layout and design. Great choice of colors!
I do like the way you have presented this particular difficulty plus it does provide me personally a lot of fodder for thought. On the other hand, from just what I have observed, I simply just hope as other remarks pile on that folks continue to be on issue and not get started upon a soap box associated with the news of the day. All the same, thank you for this superb piece and although I can not really concur with it in totality, I value your standpoint.
Thanks for discussing your ideas with this blog. Additionally, a misconception regarding the banking institutions intentions any time talking about foreclosure is that the standard bank will not take my payments. There is a certain amount of time that this bank is going to take payments in some places. If you are as well deep inside the hole, they’ll commonly demand that you pay that payment completely. However, i am not saying that they will not take any sort of payments at all. If you and the standard bank can have the ability to work one thing out, the actual foreclosure method may cease. However, in the event you continue to miss payments under the new approach, the foreclosures process can pick up where it was left off.
I’m not sure why but this blog is loading incredibly slow for me. Is anyone else having this issue or is it a issue on my end? I’ll check back later and see if the problem still exists.
This is a topic that’s near to my heart… Take care! Exactly where can I find the contact details for questions?
The next time I read a blog, I hope that it does not disappoint me as much as this one. I mean, I know it was my choice to read, but I genuinely believed you would have something helpful to talk about. All I hear is a bunch of whining about something you can fix if you weren’t too busy looking for attention.
Can I simply say what a relief to find somebody who truly knows what they are talking about on the internet. You actually understand how to bring an issue to light and make it important. A lot more people should check this out and understand this side of the story. I can’t believe you are not more popular because you certainly possess the gift.
There is definately a great deal to find out about this topic. I love all the points you’ve made.
I’m amazed, I must say. Seldom do I encounter a blog that’s both educative and amusing, and without a doubt, you have hit the nail on the head. The problem is something that too few folks are speaking intelligently about. I’m very happy I came across this in my search for something concerning this.
I’m amazed, I have to admit. Rarely do I come across a blog that’s both educative and amusing, and let me tell you, you have hit the nail on the head. The problem is something which too few men and women are speaking intelligently about. I’m very happy that I stumbled across this in my search for something regarding this.
I have realized that online diploma is getting common because accomplishing your college degree online has become a popular option for many people. A huge number of people have not necessarily had a possibility to attend a regular college or university yet seek the increased earning possibilities and a better job that a Bachelor’s Degree affords. Still others might have a diploma in one discipline but would want to pursue one thing they now possess an interest in.
creative
bless
I additionally believe that mesothelioma is a scarce form of many forms of cancer that is often found in these previously exposed to asbestos. Cancerous cells form inside mesothelium, which is a protective lining which covers almost all of the body’s organs. These cells usually form inside lining from the lungs, abdominal area, or the sac which encircles the heart. Thanks for expressing your ideas.
It’s difficult to find well-informed people in this particular topic, but you sound like you know what you’re talking about! Thanks
There may be noticeably a bundle to learn about this. I assume you made sure good factors in options also.
Thank you for sharing indeed great looking !
This web page is really a walk-by for all of the information you needed about this and didn?t know who to ask. Glimpse here, and also you?ll undoubtedly discover it.
Unquestionably consider that which you stated. Your favourite justification seemed to be on the net the easiest factor to take into account of. I say to you, I certainly get annoyed even as people consider concerns that they plainly do not realize about. You managed to hit the nail upon the highest and also outlined out the entire thing with no need side-effects , people could take a signal. Will probably be back to get more. Thank you
I love it when individuals come together and share ideas. Great blog, stick with it!
I really like it when individuals come together and share opinions. Great blog, keep it up.
These technologies engage students in dynamic ways, fostering critical thinking, creativity, and problem-solving skills.
One thing I’ve noticed is always that there are plenty of myths regarding the banks intentions whenever talking about property foreclosures. One myth in particular would be the fact the bank needs to have your house. The lending company wants your dollars, not your own home. They want the funds they lent you with interest. Preventing the bank will draw the foreclosed realization. Thanks for your write-up.
Thanks for giving your ideas. The first thing is that learners have an alternative between federal student loan as well as a private education loan where it truly is easier to opt for student loan consolidation than with the federal education loan.
There may be noticeably a bundle to find out about this. I assume you made sure good factors in features also.
Today, I went to the beach front with my children. I found a sea shell and gave it to my 4 year old daughter and said “You can hear the ocean if you put this to your ear.” She put the shell to her ear and screamed. There was a hermit crab inside and it pinched her ear. She never wants to go back! LoL I know this is completely off topic but I had to tell someone!
I appreciate, cause I found exactly what I was looking for. You have ended my 4 day long hunt! God Bless you man. Have a nice day. Bye
I must applaud your talent for simplifying complex topics. Your ability to convey intricate ideas in such a relatable manner is admirable. You’ve made learning enjoyable and accessible for many, and I deeply appreciate that.
It?s actually a cool and useful piece of information. I am glad that you shared this helpful info with us. Please keep us up to date like this. Thanks for sharing.
I believe one of your commercials caused my internet browser to resize, you may well want to put that on your blacklist.
Hmm is anyone else experiencing problems with the pictures on this blog loading? I’m trying to find out if its a problem on my end or if it’s the blog. Any feed-back would be greatly appreciated.
Howdy would you mind letting me know which hosting company you’re using? I’ve loaded your blog in 3 different browsers and I must say this blog loads a lot faster then most. Can you suggest a good hosting provider at a reasonable price? Thank you, I appreciate it!
I loved as much as you will receive carried out right here. The sketch is tasteful, your authored subject matter stylish. nonetheless, you command get got an impatience over that you wish be delivering the following. unwell unquestionably come more formerly again since exactly the same nearly a lot often inside case you shield this increase.
I have observed that online diploma is getting favorite because attaining your college degree online has become a popular alternative for many people. A huge number of people have definitely not had a chance to attend a regular college or university although seek the raised earning potential and career advancement that a Bachelor Degree provides. Still other individuals might have a degree in one field but would choose to pursue a thing they now have an interest in.
Güvenilir bir danışman için medyum nasip hocayı seçin en iyi medyum hocalardan bir tanesidir.
Güvenilir bir danışman için medyum nasip hocayı seçin en iyi medyum hocalardan bir tanesidir.
Güvenilir bir danışman için medyum nasip hocayı seçin en iyi medyum hocalardan bir tanesidir.
Undeniably believe that which you stated. Your favorite reason seemed to be on the internet the simplest thing to be aware of. I say to you, I definitely get irked while people think about worries that they plainly do not know about. You managed to hit the nail upon the top and also defined out the whole thing without having side effect , people can take a signal. Will likely be back to get more. Thanks
Its like you read my mind! You seem to know a lot about this, such as you wrote the guide in it or something. I feel that you just could do with a few to drive the message house a bit, but instead of that, this is great blog. A great read. I’ll definitely be back.
Güvenilir bir danışman için medyum haluk hocayı seçin en iyi medyum hocalardan bir tanesidir.
We are offering Concrete Parking Lot Contractor, Concrete Installation Contractor Service, warehouse flooring, commercial, and industrial concrete roadways.
We are offering Concrete Parking Lot Contractor, Concrete Installation Contractor Service, warehouse flooring, commercial, and industrial concrete roadways.
This is the fitting blog for anybody who desires to seek out out about this topic. You understand so much its nearly laborious to argue with you (not that I actually would want?HaHa). You definitely put a brand new spin on a subject thats been written about for years. Great stuff, just great!
I additionally believe that mesothelioma is a exceptional form of melanoma that is commonly found in those previously subjected to asbestos. Cancerous cellular material form in the mesothelium, which is a protective lining that covers the vast majority of body’s bodily organs. These cells usually form inside the lining of your lungs, abdominal area, or the sac that really encircles the heart. Thanks for sharing your ideas.
We are offering Concrete Parking Lot Contractor, Concrete Installation Contractor Service, warehouse flooring, commercial, and industrial concrete roadways.
We are offering Concrete Parking Lot Contractor, Concrete Installation Contractor Service, warehouse flooring, commercial, and industrial concrete roadways.
I cherished up to you will obtain carried out proper here. The cartoon is tasteful, your authored subject matter stylish. nonetheless, you command get got an nervousness over that you would like be delivering the following. sick certainly come more beforehand again since precisely the similar nearly a lot often within case you defend this hike.
I used to be recommended this blog through my cousin. I’m no longer certain whether or not this put up is written through him as no one else recognise such unique about my trouble. You’re incredible! Thank you!
This is the right blog for anybody who would like to find out about this topic. You realize a whole lot its almost tough to argue with you (not that I really would want to…HaHa). You definitely put a new spin on a subject that’s been written about for years. Wonderful stuff, just wonderful.
Thanks for sharing your ideas. The one thing is that students have a solution between federal student loan and a private student loan where it truly is easier to opt for student loan debt consolidation reduction than in the federal education loan.
Things i have observed in terms of laptop memory is always that there are specifications such as SDRAM, DDR and so on, that must fit in with the requirements of the mother board. If the pc’s motherboard is pretty current and there are no main system issues, modernizing the storage space literally requires under one hour. It’s one of several easiest laptop upgrade methods one can picture. Thanks for discussing your ideas.
This really answered my downside, thanks!
Also I believe that mesothelioma is a extraordinary form of melanoma that is generally found in those people previously subjected to asbestos. Cancerous cellular material form inside the mesothelium, which is a protective lining that covers many of the body’s body organs. These cells generally form inside the lining with the lungs, abdominal area, or the sac that encircles one’s heart. Thanks for sharing your ideas.
You can definitely see your skills in the paintings you write. The arena hopes for even more passionate writers such as you who aren’t afraid to say how they believe. Always go after your heart.
Good blog you have here.. It’s difficult to find high-quality writing like yours nowadays. I really appreciate individuals like you! Take care!!
Thank you, I have recently been looking for information approximately this subject for ages and yours is the best I’ve came upon till now. However, what concerning the conclusion? Are you positive about the source?
Heya i?m for the first time here. I found this board and I to find It truly useful & it helped me out much. I’m hoping to present one thing back and help others like you aided me.
Thank you, I have recently been searching for info about this topic for ages and yours is the best I’ve discovered till now. But, what about the conclusion? Are you sure about the source?
The information shared is of top quality which has to get appreciated at all levels. Well done…
You could definitely see your expertise in the work you write. The world hopes for more passionate writers like you who aren’t afraid to say how they believe. Always go after your heart.
The information shared is of top quality which has to get appreciated at all levels. Well done…
What i do not realize is actually how you’re not really much more well-liked than you may be now. You’re very intelligent. You realize thus significantly relating to this subject, produced me personally consider it from so many varied angles. Its like men and women aren’t fascinated unless it?s one thing to do with Lady gaga! Your own stuffs outstanding. Always maintain it up!
My partner and I stumbled over here by a different web address and thought I might as well check things out. I like what I see so now i’m following you. Look forward to looking at your web page for a second time.
You need to be a part of a contest for one of the best blogs on the net. I will highly recommend this blog!
The information shared is of top quality which has to get appreciated at all levels. Well done…
Thanks for these pointers. One thing I should also believe is always that credit cards supplying a 0 apr often entice consumers along with zero rate of interest, instant approval and easy online balance transfers, nonetheless beware of the main factor that may void that 0 easy road annual percentage rate and throw anybody out into the poor house rapidly.
Great blog! Is your theme custom made or did you download it from somewhere? A design like yours with a few simple adjustements would really make my blog stand out. Please let me know where you got your theme. Appreciate it
Along with almost everything that seems to be building throughout this particular subject matter, many of your opinions happen to be rather exciting. However, I am sorry, but I can not subscribe to your whole idea, all be it exhilarating none the less. It appears to everyone that your opinions are not entirely validated and in simple fact you are your self not totally convinced of your assertion. In any case I did appreciate looking at it.
I used to be recommended this blog via my cousin. I’m now not certain whether this publish is written by him as no one else know such detailed approximately my problem. You are wonderful! Thanks!
excellent points altogether, you simply won a emblem new reader. What would you suggest in regards to your put up that you just made some days in the past? Any positive?
I’m impressed, I must say. Seldom do I encounter a blog that’s both equally educative and interesting, and without a doubt, you have hit the nail on the head. The problem is something that not enough folks are speaking intelligently about. I am very happy I stumbled across this in my hunt for something regarding this.
Thanks for the recommendations shared on your own blog. Another thing I would like to say is that losing weight is not information about going on a dietary fads and trying to shed as much weight as possible in a couple of weeks. The most effective way to burn fat is by consuming it little by little and obeying some basic ideas which can help you to make the most from a attempt to shed weight. You may understand and already be following a few of these tips, nonetheless reinforcing understanding never hurts.
It is in point of fact a nice and helpful piece of info. I?m glad that you just shared this helpful information with us. Please stay us up to date like this. Thank you for sharing.
Heya i am for the primary time here. I found this board and I in finding It truly helpful & it helped me out a lot. I hope to offer something again and aid others like you helped me.
I used to be suggested this blog by way of my cousin. I am no longer sure whether or not this submit is written by means of him as no one else recognize such distinctive approximately my difficulty. You are amazing! Thanks!
Heya i am for the first time here. I came across this board and I find It really useful & it helped me out much. I hope to give something back and help others like you helped me.
Sweet blog! I found it while searching on Yahoo News. Do you have any tips on how to get listed in Yahoo News? I’ve been trying for a while but I never seem to get there! Cheers
The information shared is of top quality which has to get appreciated at all levels. Well done…
Can I simply say what a comfort to uncover somebody who truly knows what they’re discussing on the web. You certainly realize how to bring a problem to light and make it important. More and more people ought to look at this and understand this side of the story. I was surprised that you aren’t more popular since you certainly possess the gift.
En iyi medyum olarak bir danışman için medyum haluk hocayı seçin en iyi medyum hocalardan bir tanesidir.
Thanks for your concepts. One thing I have noticed is that often banks in addition to financial institutions understand the spending behaviors of consumers and as well understand that many people max out and about their real credit cards around the getaways. They smartly take advantage of this real fact and start flooding ones inbox plus snail-mail box together with hundreds of 0 APR credit card offers just after the holiday season closes. Knowing that if you’re like 98 of American public, you’ll rush at the possible opportunity to consolidate card debt and move balances to 0 interest rate credit cards.
Hi! Do you know if they make any plugins to safeguard against hackers? I’m kinda paranoid about losing everything I’ve worked hard on. Any suggestions?
Hi, I do believe this is an excellent blog. I stumbledupon it 😉 I am going to return yet again since i have book-marked it. Money and freedom is the greatest way to change, may you be rich and continue to guide others.
I’m impressed, I have to admit. Seldom do I come across a blog that’s both equally educative and engaging, and let me tell you, you have hit the nail on the head. The issue is something which too few men and women are speaking intelligently about. I’m very happy I found this in my hunt for something relating to this.
I?m impressed, I need to say. Really rarely do I encounter a blog that?s each educative and entertaining, and let me inform you, you may have hit the nail on the head. Your thought is excellent; the difficulty is something that not enough people are talking intelligently about. I’m very glad that I stumbled across this in my seek for something relating to this.
This blog was… how do I say it? Relevant!! Finally I have found something which helped me. Thanks.
This is a topic that is near to my heart… Many thanks! Where are your contact details though?
Great blog you’ve got here.. It’s difficult to find good quality writing like yours nowadays. I honestly appreciate people like you! Take care!!
I love how you explained [topic] in such a clear and understandable way
I appreciate the research you put into this. It makes your points even more compelling
I appreciate the research you put into this. It makes your points even more compelling