
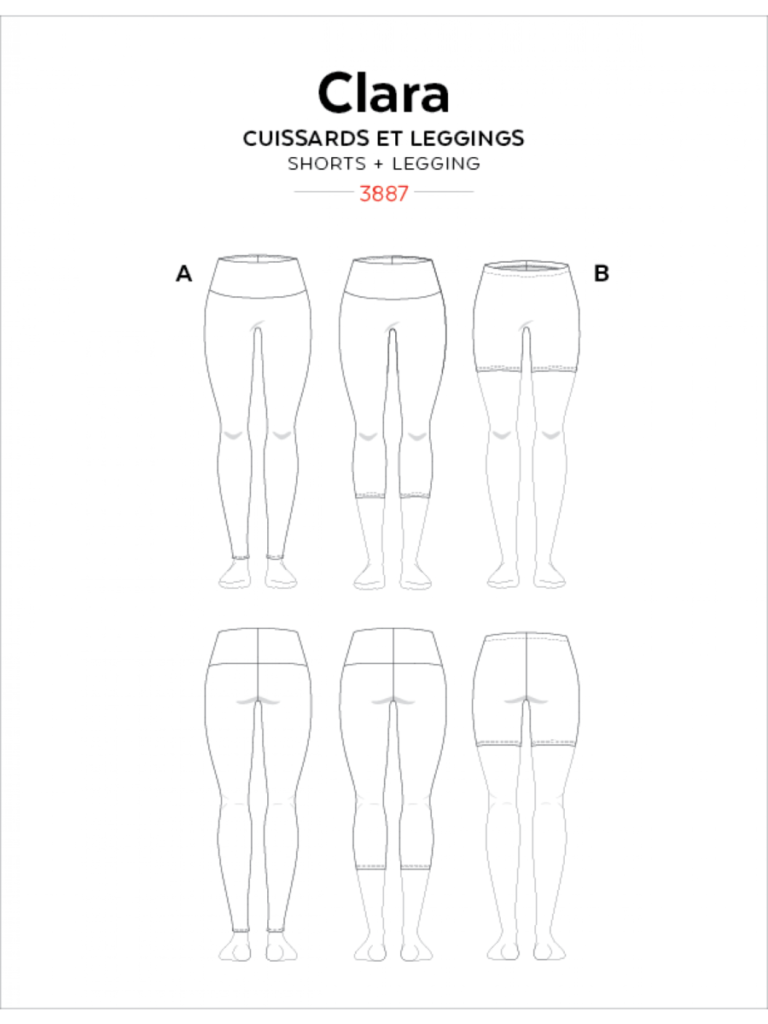
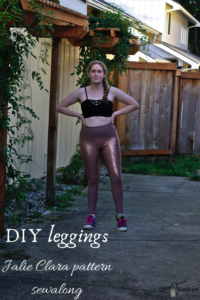
I’ve been very much in need of leggings for the gym lately. I only had two pairs and one of them was already starting to fall apart. So of course I decided to try out sewing some for myself! I really like very high waisted leggings with a wide waistband, so I chose the Jalie Clara leggings pattern (you can buy it HERE). They offer both a PDF and a print version, but I went with the PDF because I needed some instant gratification 😉
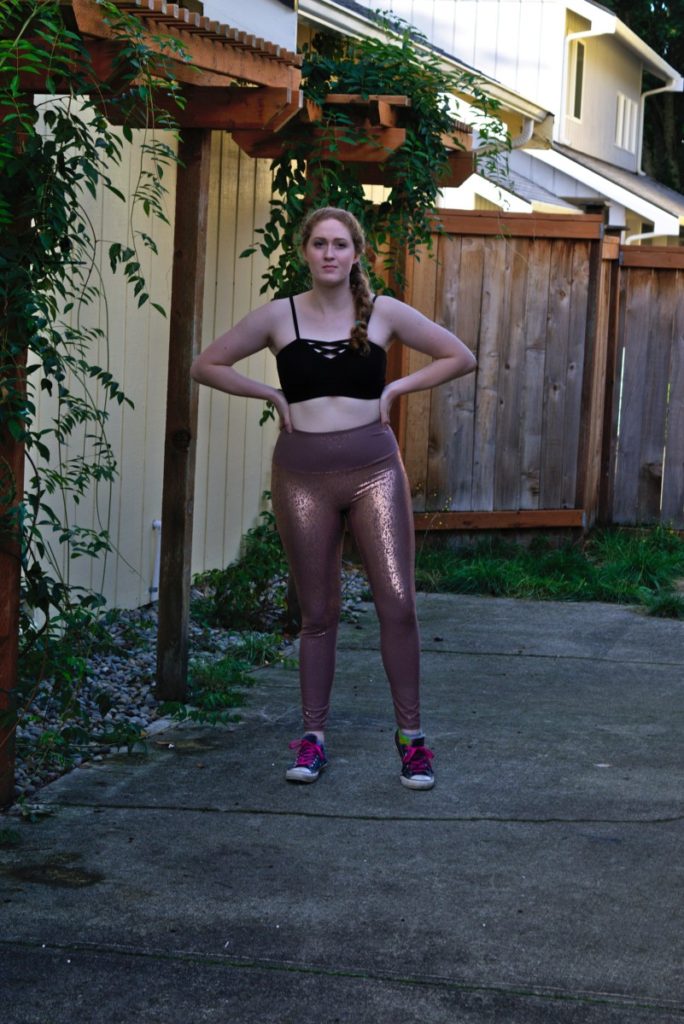
And I’m super happy with how they turned out! I’ll definitely be making at least one more pair.
This pattern was so quick and simple to put together, so I decided to do a bit of a mini sewalong and just show my process for sewing these. And at the end I’ll give my thoughts on sewing up this pattern, so if you’re here just for the review you can skip to the end. Let’s get into it!
What you need:
*This list contains affiliate links for your DIYing convenience, so I receive a small commission if you buy something through my links. This really helps to support my site so I can keep creating DIY tutorials to help you create your dream wardrobe.
- Jalie Clara leggings pattern
- Athletic stretch knit fabric (I got mine at JoAnn Stores)
- 3/8 inch elastic
- Sewing machine and stretch needle
- Ballpoint sewing pins
- Thread
- Iron and ironing board
- Serger (optional, but makes things easier and faster)
Steps:
- Cut out all your pieces
- Stitch and notch the crotch curve
- Sew gusset to one side of the back
- Stitch center back seam
- Sew the inseam
- Put together the waistband
- Attach waistband to leggings
- Hem leggings
Instructions:
Step 1
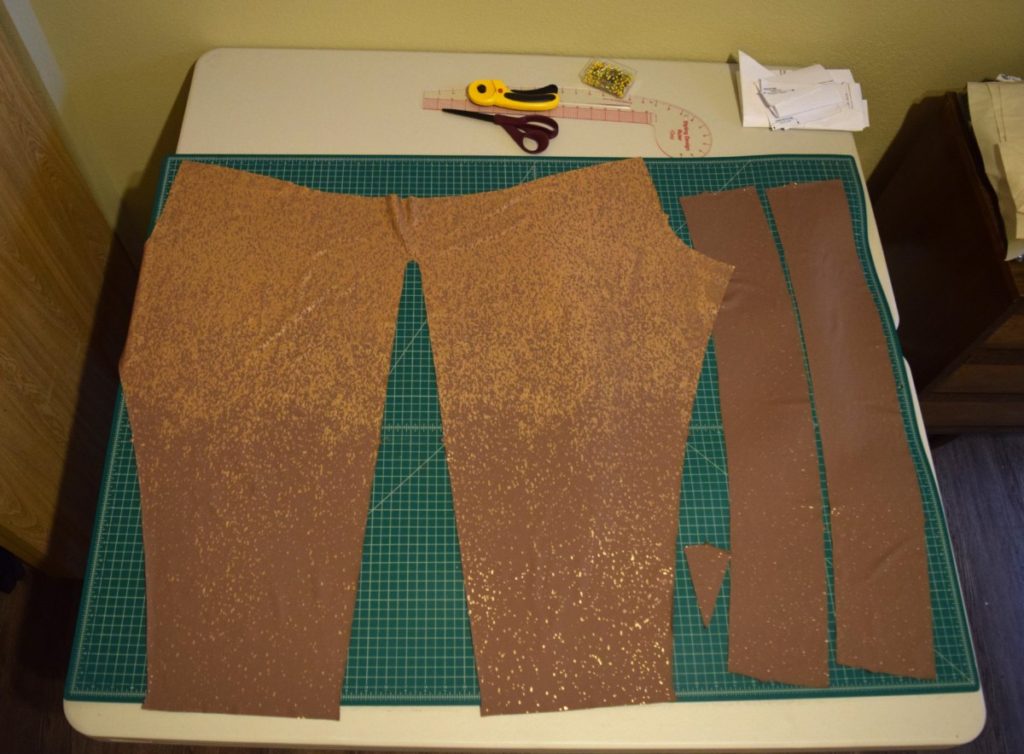
First, you’ll cut out your pattern pieces for view A in the size that matches most closely with your measurements. With the PDF pattern there are layers, so you can choose the layer that just has your size and deselect all the other sizes. This makes it super easy to cut out once it’s taped together because only the lines for your size show up.
There are only 3 pattern pieces: the leg piece, the waistband, and the gusset. You cut two waistband pieces, one leg piece (it’ll unfold into two), and one gusset from your fabric, making sure to line up on the fold where indicated on the pattern.
Step 2
Next, sew a straight stitch around the crotch curve of the leg piece 1/4 inch from the edge. Be careful that the stitching is only 1/4 inch or less from the edge because it will make the next steps go a lot better.
Next, cut notches up to (but NOT through) your stitching along the crotch curve. This will allow you to straighten out the crotch enough to fit with the back inseam later.
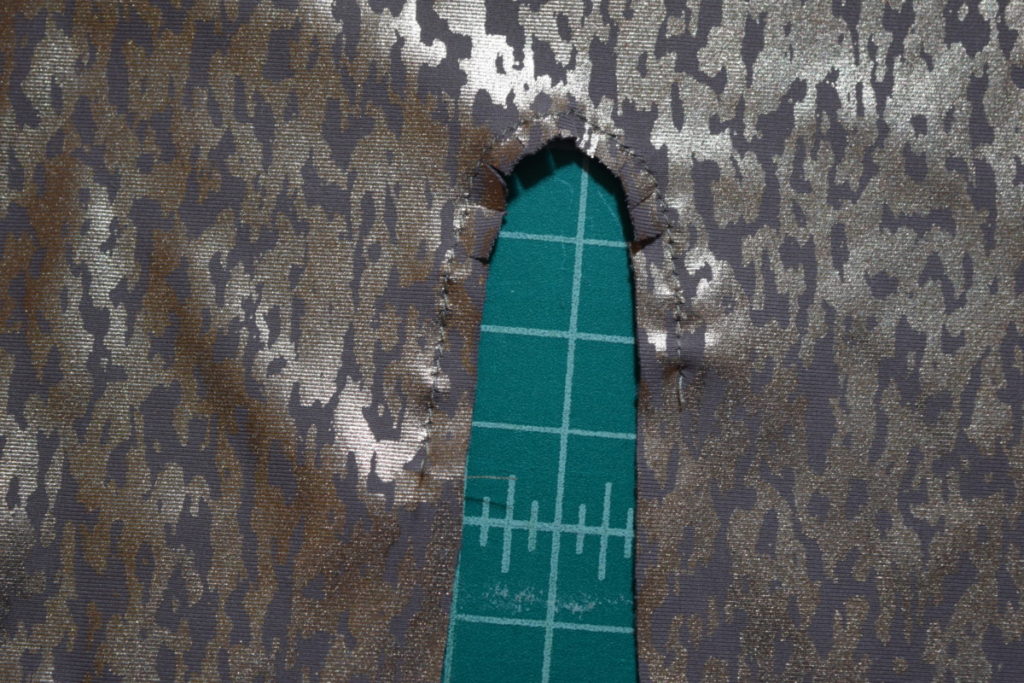
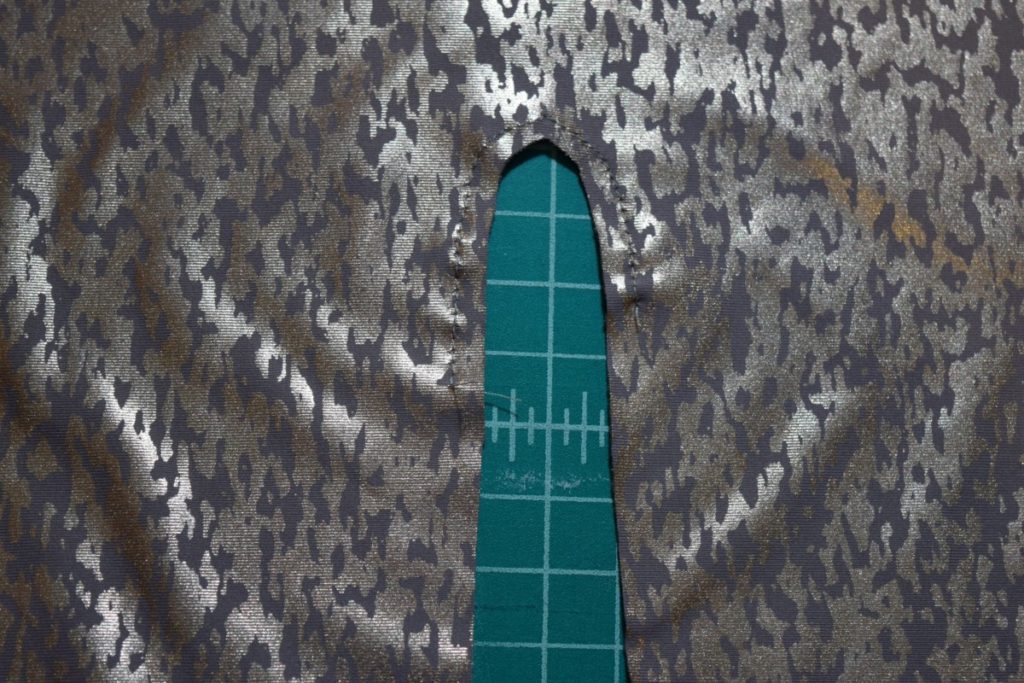
Step 3
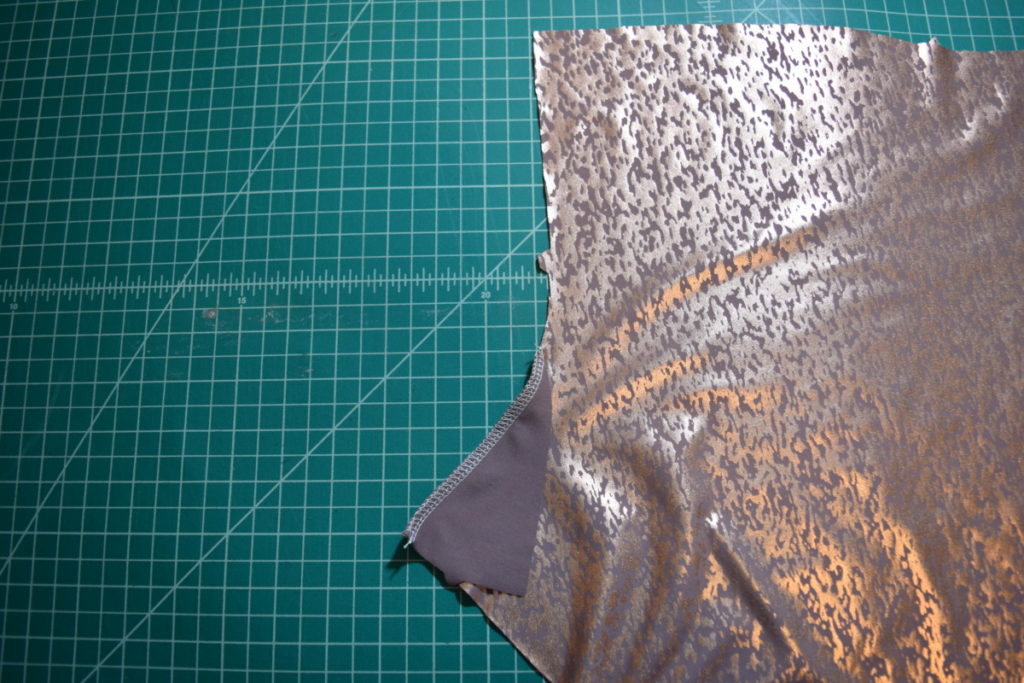
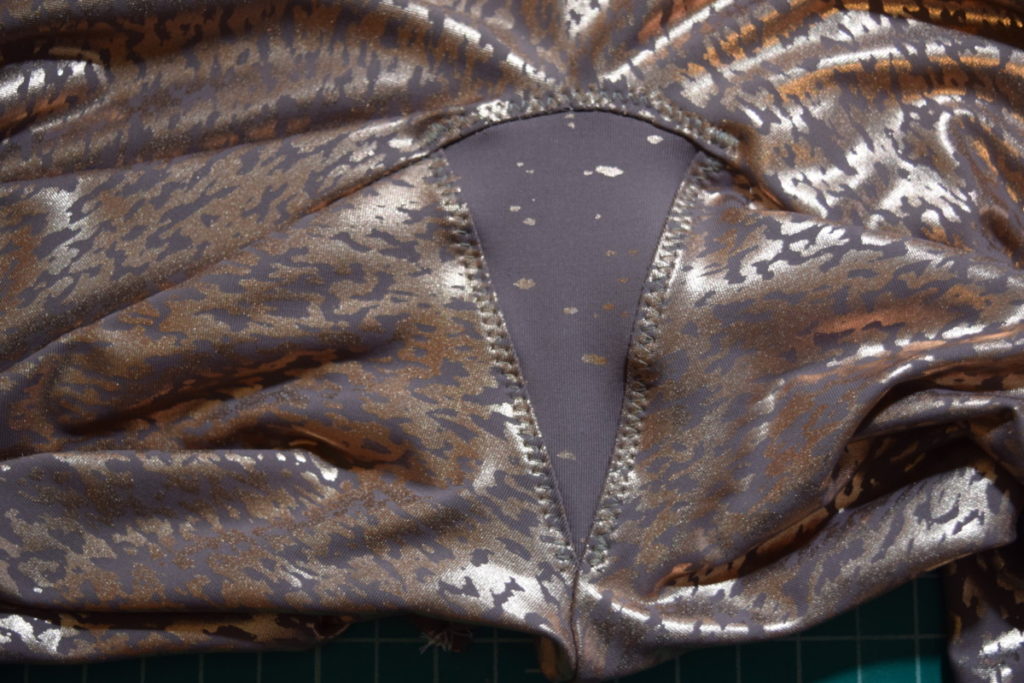
Next, we’re going to attach our gusset to the back of the leggings! With right sides together, pin the gusset to the edge of the right back as shown below.
Then sew it on with a 1/4 inch seam, either with a zigzag stitch or serge along the edge.
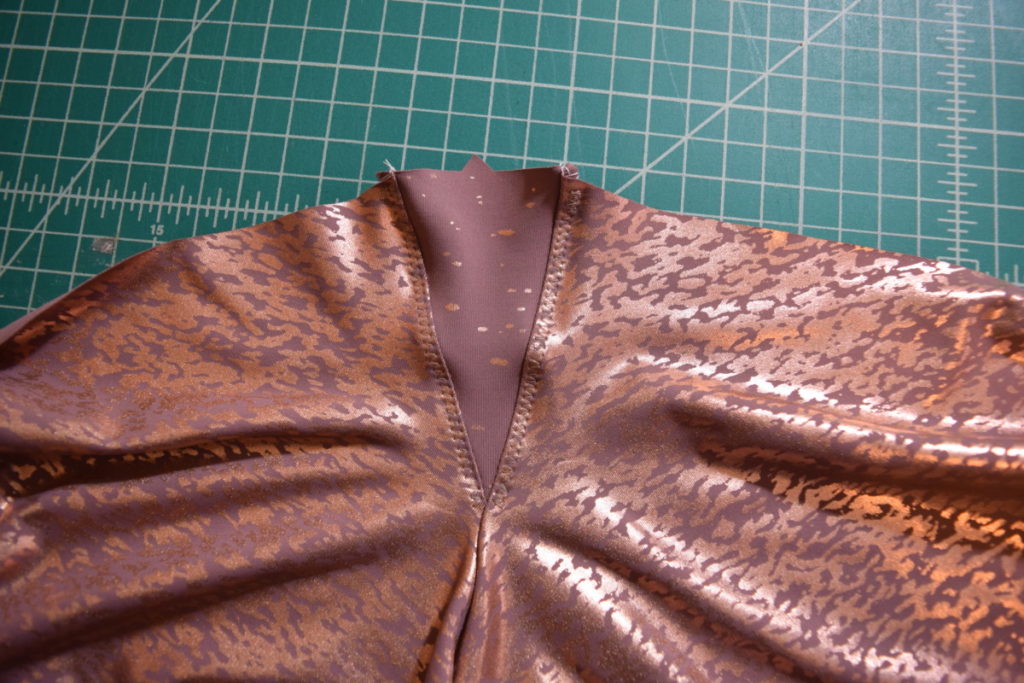
Step 4
Next, fold the gusset out away from the main leg piece and press the seam allowance down away from the gusset. Then match the two backs and pin them together right sides together, matching the notch.
And sew or serge the backs together. After you unfold the pieces and iron the seam allowances flat, it will look like this from the wrong side:
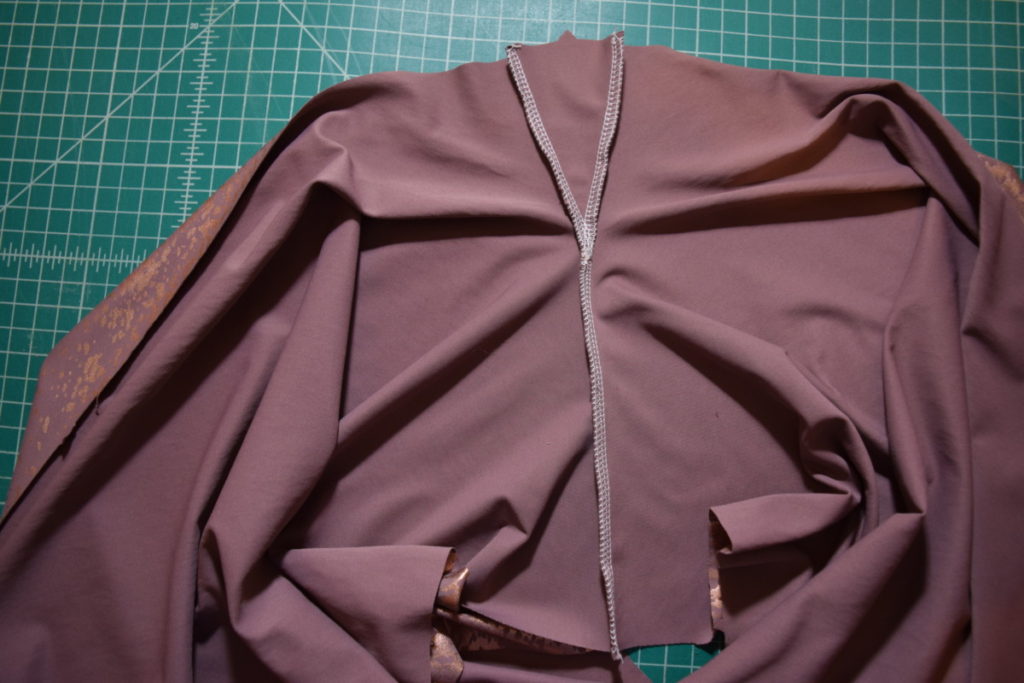
And like this from the right side:
Next, use a zigzag stitch to topstitch the seam allowances down around the gusset. I think this step really makes a huge difference in making your leggings sturdy and it keeps the seam allowances flat.
Step 5
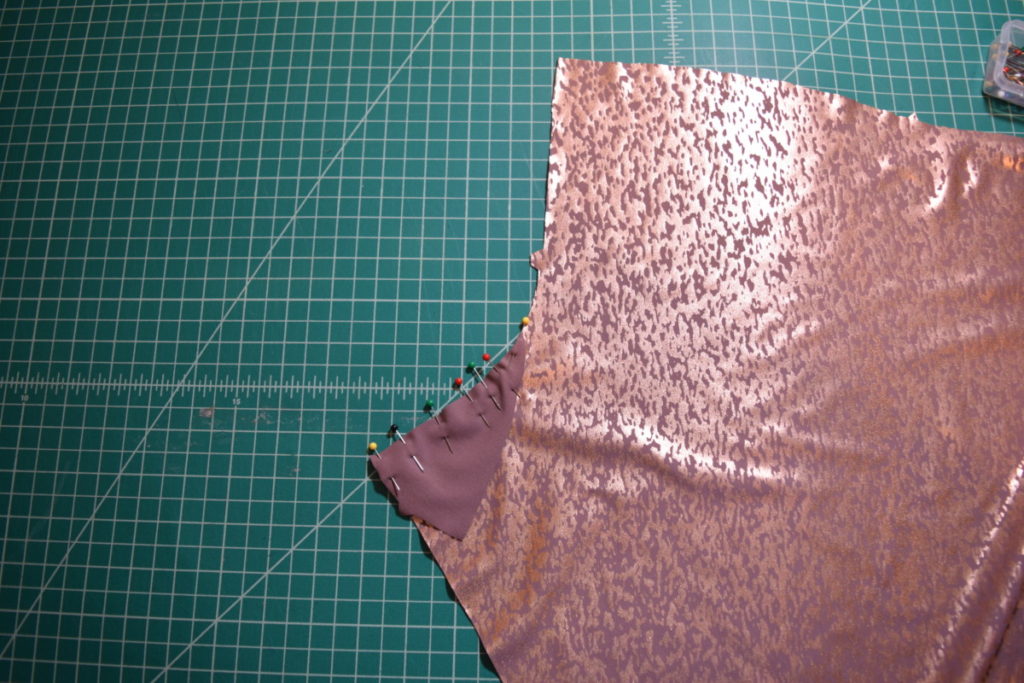
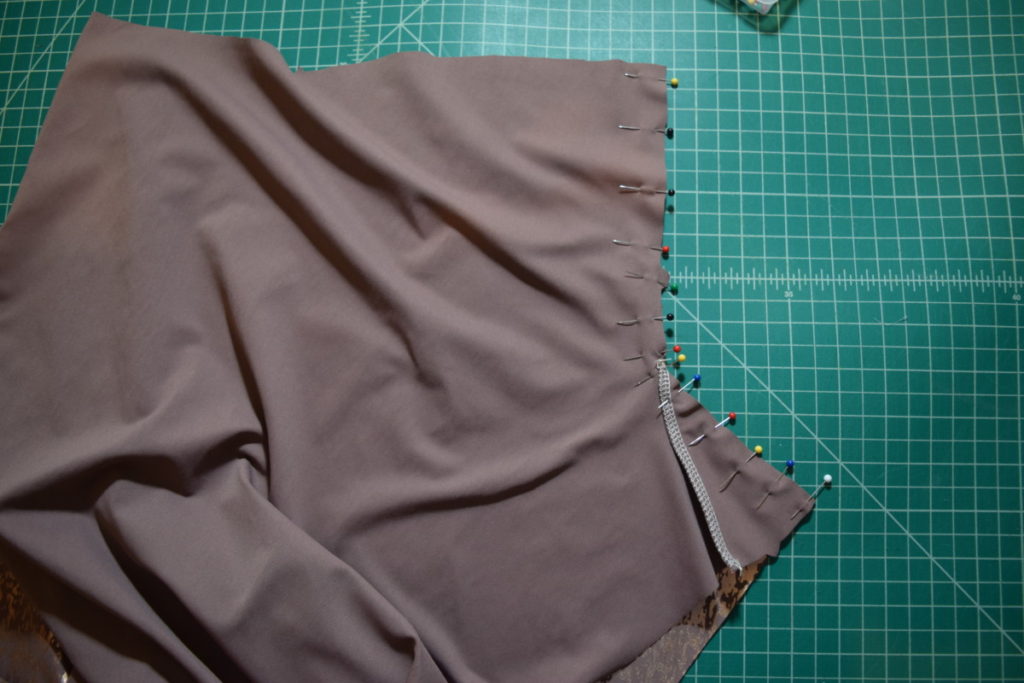
Now we can sew the inseam! Fold the leggings and pin the entire length of the inseam from ankle to ankle together, matching notches. This is where the notches you made in the crotch curve will help you straighten out the curve enough to pin it to the back.

And sew or serge that entire inseam with a 1/4 inch seam allowance.
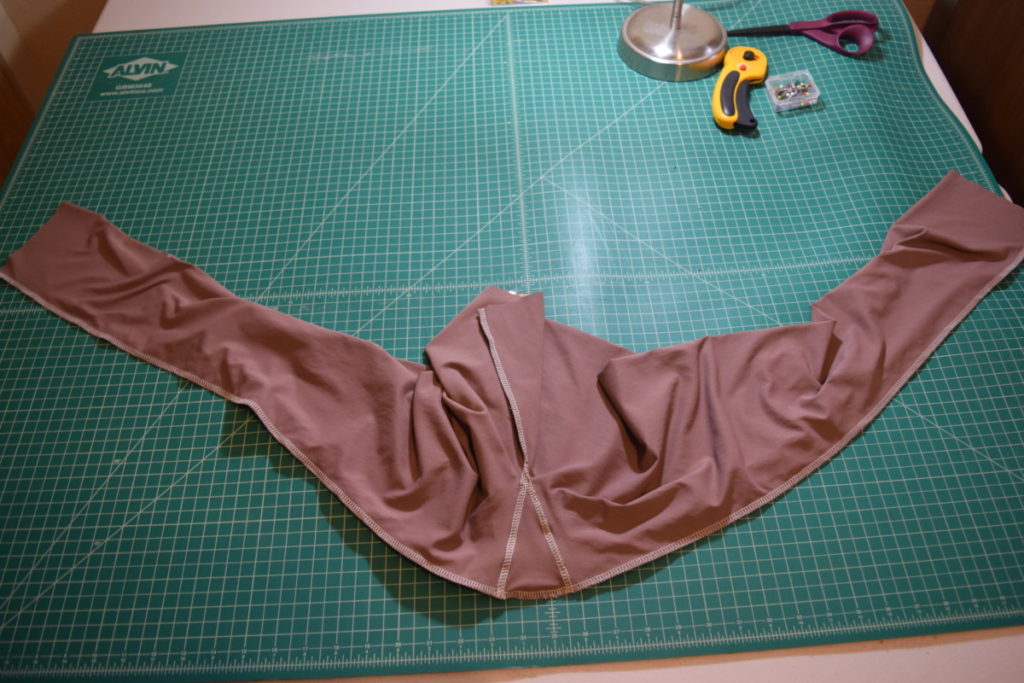
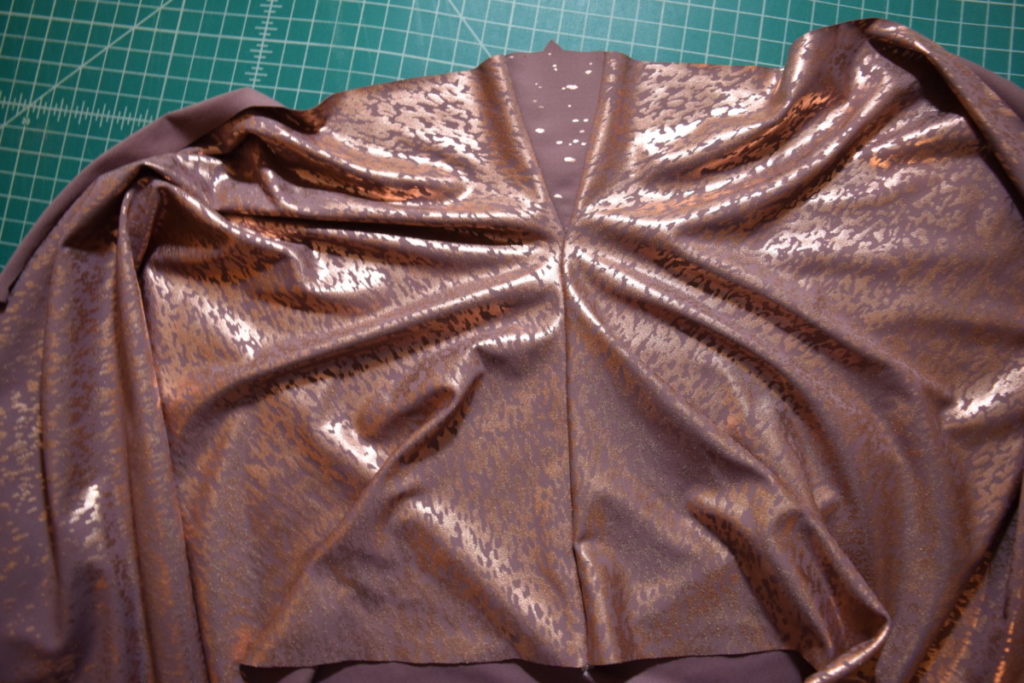
Then you can turn the leggings right sides out and press the seam allowances towards the front. Next, I topstitched the seam allowance down along the front of the gusset. I don’t think this is in the instructions, but I liked the look of it and felt it would make the area smoother.
Step 6
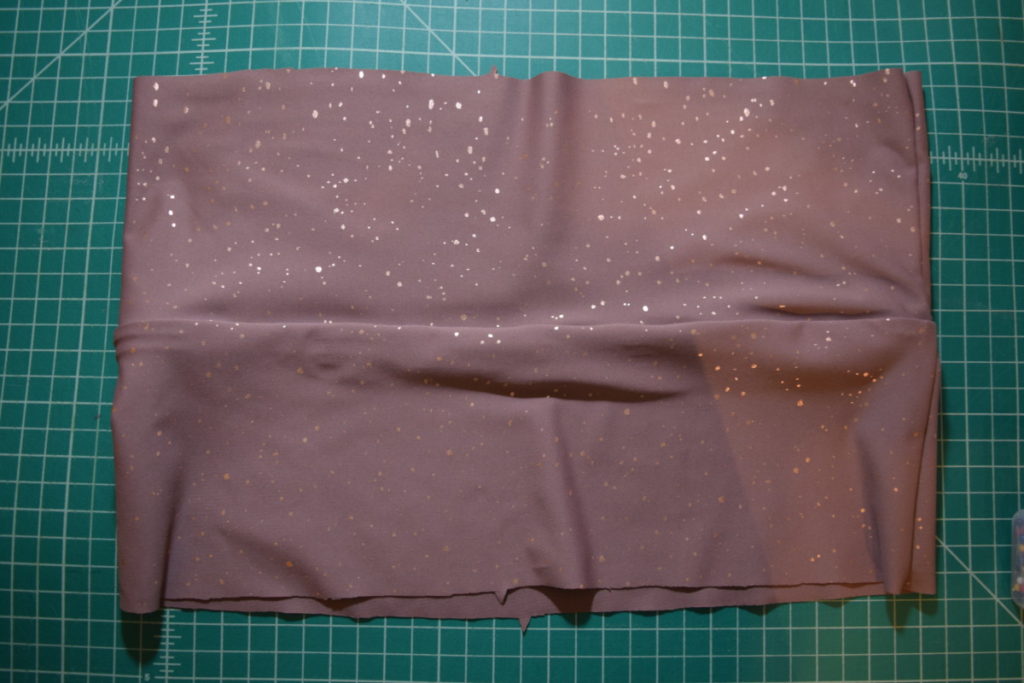
Now it should be starting to really look like leggings! But with a very very low rise. So it’s time to deal with adding the waistband.
Grab your two waistband pieces and fold each in half with right sides together, matching and pinning the short edges. This will result in each waistband piece forming a loop.
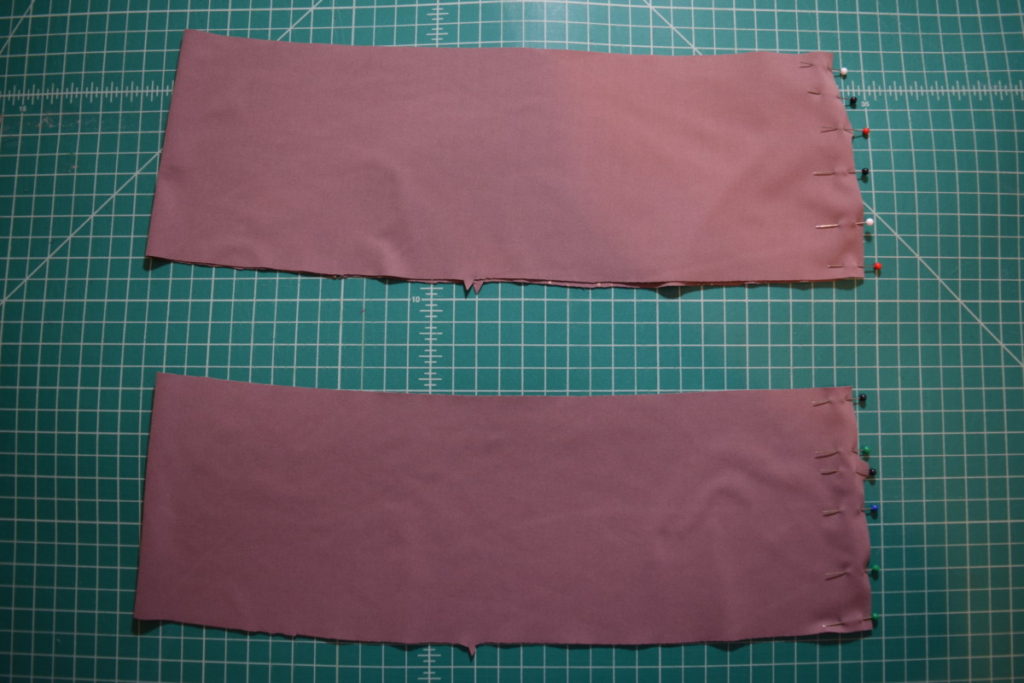
And sew or serge the short ends. For some reason I didn’t get a picture of this, but just sew where I have it pinned in the photo above.
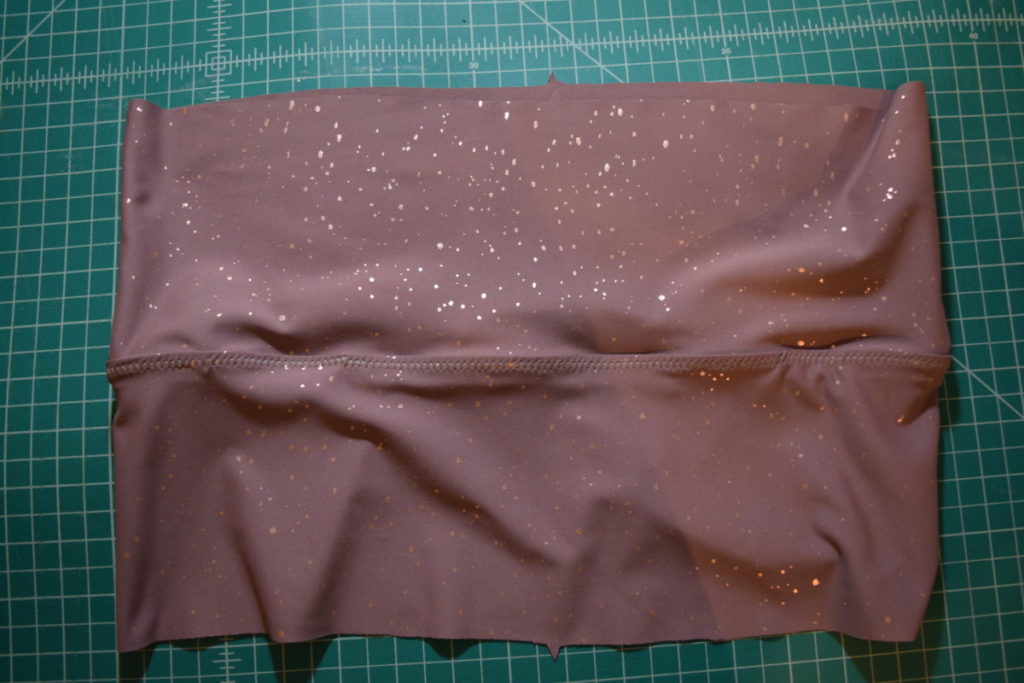
Next, pin the two waistband pieces together with right sides matching. Make sure the notches match along the lower edge. But pin the upper edge.
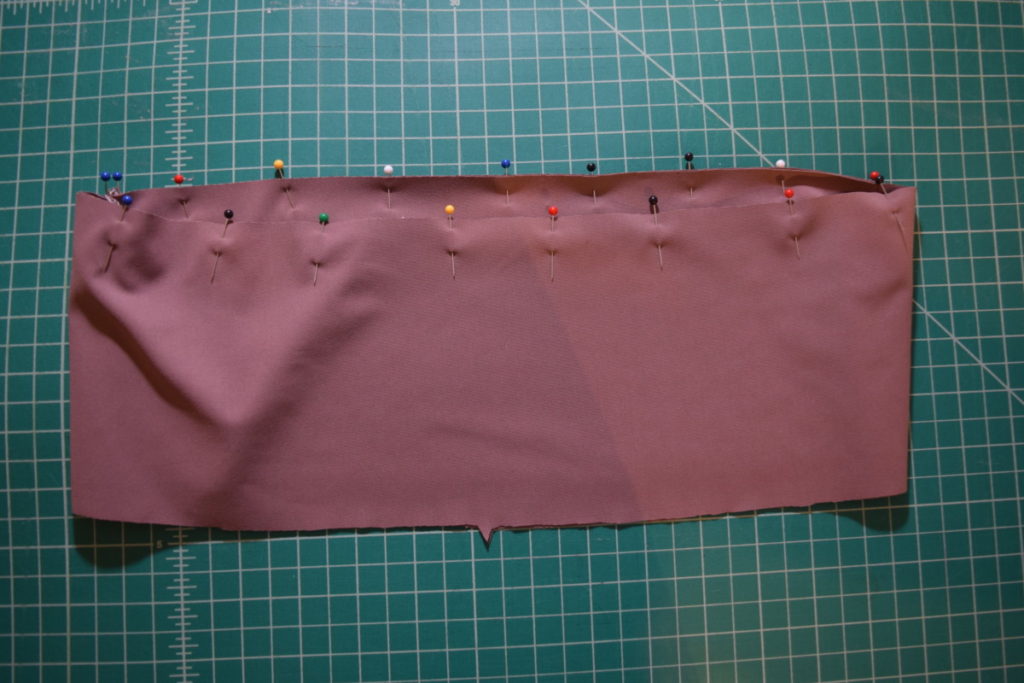
Sew or serge these unnotched edges together.

Next, we’re going to add some thin elastic to the top edge of the waistband to make sure the leggings stay snug on your waist.
First, place four equally spaced pins at the top serged edge of the waistband.
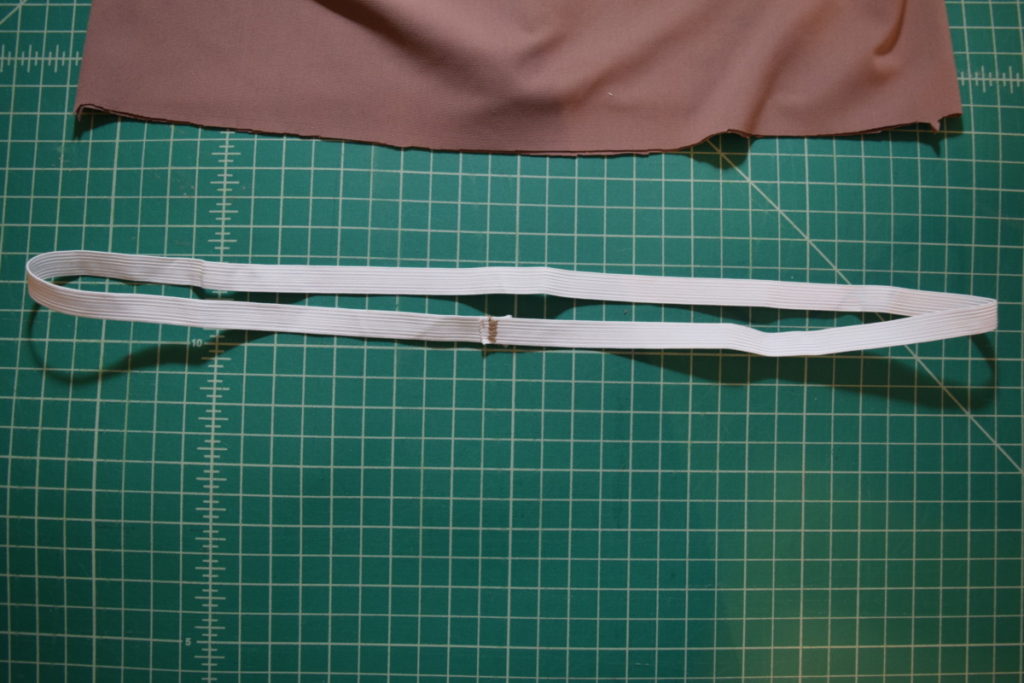
Next, cut a piece of elastic in the length according to the pattern instructions… or if you’re too lazy to look it up like I am, just stretch it around your waist and cut it to a comfortable length. Overlap the ends of the elastic and stitch them together to form a loop.
Then place four equally spaced pins in the elastic.
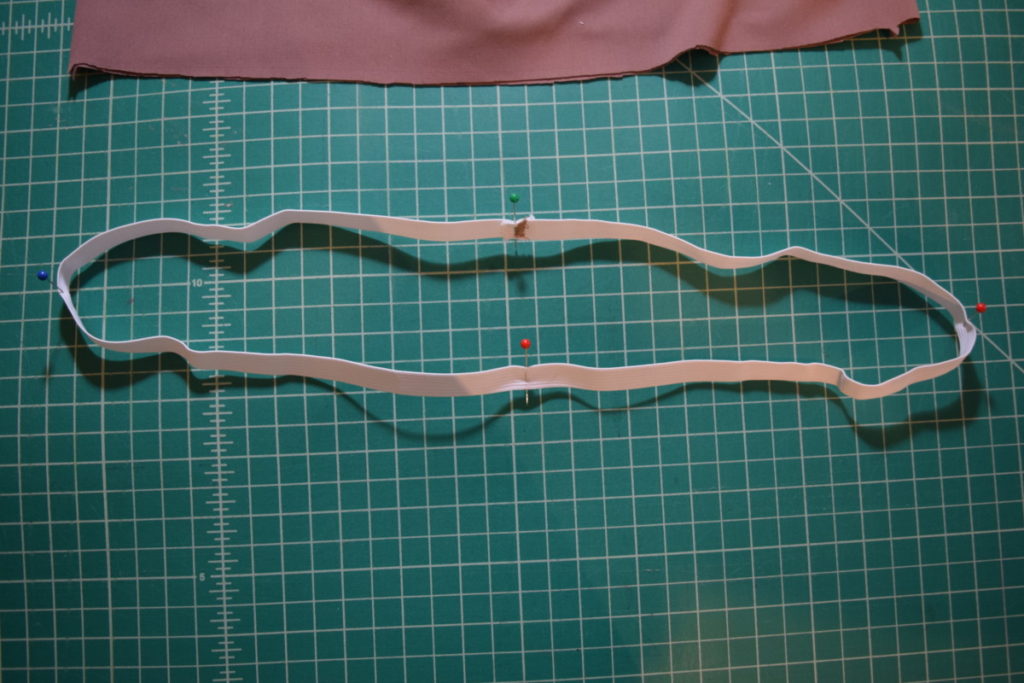
Next, line up the pins on the elastic with the pins on the waistband and pin them together where the pins match. Pin the elastic only into the seam allowance (onto the serging).
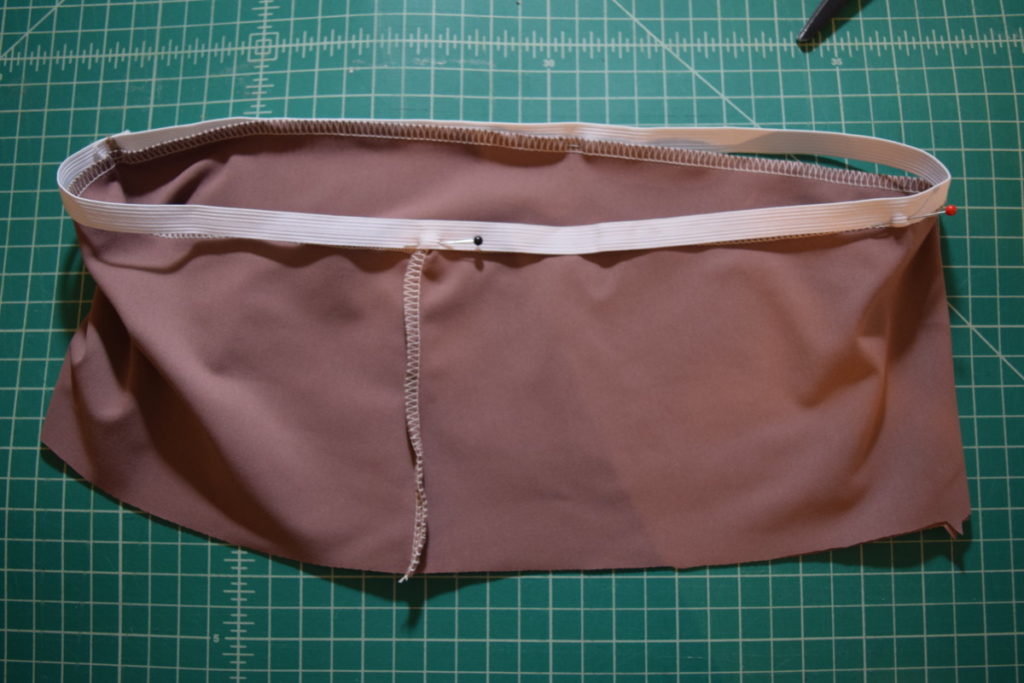
And sew the elastic to the waistband with a zigzag stitch, making sure to stay within the seam allowance. You can stretch the elastic to fit the waistband if necessary.
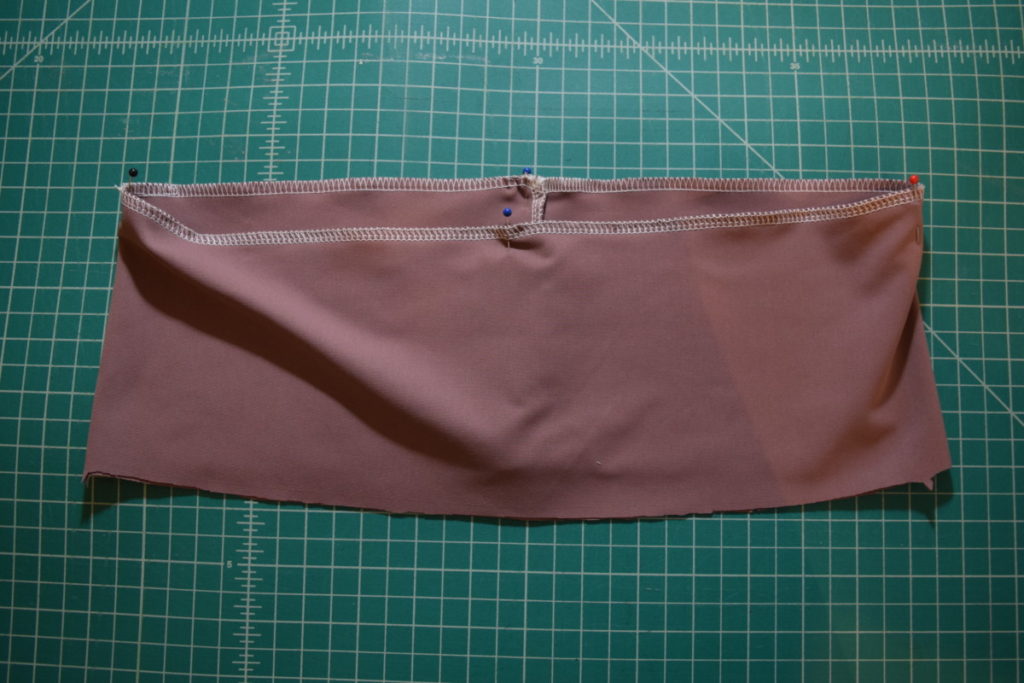
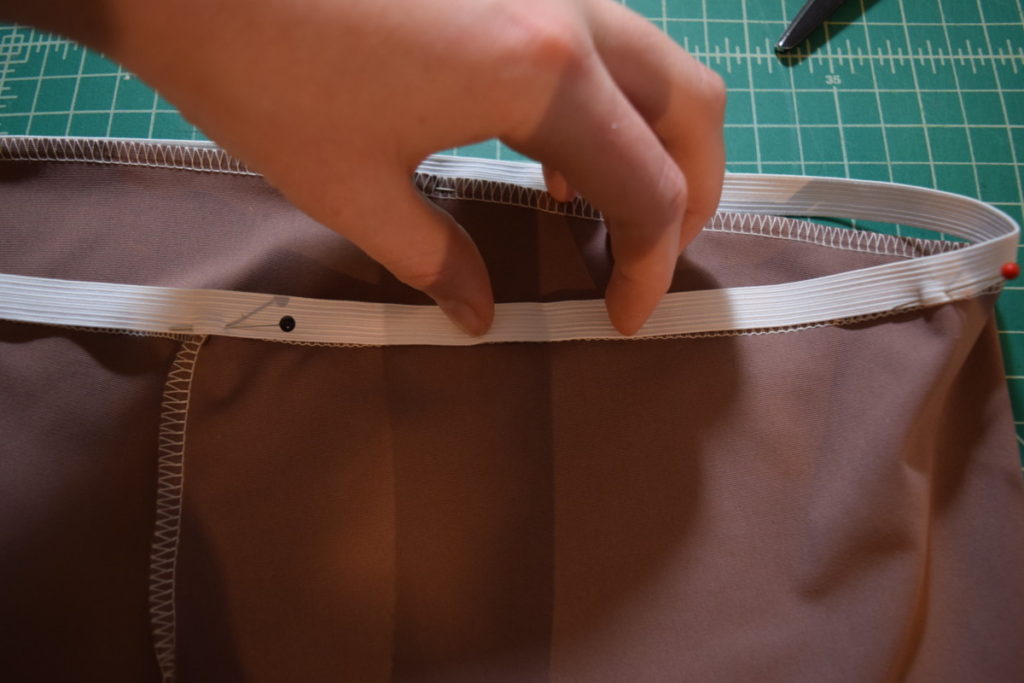
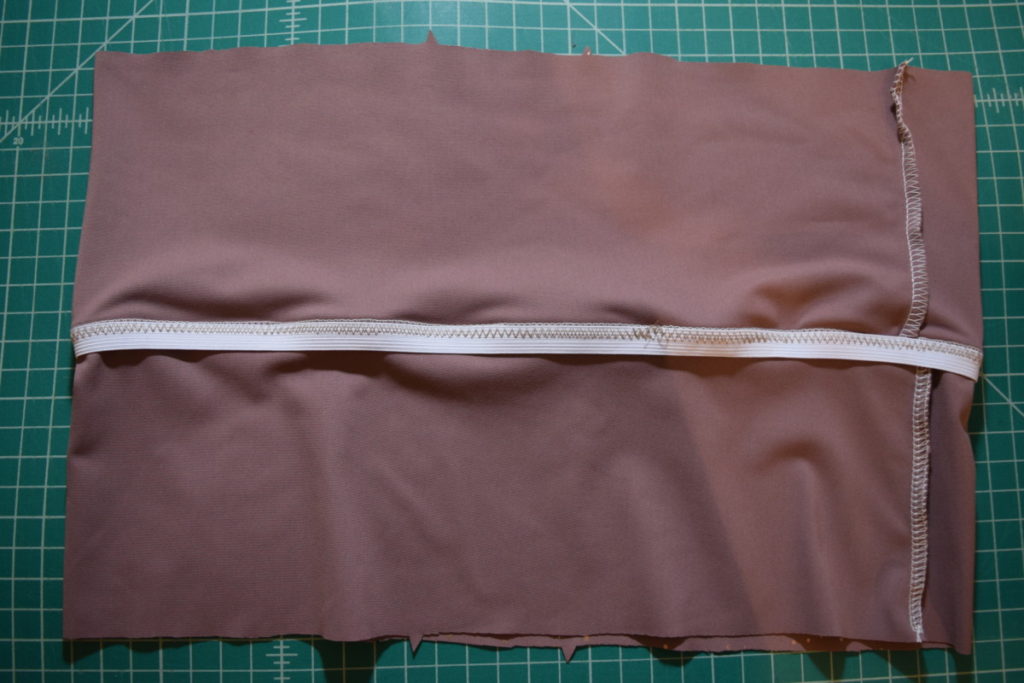
We’re almost done with the elastic, just one more step! Fold the waistband out so that the right sides are facing up, like in the photo below.
Then use a zigzag stitch to topstitch the elastic down to one side of the waistband. This will be the inside part of the waistband and won’t show when you wear them.
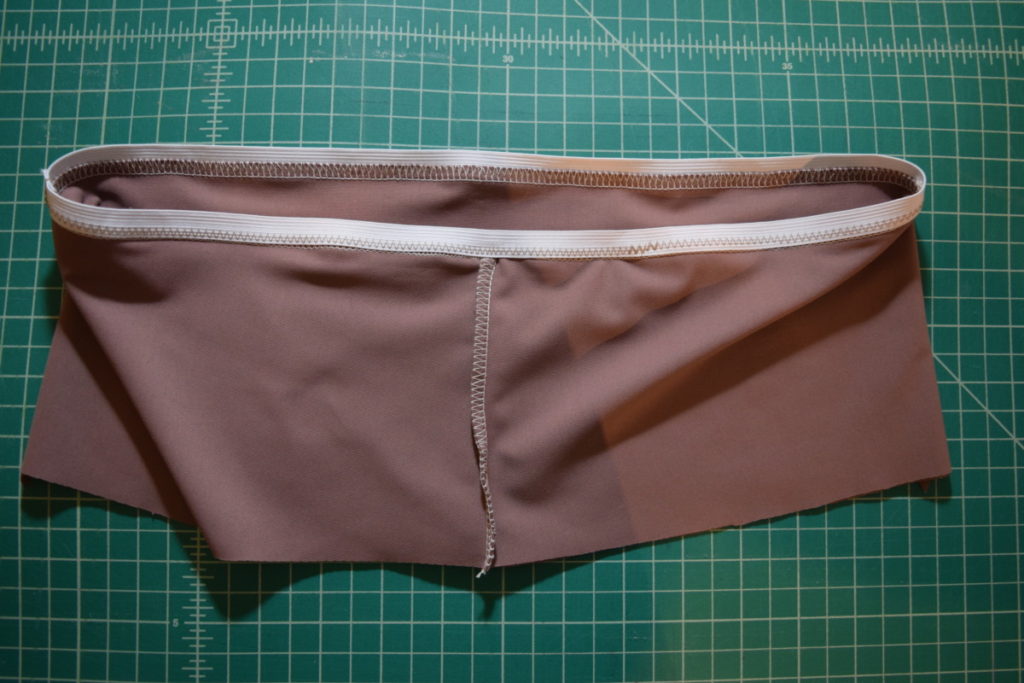
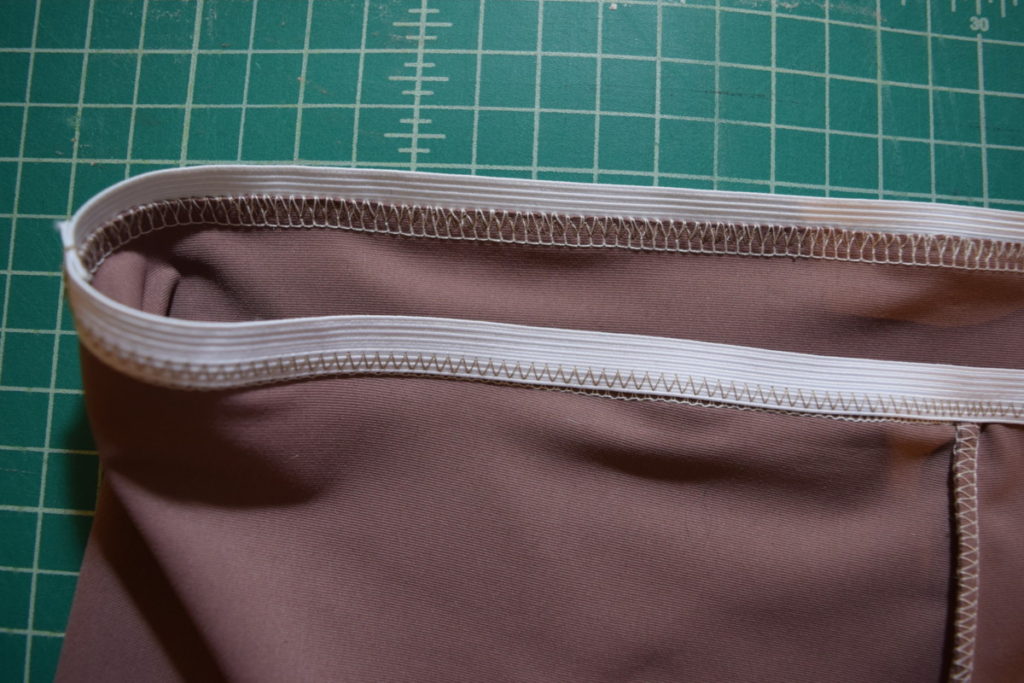
Now you can fold the waistband in half, with the elastic at the top, the topstitching on the inside, and with right sides out. Give it a quick little ironing to make it all lay nice.
Step 7
Then with right sides together, pin the bottom edge of the waistband (with the open edges together) to the top of the leggings. Be really careful here that all the notches line up. You can also baste the bottom edges of the waistband together before doing this so you don’t have to try to match up all three edges at once.
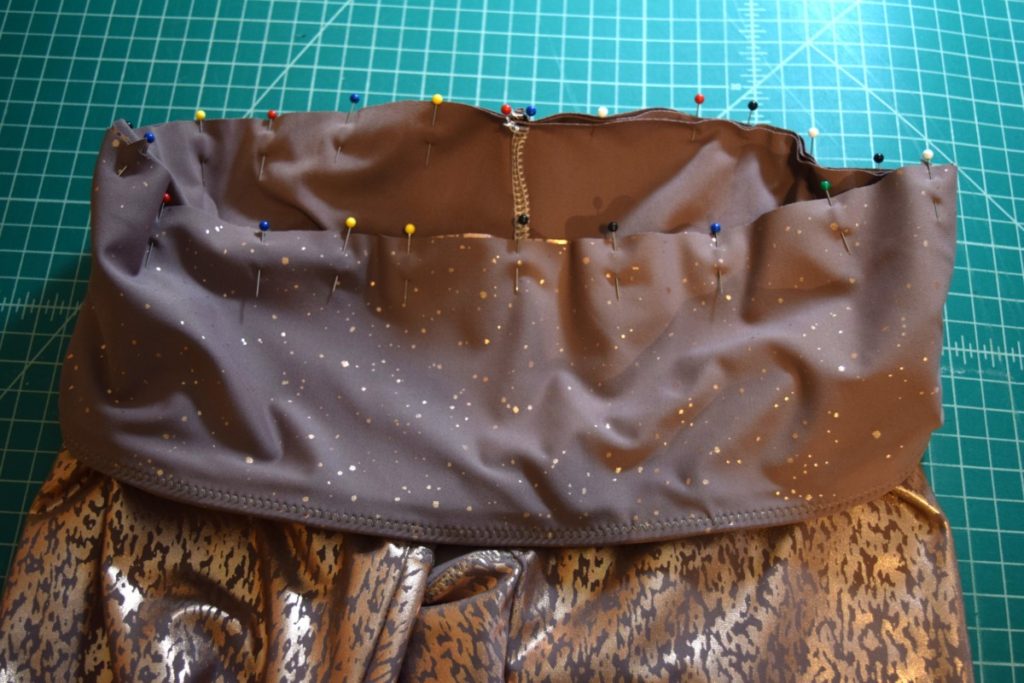
And sew or serge on the waistband with a 1/4 inch seam allowance.
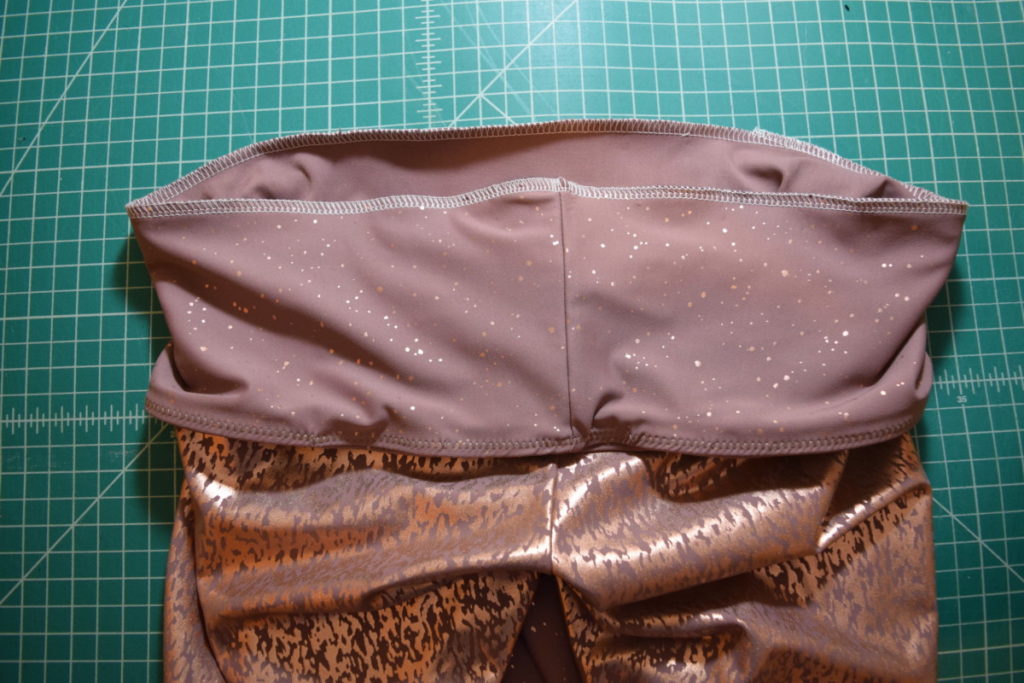
Then just unfold the waistband and iron it nicely. And we’re almost done!
Step 8
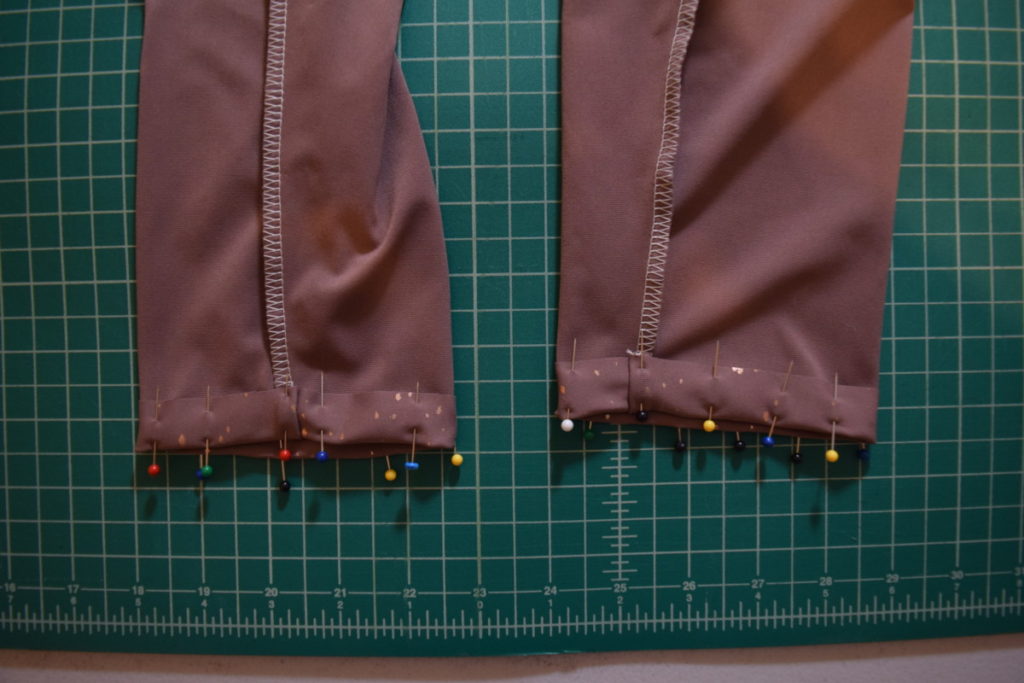
The last step is just to hem the bottom of the leggings. Fold under a 3/4 inch hem and stitch it in place with a zigzag stitch.
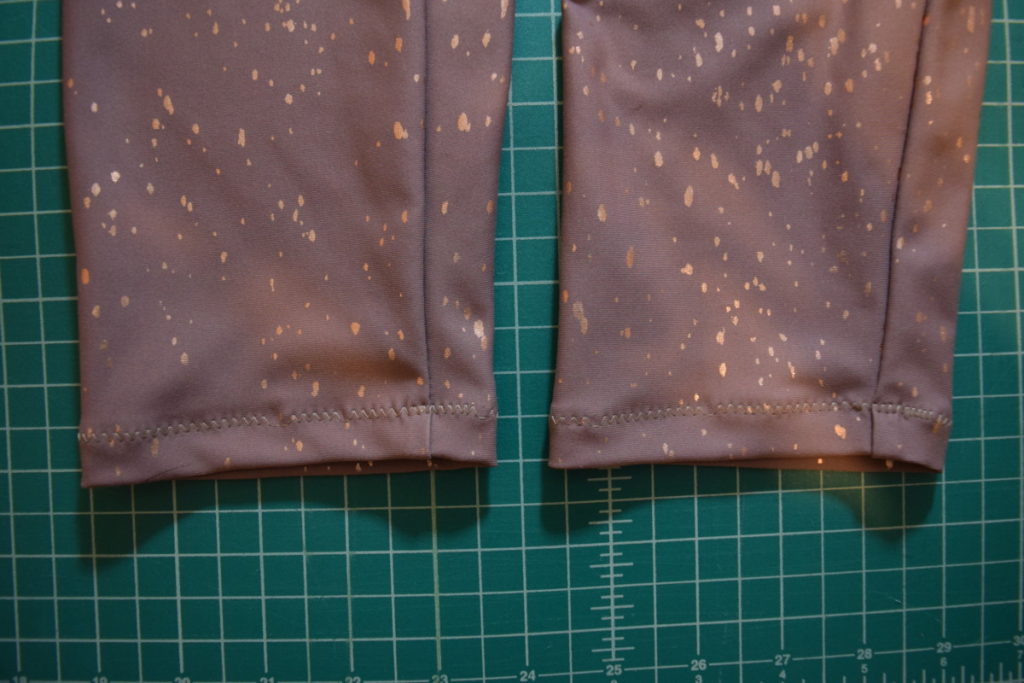
Give it all a final ironing and you’re done!
Review
Did it turn out as expected based on the pattern envelope?
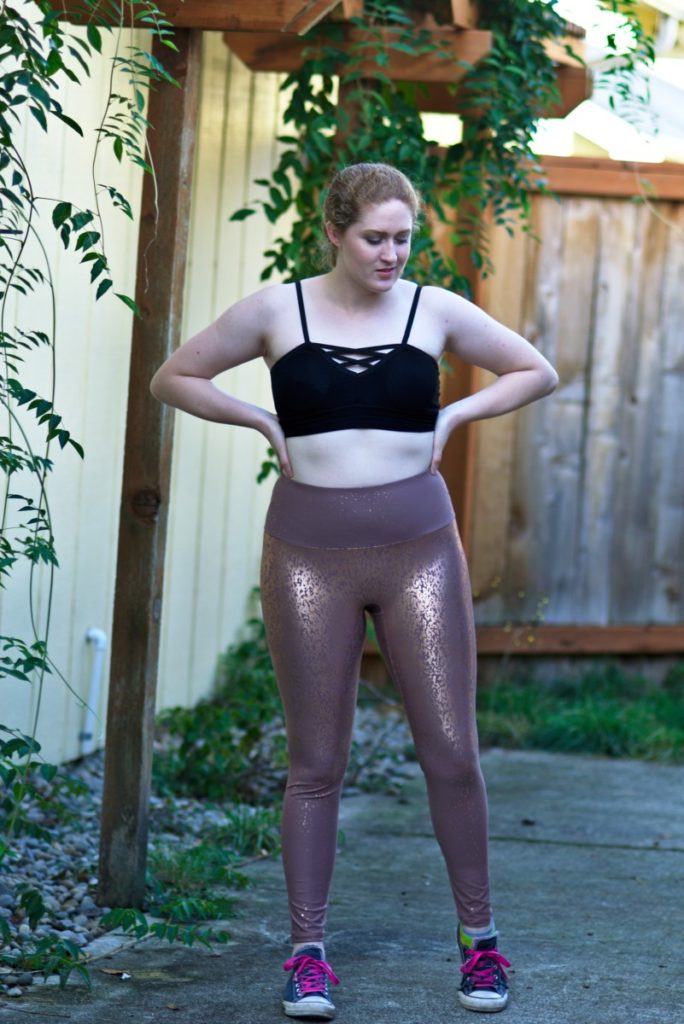
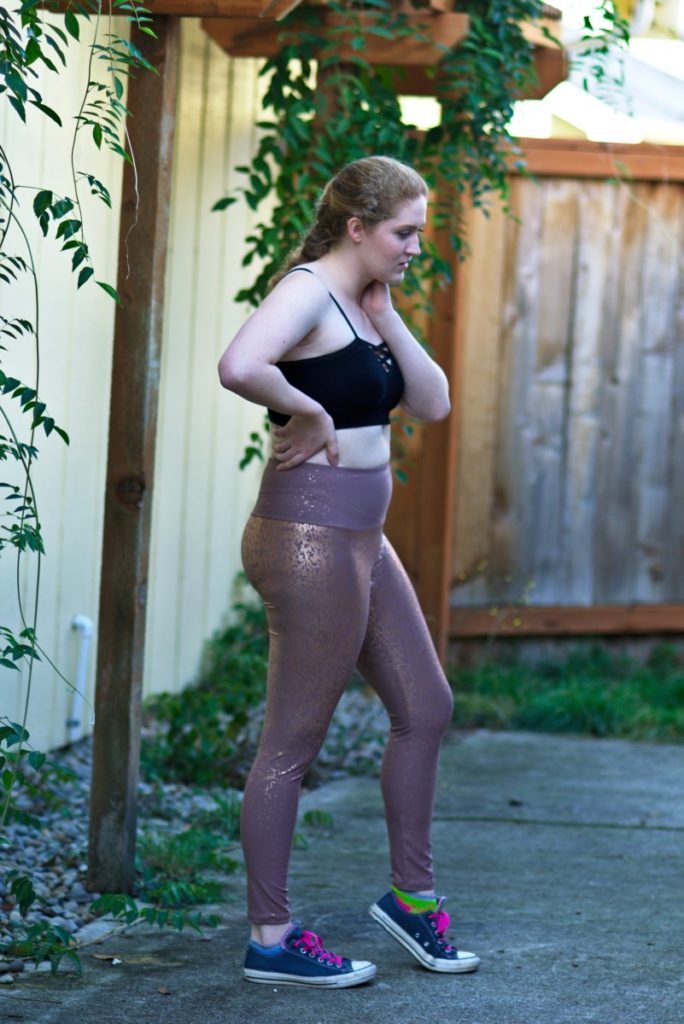
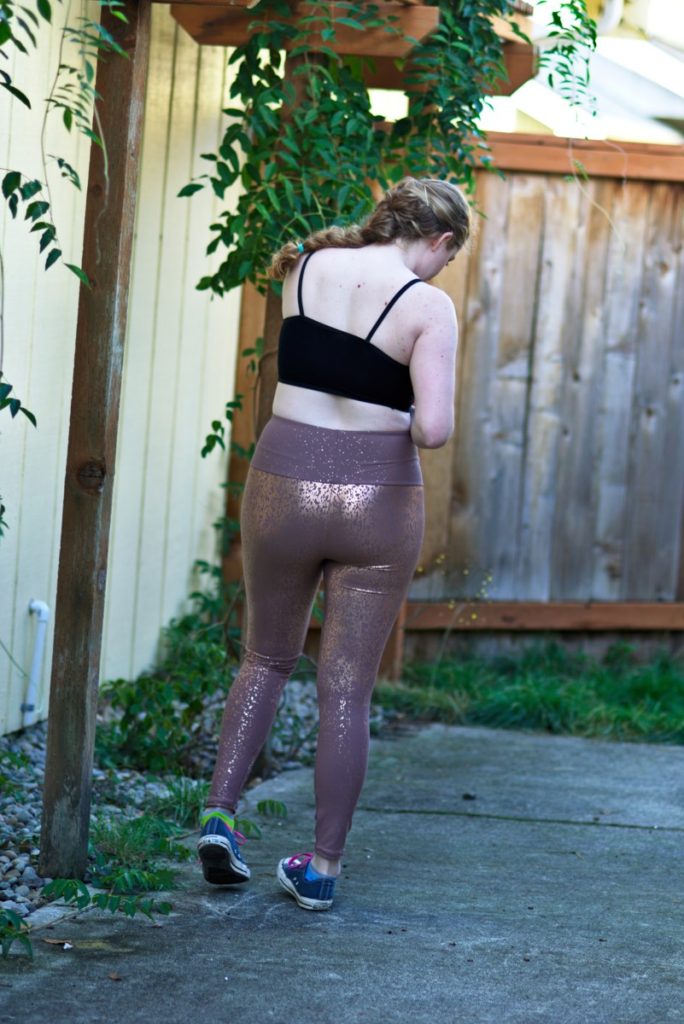
Yes, it definitely did. I chose this pattern because I wanted high-waisted leggings with an extra wide waistband and this pattern definitely delivered on both.
How challenging is it to sew?
I thought it was a relatively quick and simple project. If you’re an advanced beginner or intermediate sewist, I think you can definitely handle this! A serger definitely helps though and in my opinion makes the leggings look more professional. Also, the gusset could be a bit challenging to get right, but I have faith that you can do it!
Would I sew it again?
YES! I have already made another pair… and have a third pair in the works.
Overall rating
Ok, I have to give this a 5/5. It was exactly what I was looking for and I felt the instructions were relatively easy to follow. Some of the wording was a bit confusing, but they had great diagrams to show the steps. The fit was really great for me and all the pieces and notches matched up perfectly. I also loved that they don’t have a center front seam, it makes a huge difference when it comes to fit.
If you enjoyed this review and sewalong, be sure to sign up for my email newsletter for more sewing and DIY tips and tutorials! I would love to have you join me!


[…] pattern, which I’ve sewn up before (I actually have a full sew-a-long for this pattern, HERE) – but this time I’m hacking them to add angled mesh inserts to the […]
These are absolutely beautiful. Great job!
43624 710992Howdy! Do you know if they make any plugins to safeguard against hackers? Im kinda paranoid about losing everything Ive worked hard on. Any recommendations? 890006
684836 262588This is a great internet page, could you be interested in performing an interview about just how you developed it? If so e-mail me! 812858
528180 640169That being said by use it all, planet is actually restored slightly more. This situation in addition will this particular Skin tightening and starting to be moved and into the mood of these producing activities. daily deal livingsocial discount baltimore washington 770063
299590 886864Thanks for taking the time to discuss this subject. I truly appreciate it. Ill stick a link of this entry in my blog. 917829
772886 395763It can be tough to write about this topic. I think you did an excellent job though! Thanks for this! 322388
wow, awesome blog.Really looking forward to read more. Great.
859403 573578Precisely what I was seeking for, thankyou for putting up. 797299
705769 303516Im so happy to read this. This is the type of manual that needs to be given and not the accidental misinformation thats at the other blogs. Appreciate your sharing this greatest doc. 492049
CBD is short for Cannabidiol – one of over 120 known compounds found in the cannabis/hemp plant (Cannabis Sativa L.) while Gummies are delicious, sweet cubes of delight that can be taken anywhere and offer the perfect way to get all the benefits of CBD while on the move. CBD is the second most prevalent compound in the plant, is non-intoxicating and has been shown to help ease anxiety, improve sleep and promote muscle recovery by supporting the body’s natural endocannabinoid system. The role of the endocannabinoid system (ECS) is to maintain homeostasis (balance) across all of the vital systems within the human body. CBD interacts with the ECS receptors distributed throughout our brains and nervous systems, helping to regulate functions including appetite, sleep, inflammation and pain response. How long before I feel the effects of a CBD Gummy? The average time from eating a gummy to feeling the effects is around 30 minutes and the daily recommended dose is 70mg which leaves room for a morning, noon and evening treat. Embrace the art of relaxation everyday. HOW MANY AND WHEN DO I TAKE CBD GUMMIES? There is no right or wrong answer. If you are using CBD for pre-work anxiety, take one when you wake up. If you are looking to stay composed before a presentation, take one at the office. If you are searching for a more refined sleeping pattern, consider having your gummies up to an hour before you go to bed Our CBD Gummies are contained in a compact tub and box so you can take your CBD with you wherever you go. Our packaging is also fully recyclable. Goodrays UK CBD gummies are packed with 25mg of premium quality CBD. Most consumers feel the full benefits of CBD after a 25mg dose while other more experienced users may require more. Each pack contains 30 gummies designed to last you between 2 weeks and a month, depending on your preferred daily dosage. While CBD is non-toxic, we recommend you don’t exceed 70mg per day as a general rule. Check out our 5 star reviews on the product page to see what our customers have to say!
Pure and Potent Formulation: Herbal Health CBD Gummies UK boast a premium blend of hemp extracts, ensuring a pure and potent CBD experience in every bite. Elevate your well-being with the power of nature.Deliciously Irresistible Flavours: Immerse your taste buds in a world of flavours with our range of mouth-watering CBD Gummy bears. From juicy berry bursts to refreshing citrus sensations, each CBD gummy is a treat for your senses.Third-Party Tested for Quality: At Herbal Health, transparency is our priority. Rest assured that the range of CBD Gummy Sweets we offer, undergoes rigorous third-party testing, guaranteeing the highest standards of quality, purity, and potency.Wellness Made Convenient: Embrace the natural benefits of CBD with the ease and convenience of CBD Gummies. Perfect for those on the go or anyone seeking a tasty and discreet wellness solution.Explore Our Range: Choose from our diverse selection of CBD Sweets and edibles, each crafted to cater to specific wellness needs. Whether it’s relaxation, stress relief, or overall balance, Herbal Health has a CBD Gummy for you.Transform your wellness journey with Herbal Health CBD Gummies UK – where purity meets pleasure in every delectable bite. Shop now to experience the holistic benefits of premium CBD in a delightful and convenient form.Embrace a life of balance and bliss with Herbal Health CBD Gummies – nature’s goodness packaged just for you. Order now and discover the joy of wellness in every gummy!
650313 94703You made various good points there. I did a search on the topic and located many people will have the same opinion with your blog. 561489
KLChTABDz
BgXaPRKEteWMduLx