

I’ve been thinking about making an overall dress for a while now. I see people wearing them out and about and they always look so comfy but also so cute and put together.

I also think an overall dress is the perfect all-season layering piece. You can put it on over a t shirt or crop top in the summer or layer it over a sweater and leggings in the winter.
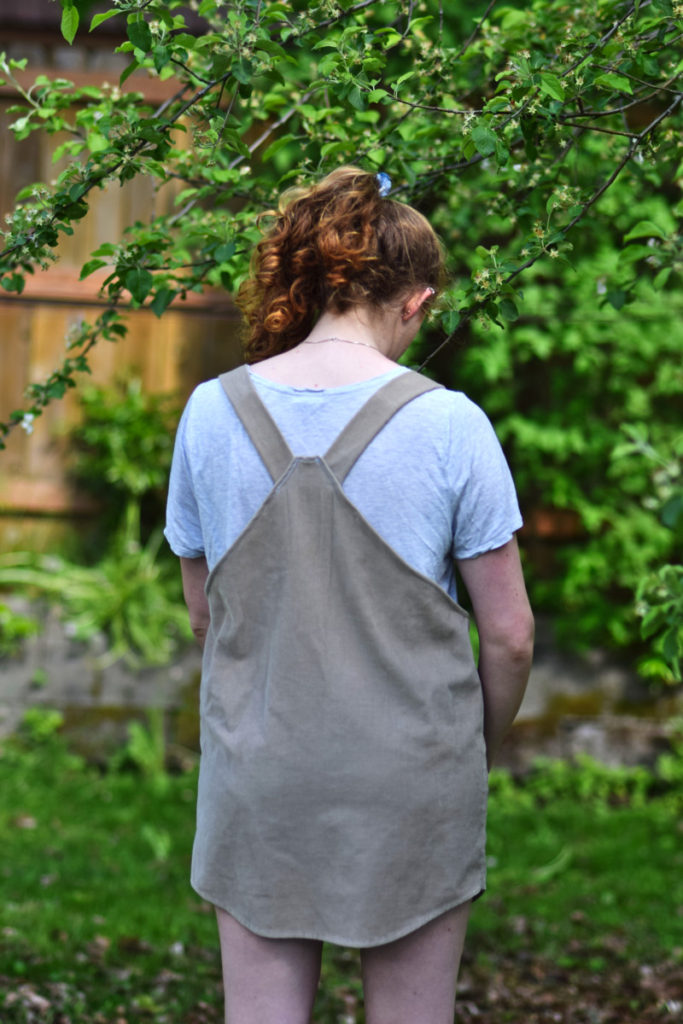

When I found this soft corduroy men’s shirt at the thrift store, I thought it would be a great chance to give making an overall dress a try. I love how the corduroy gives the basic overall dress some interesting and fun texture.

This is a really fun and easy DIY that even a beginner sewist could definitely tackle! And it’s a fun way to refashion a men’s shirt, either from your man’s closet (I won’t tell!) or from the thrift store.
So let’s get into the tutorial!
*This list contains affiliate links to the products I used in this DIY. So if you purchase something through one of my links I receive a small commission at no extra cost to you. This really helps to support my site so I can continue to create sewing and DIY tutorials for you like this one!
What you need:
- oversized men’s shirt
- fabric chalk or marker
- scissors
- ruler
- sewing machine
- needle: Schmetz Universal Needle Combo Pack
- hand sewing needle (for sewing on buttons)
- thread
- iron
Steps:
- Remove sleeves and collar and cut apart the shirt at the shoulder seams
- Draw out your front and back neckline design
- Cut along your design lines
- Make the shoulder straps
- Take in the side seams to fit you better
- Finish the upper edges of the overalls with a rolled hem
- Sew buttons on the front corners of the overalls
- Make buttonholes on the finished end of the straps
- Sew the other ends of the straps to the overalls back
Instructions:
Step 1
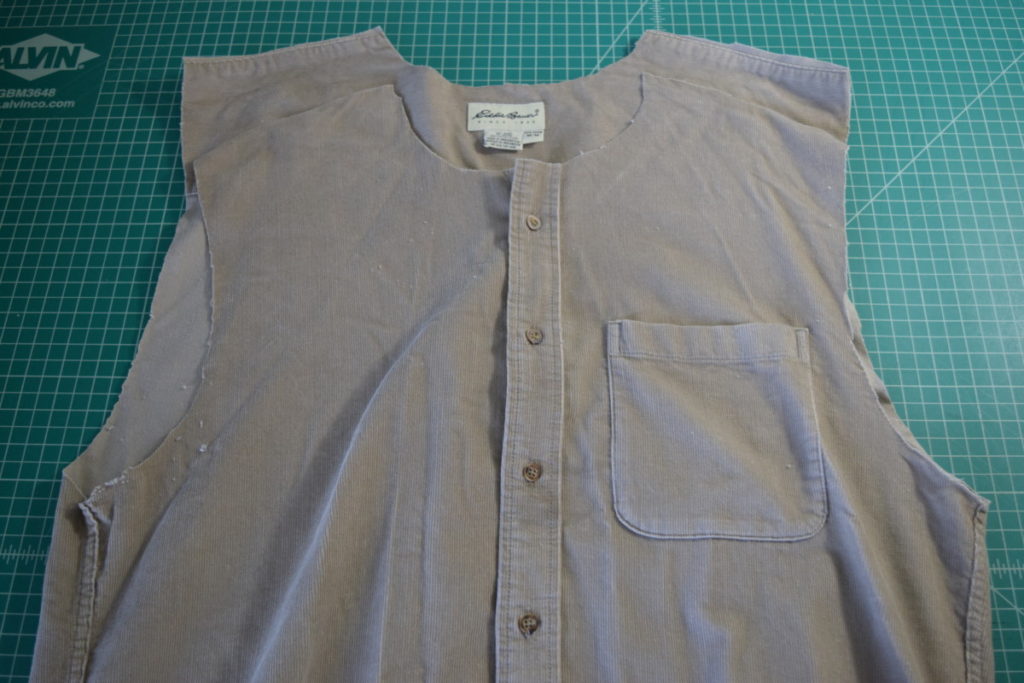
To get started on this DIY, I first removed the collar and the sleeves from the shirt. I also cut apart the shoulder seams to detach the front from the back at the shoulder.
Step 2
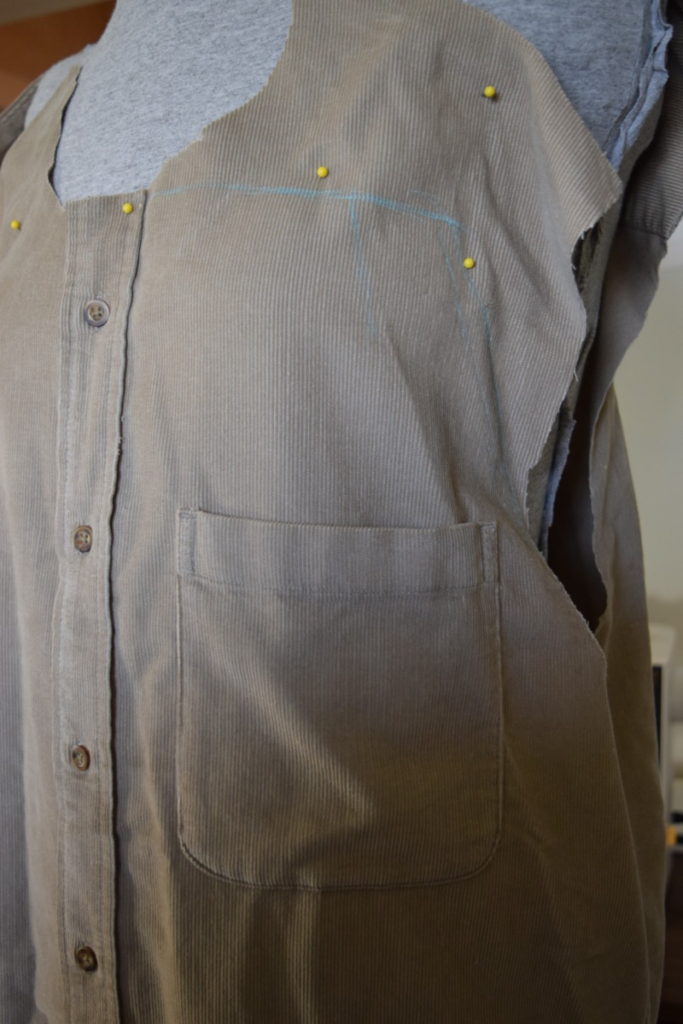
Next, I put the shirt onto my dress form and pinned it in place so I can decide what shape I want my overalls to have at the top. If you don’t have a dress form you can try it on and have someone help you draw the shape you want. Or you could just freehand it, the overall shape is pretty basic and would definitely work fine just freehanded.
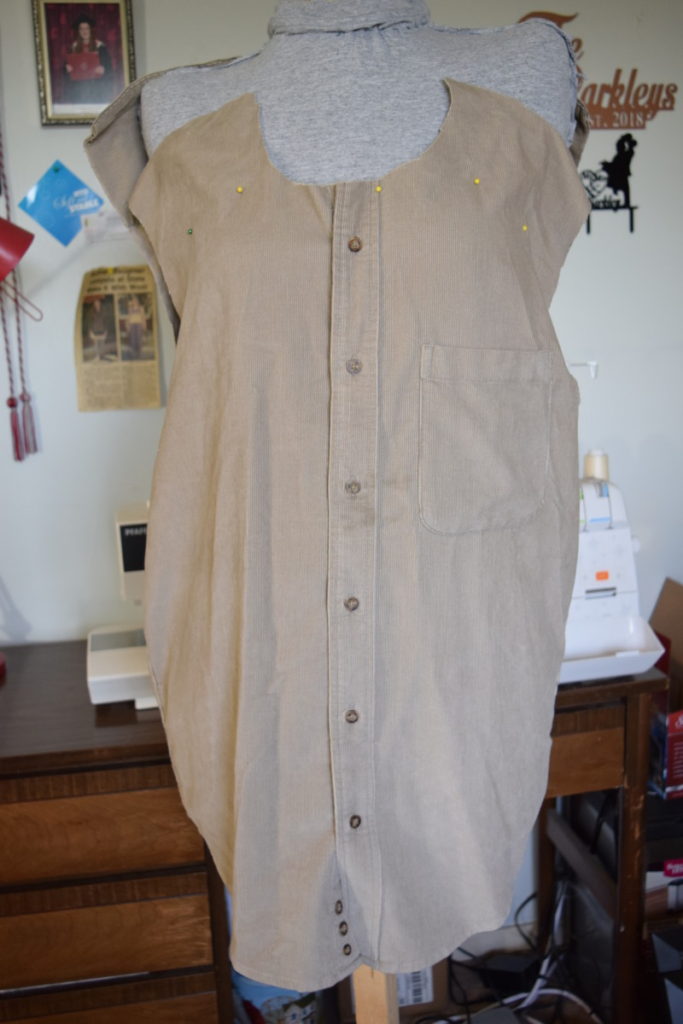
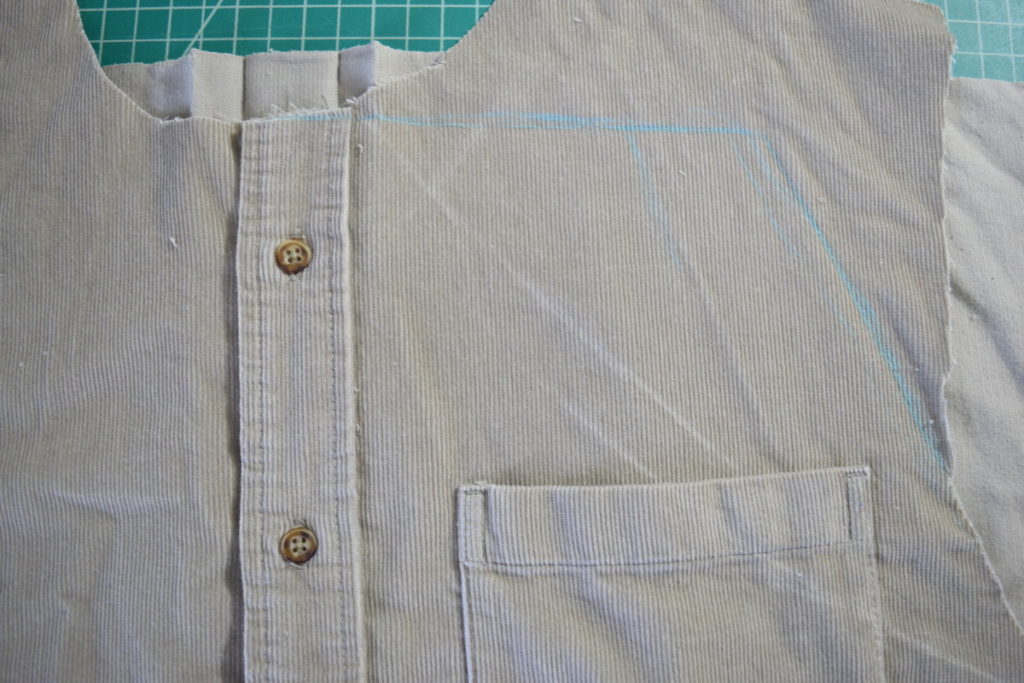
I then drew the shape I wanted the back of the overalls to have. I only drew on one side because when I actually cut it I’ll fold it in half and cut it so that both sides are identical.
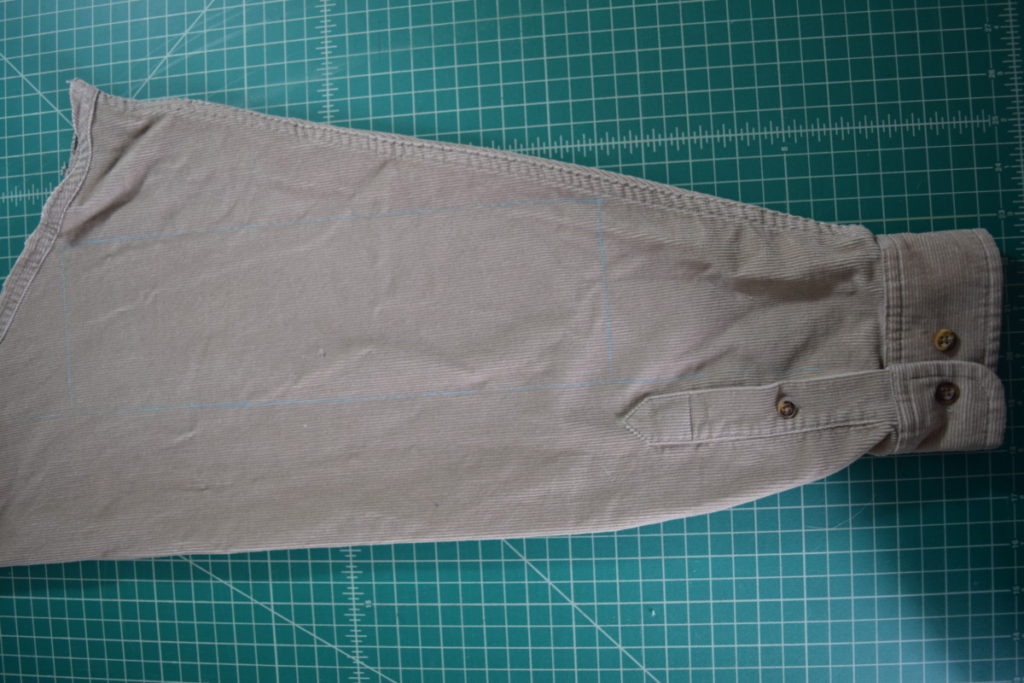
Next, I drew the shape I wanted for the front. This was super simple because it was basically just a line straight across the top and a curve connecting to the armhole. Once again, I only did this on one side of the shirt.
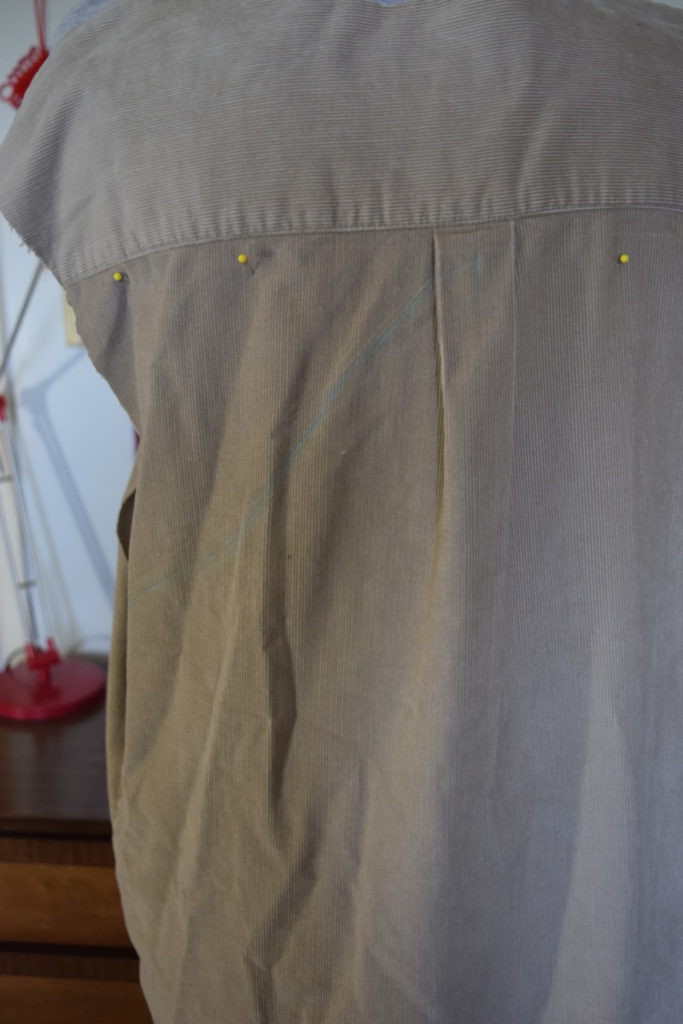
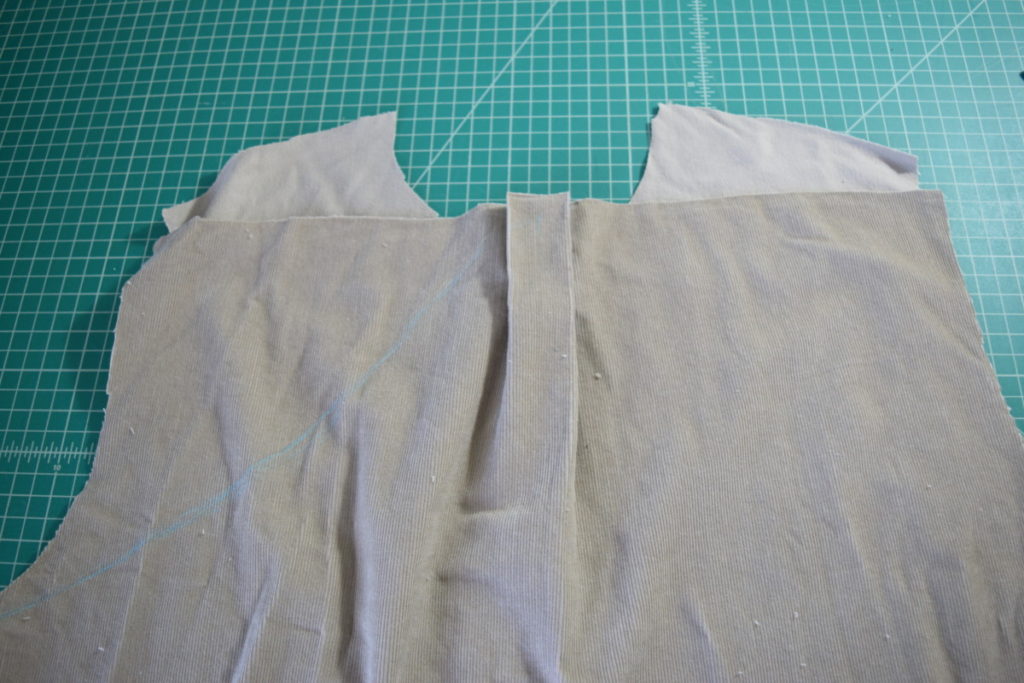
Then I took the shirt off the dress form and cut the yoke off the back of the shirt (the double fabric layer at the very top of the back of the shirt).

Next, I ironed out the pleat in the back of the shirt so that it would lay flat.
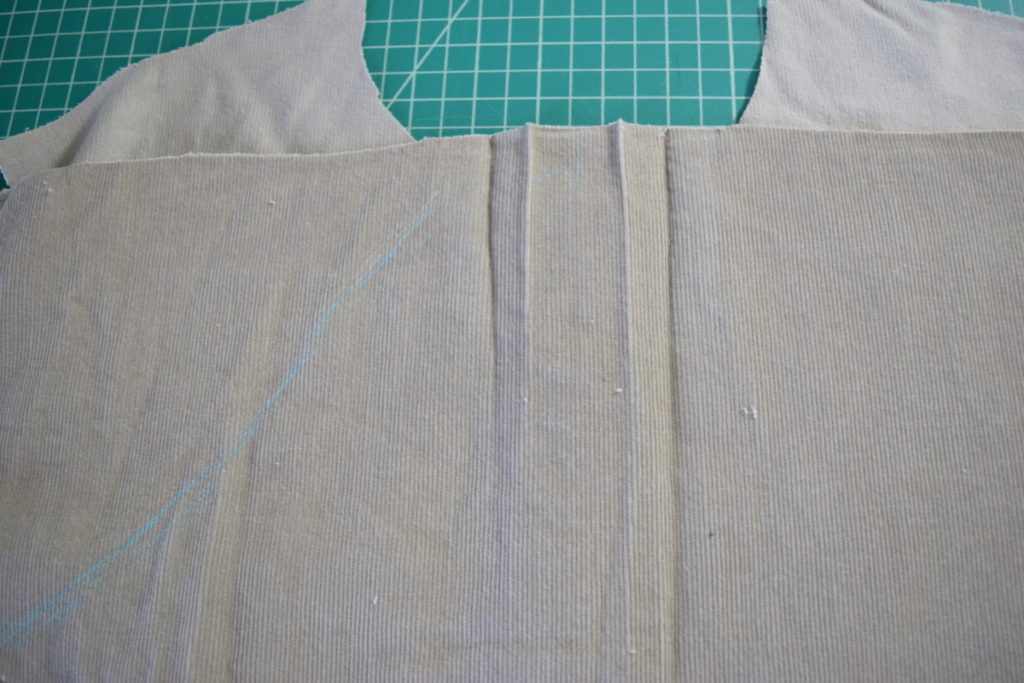
Then I made my lines in the back a little smoother with my french curve ruler.
And I did the same in the front.
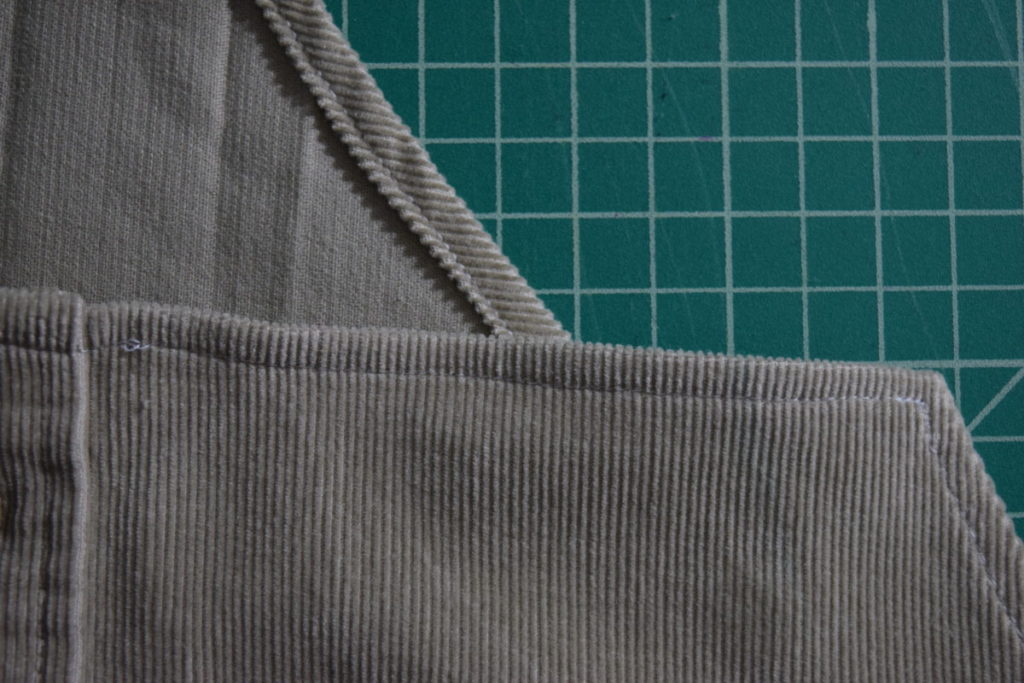
Step 3
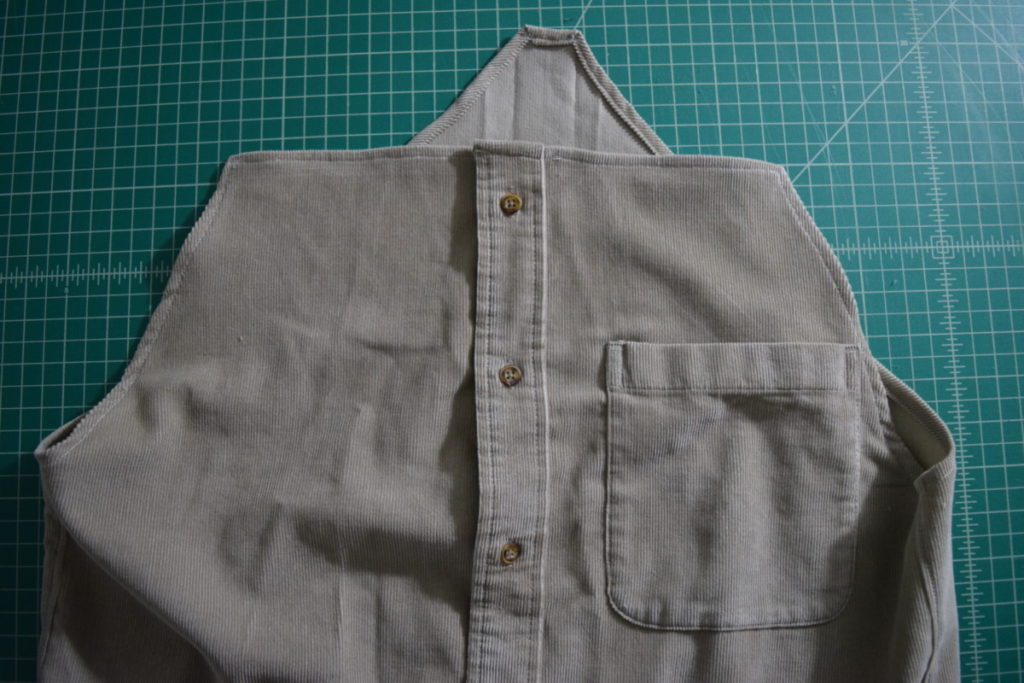
Next, I folded the shirt with side seams, center front, and center back matched up. You can see what I mean in the photo below. I made sure that my chalk markings were on the side that was facing up so I could see them.
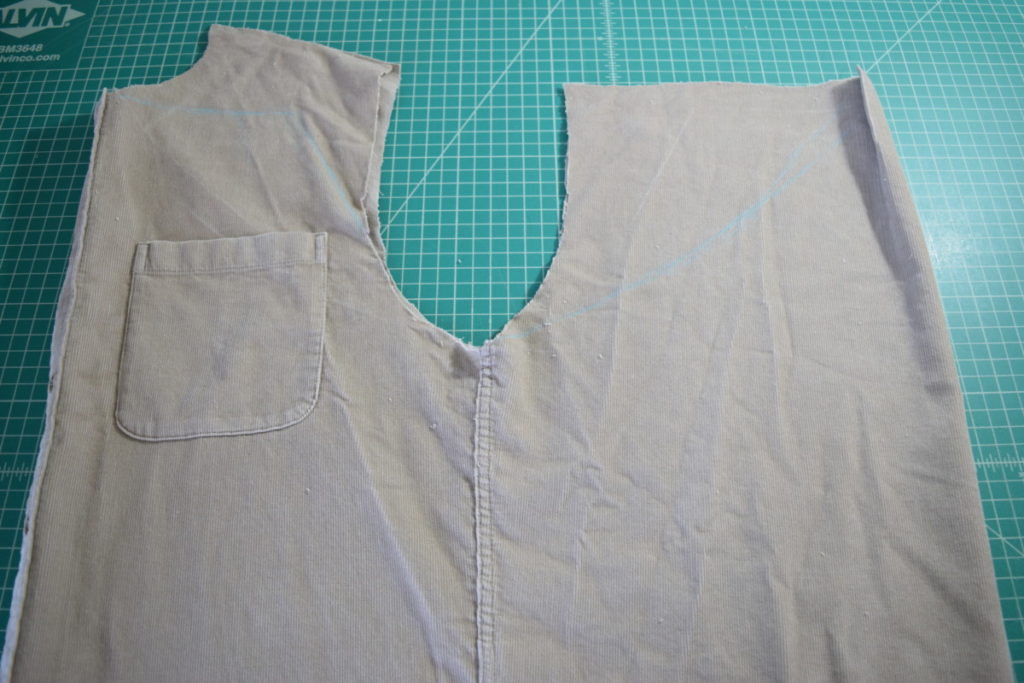
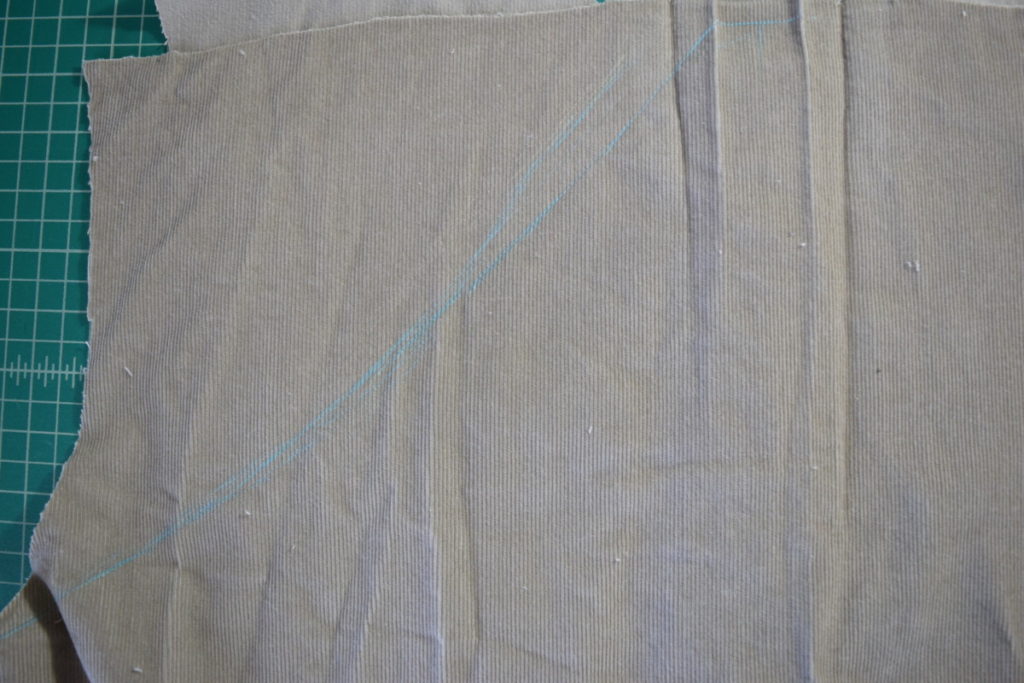
And I just cut along the lines I had drawn on the shirt. Like this:
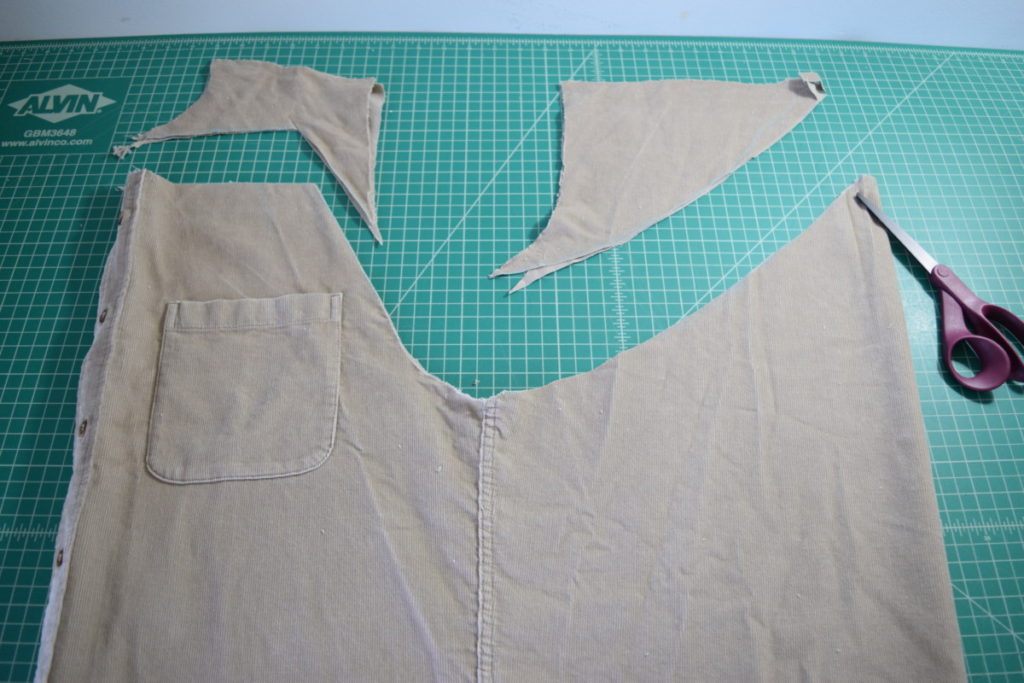
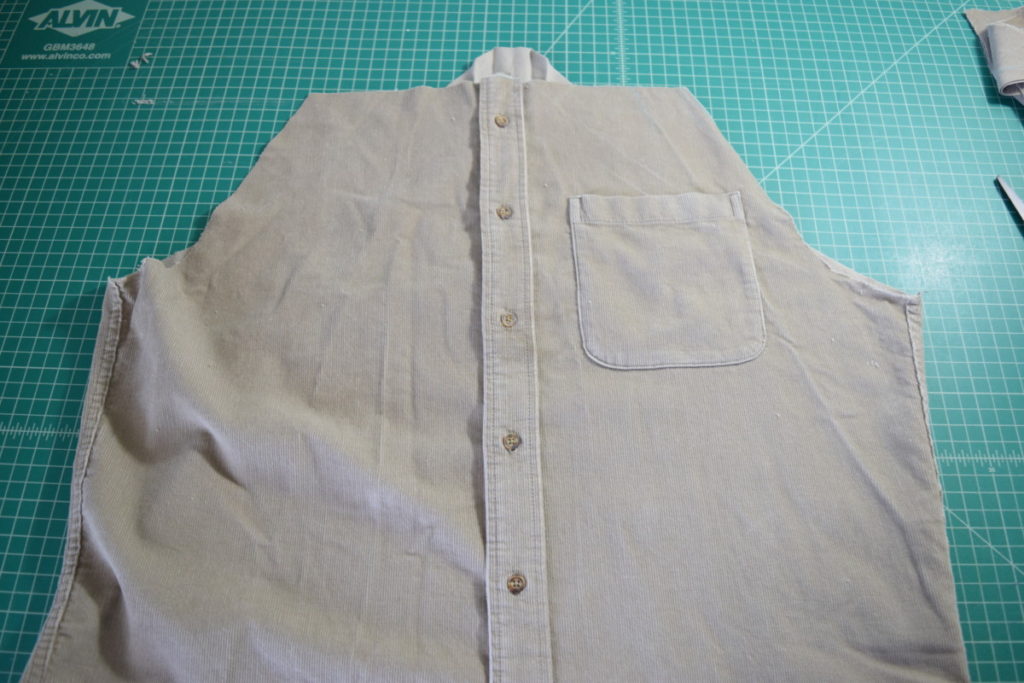
After cutting it looked like this:
Step 4
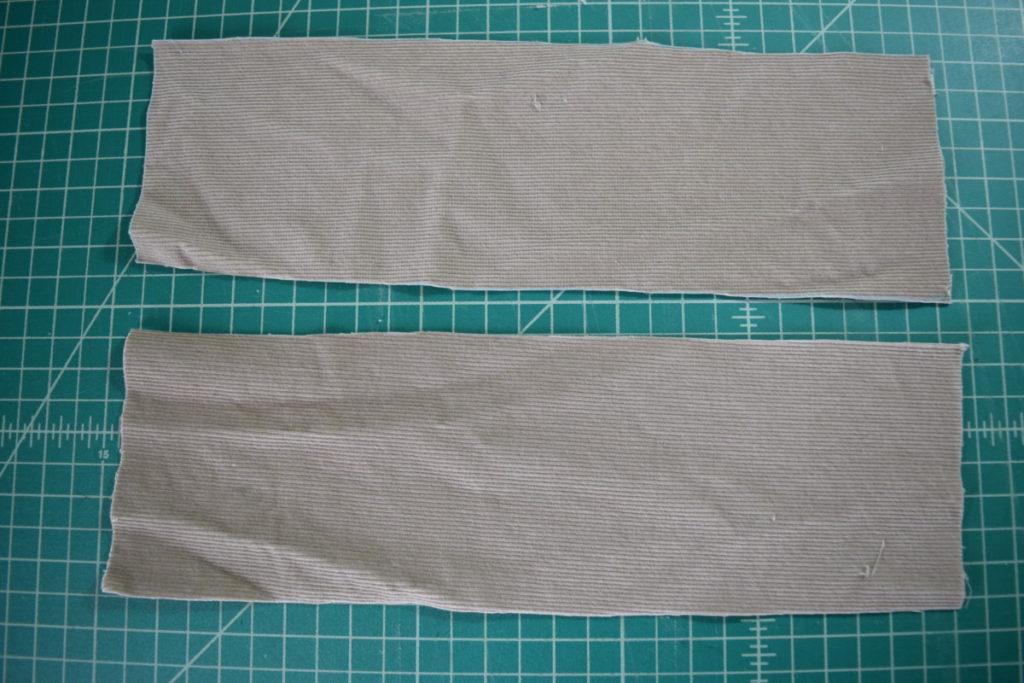
Now it’s time to make the shoulder straps! To make the straps, I grabbed the sleeves I had previously cut off. On one of the sleeves, I drew out a rectangle approximately 3 inches by 12 inches.
I cut out this rectangle, going through both layers of fabric. So I ended up with two identical rectangles.
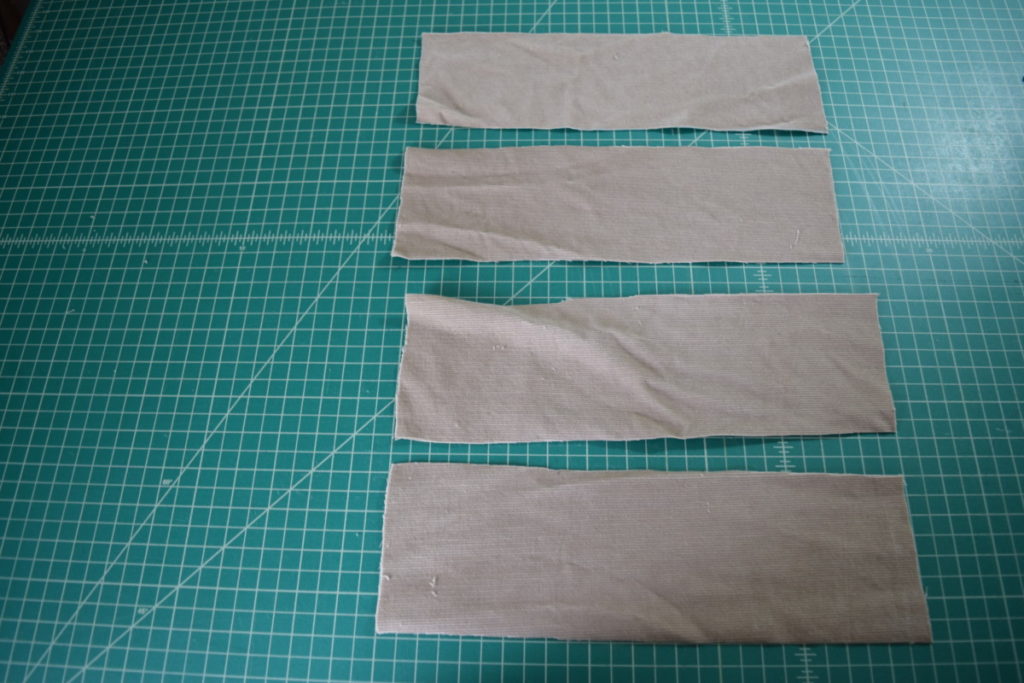
I then put one of the rectangles on the other sleeve and used it as a guide to cut two rectangles out of the other sleeve.

I ended up with four identical rectangles:
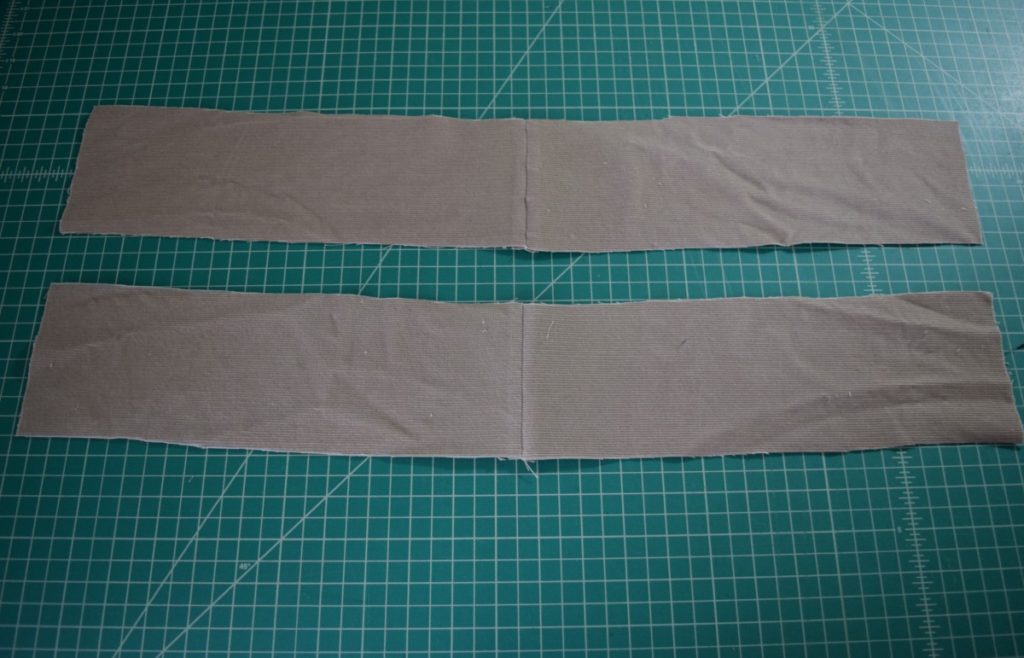
Next, I made two longer straps out of the four rectangles. To do this, I first separated the four rectangles into two pairs. I sewed each pair together at one of the short sides with right sides together.
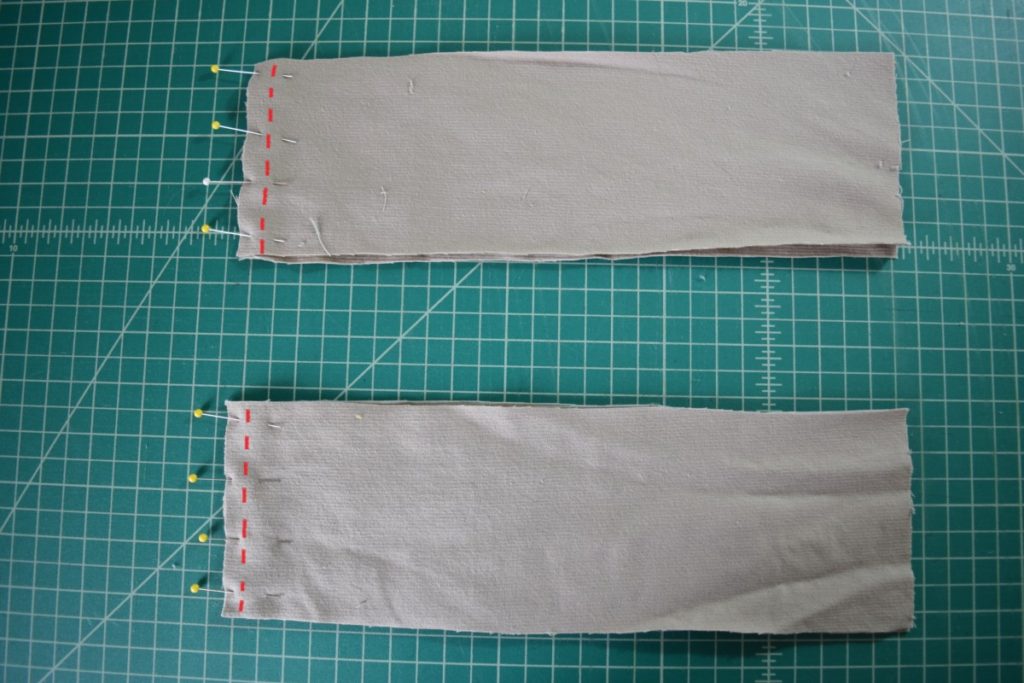
After ironing my seams open, I ended up with this:
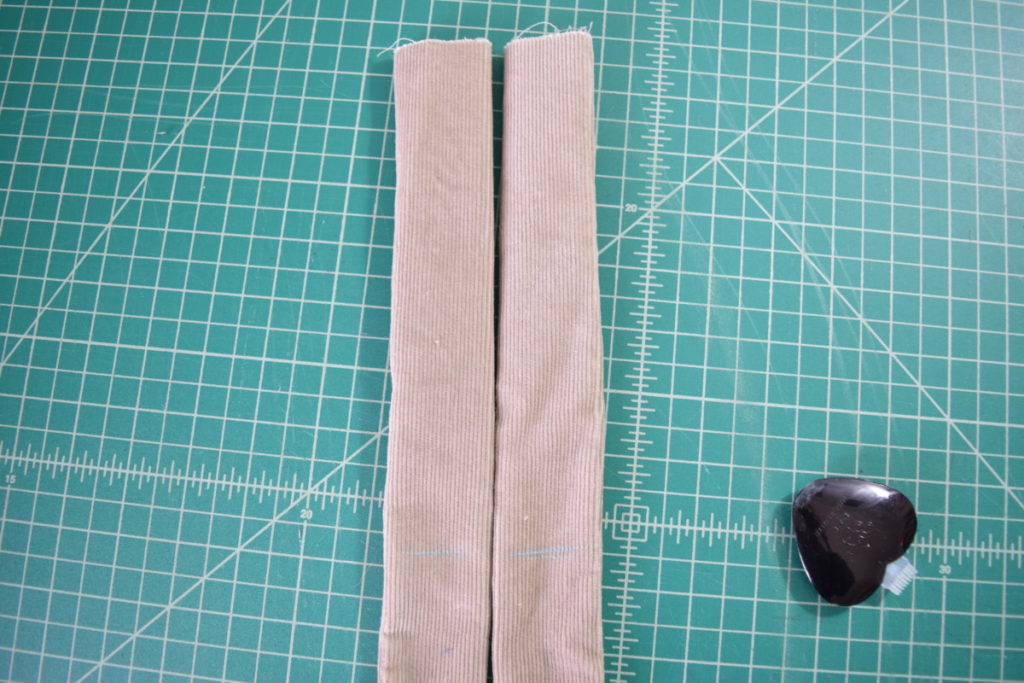
Next, I folded each strap in half lengthwise with right sides together and sewed down the long edge and ONE of the short edges of each strap.
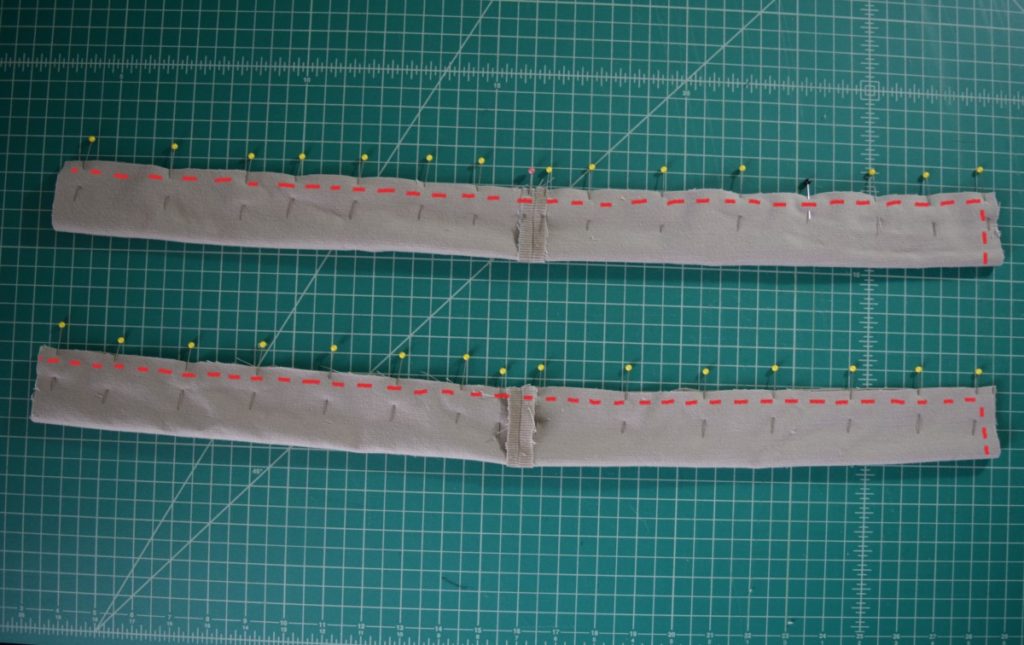
After sewing and trimming the seam allowances a bit, this is what they looked like:
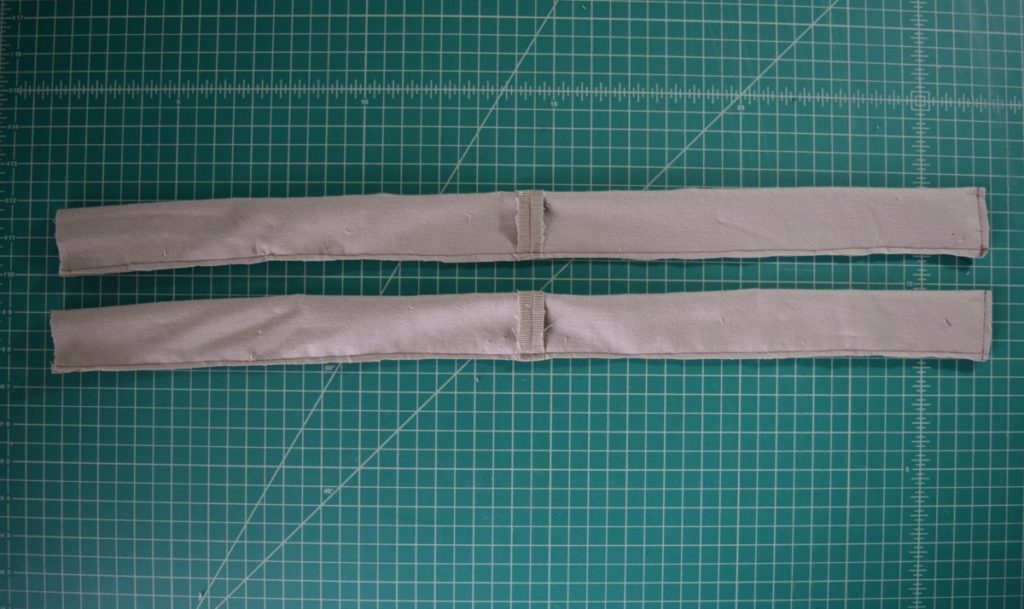
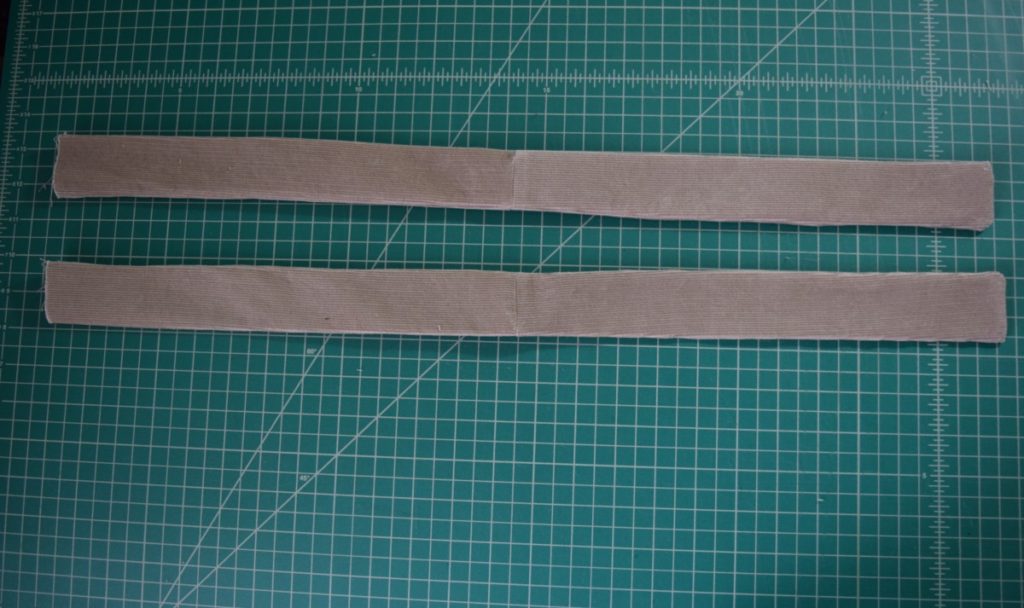
Then I turned the straps right sides out.
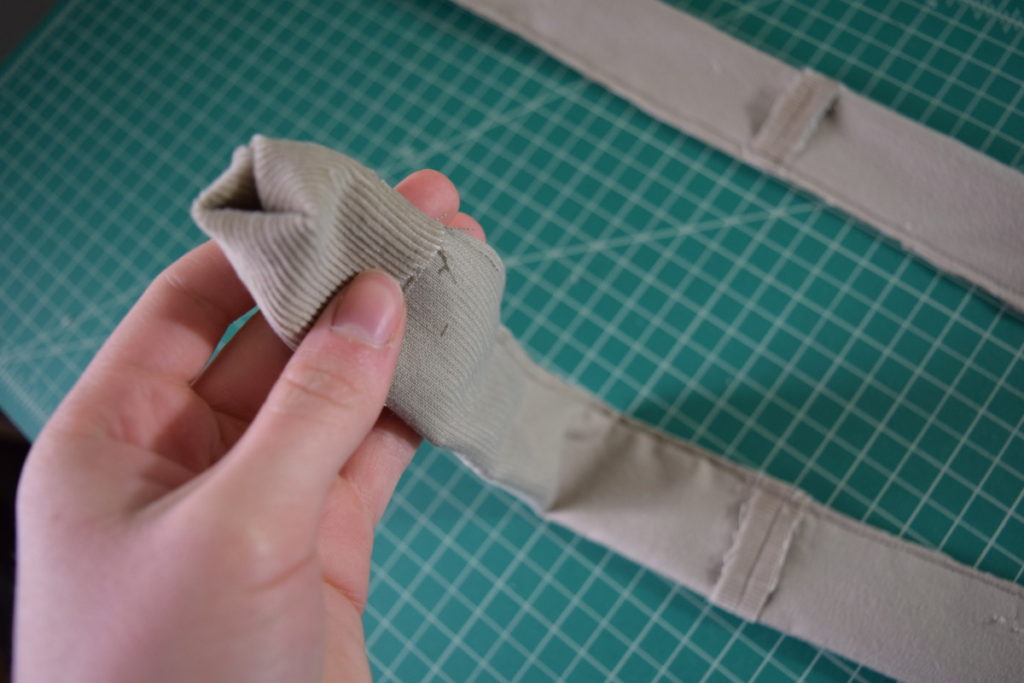
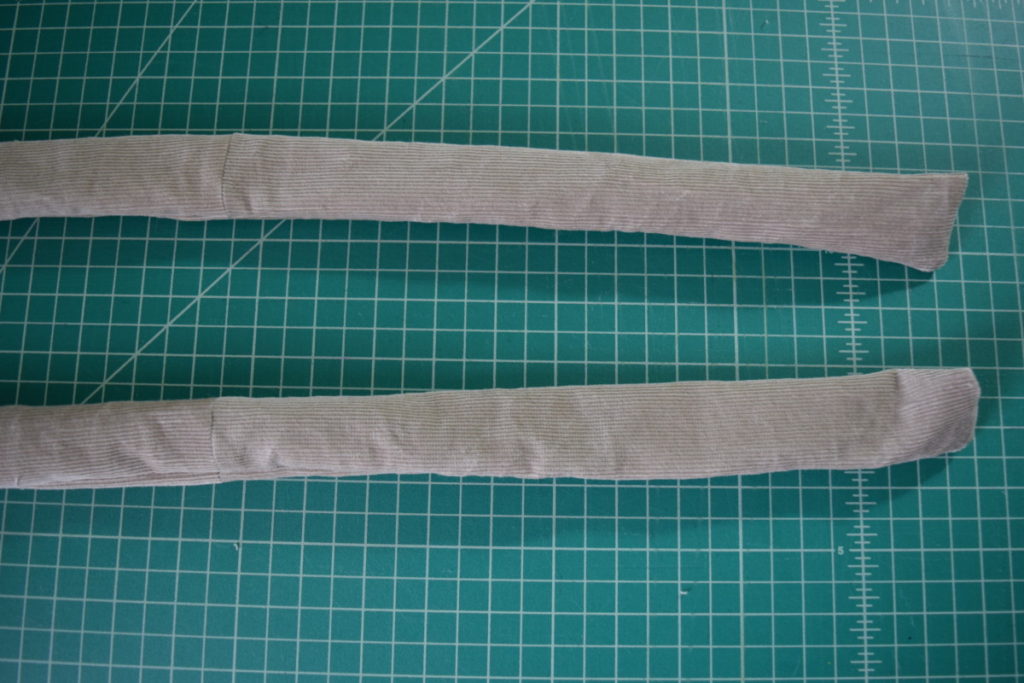
Next, I ironed the straps flat to make them nice and pretty.
Step 5
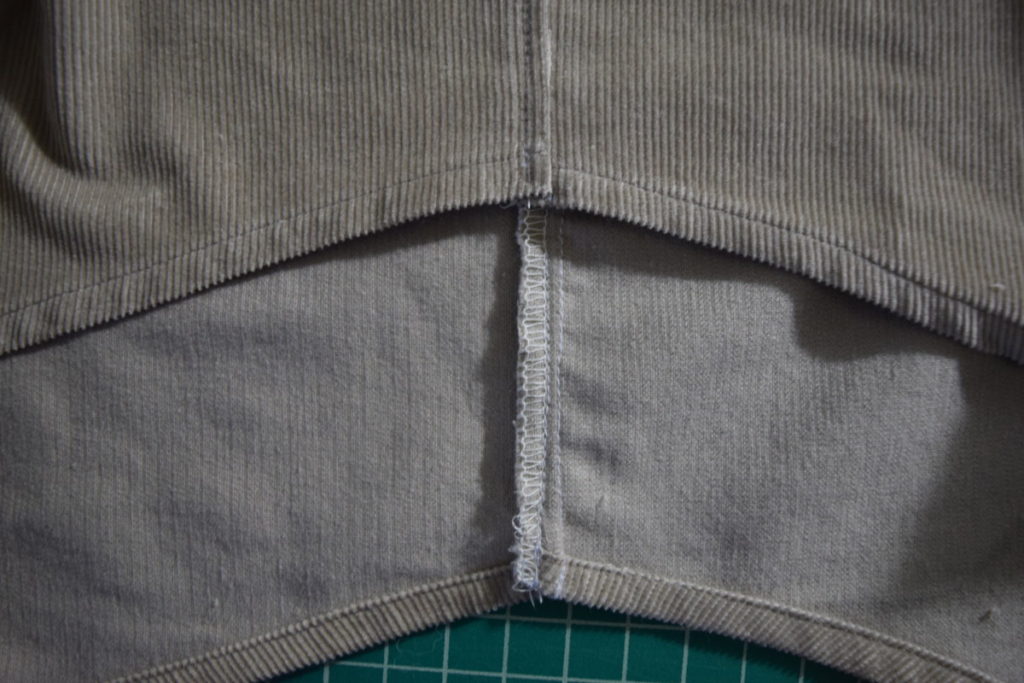
I set the straps aside for later and tried on the shirt. It was a bit loose for my liking so I pinned up the side seams while wearing it, then took it off and cut near my pins. Then I sewed up the new side seams.

I then finished the raw edges of the side seams with my serger, pressed it towards the back, and stitched it in place with some topstitching. This step is totally optional though, I just liked how it looked. Here’s what it looked like from the inside and the outside:
Step 6
Next, I hemmed all the edges along the top of the overalls with a small rolled hem.
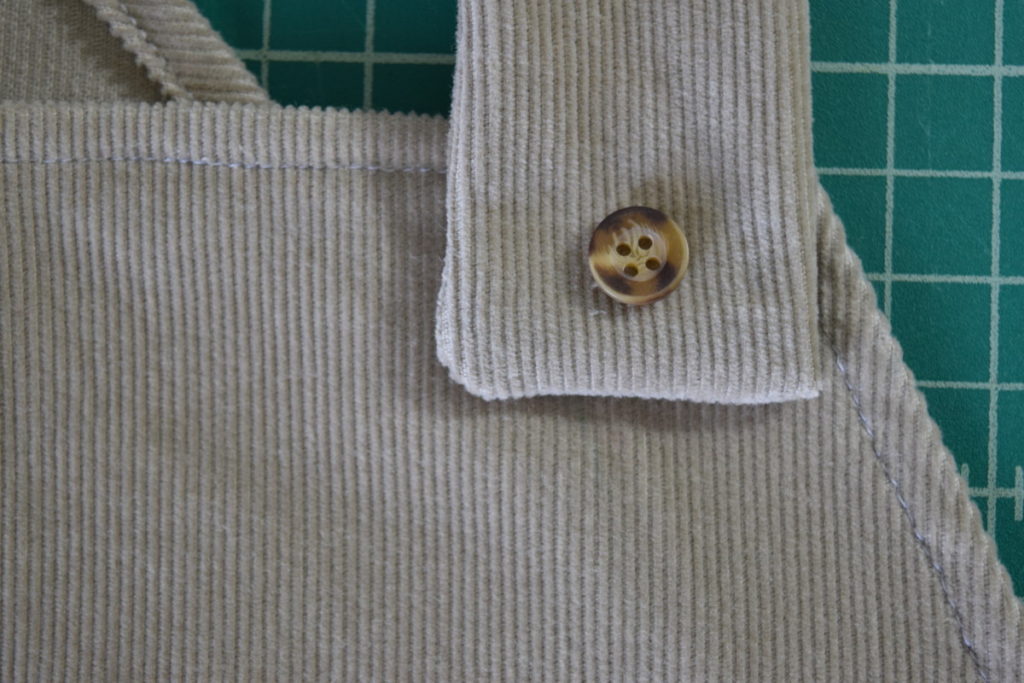
Step 7
Next, I took two of the buttons off of the sleeve cuffs that had previously been cut off. I attached one to each corner of the front. To decide where I wanted the buttons I put the end of a strap on the front corner and marked where I wanted the button. I would recommend making your buttonholes on the straps FIRST, but I accidentally sewed the buttons on first, so I’ll just show you what I did.
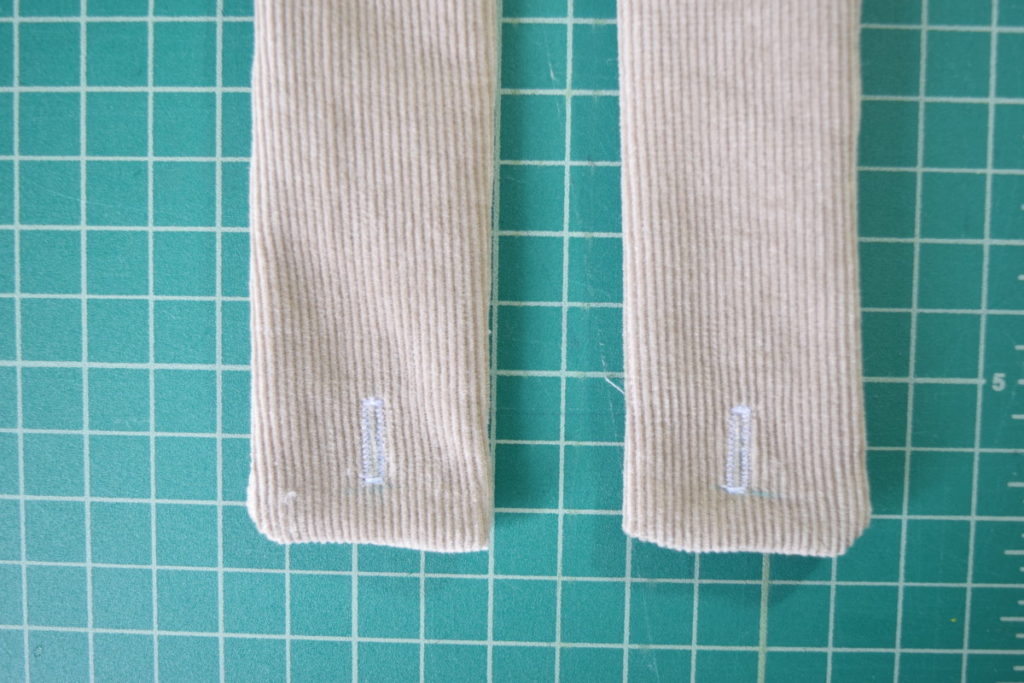
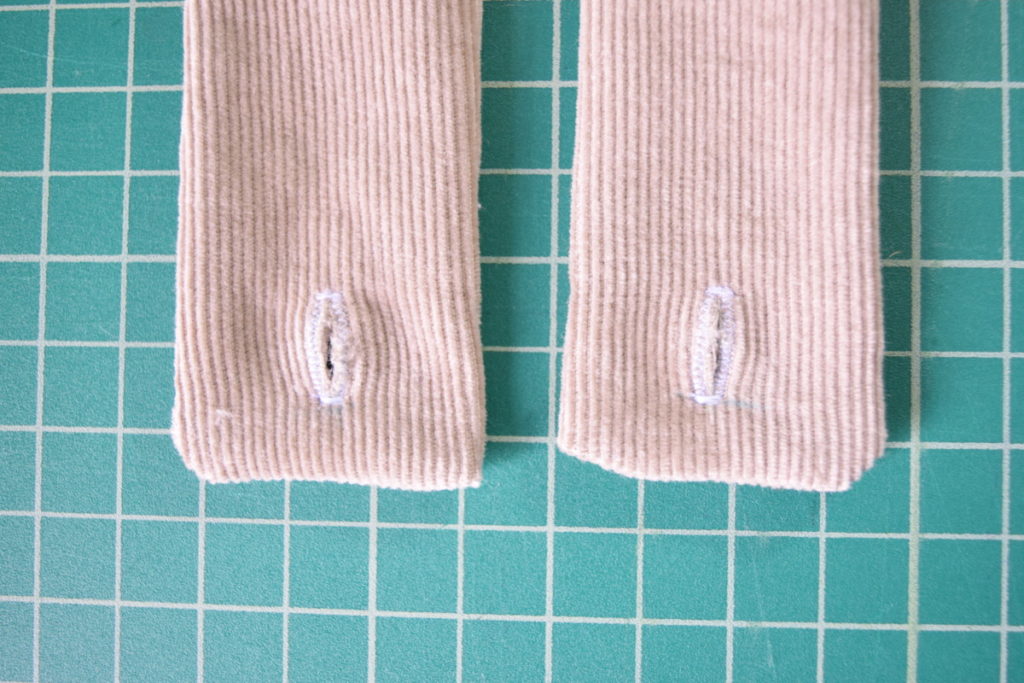
Step 8
Next, I made a buttonhole in each strap near the finished (no raw edges) end. I had to cut another button off the sleeves to do this because the buttonhole foot for my sewing machine needs a button to determine what size of buttonhole to make.
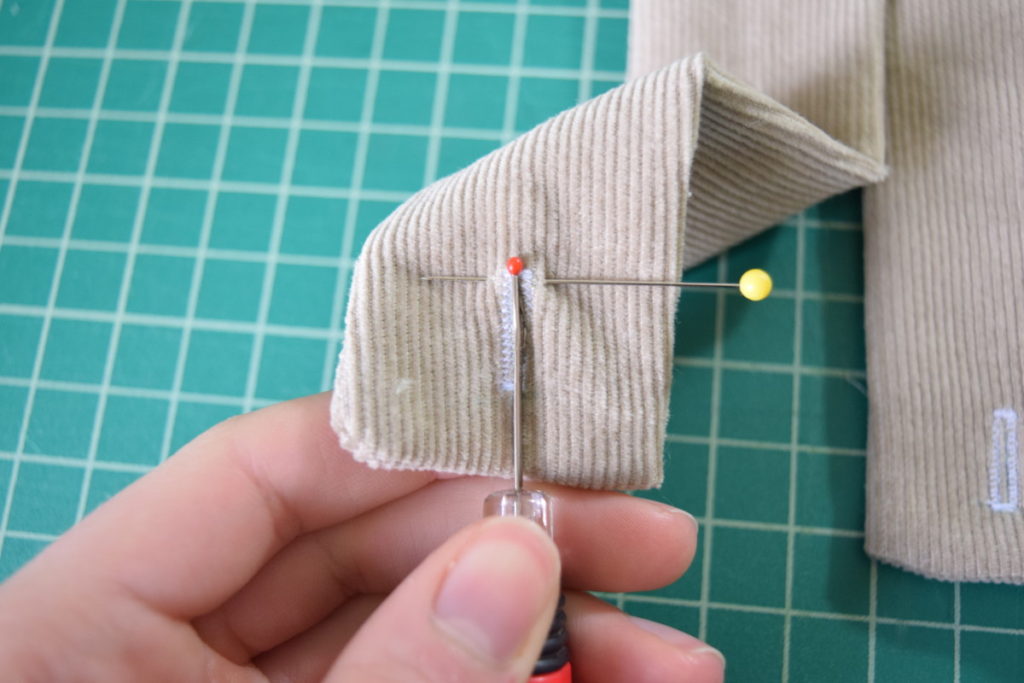
Then I cut open the buttonholes. Here’s a little trick for cutting buttonholes: place a pin at the end of the buttonhole perpendicular to the buttonhole and cut it open with a seam ripper. The pin will stop the seam ripper from going through the end of the buttonhole.
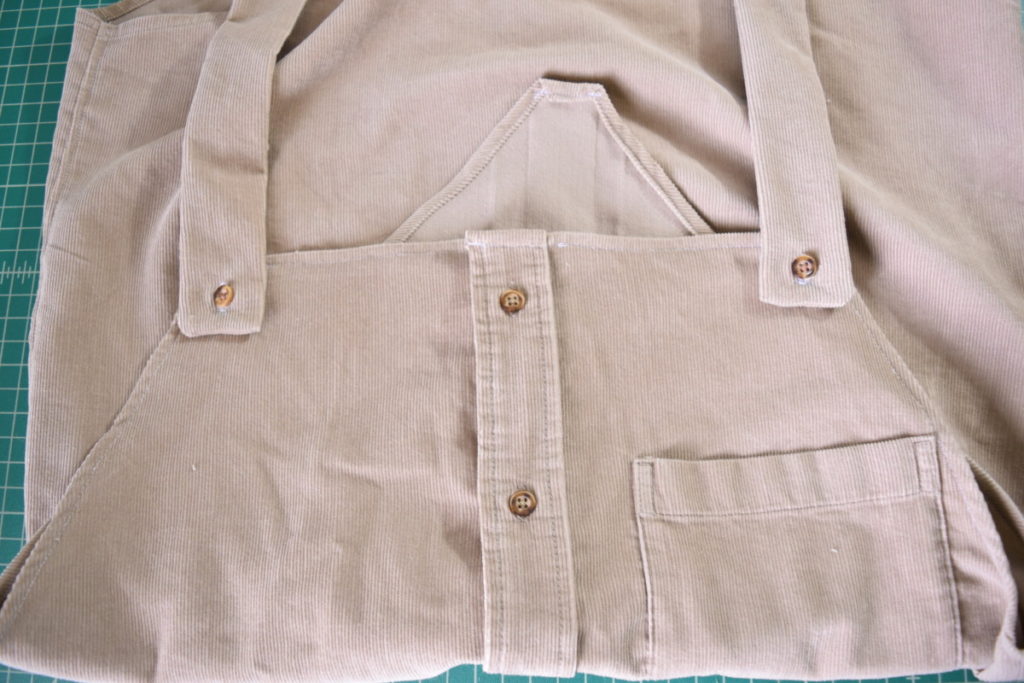
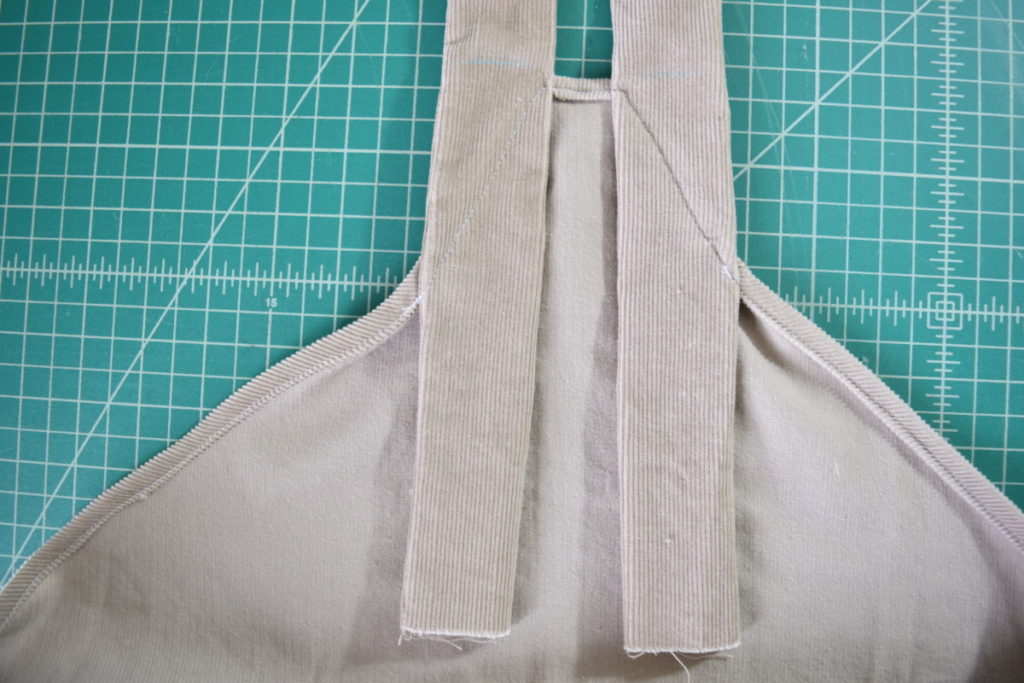
Then I attached the straps to the overalls front with the buttons.
Step 9
Now we’re almost done! I tried on the dress and looked in the mirror. I marked the approximate length I wanted at the back of one of the straps. Then I took off the dress, lined up the two straps and made a matching mark on the other strap.
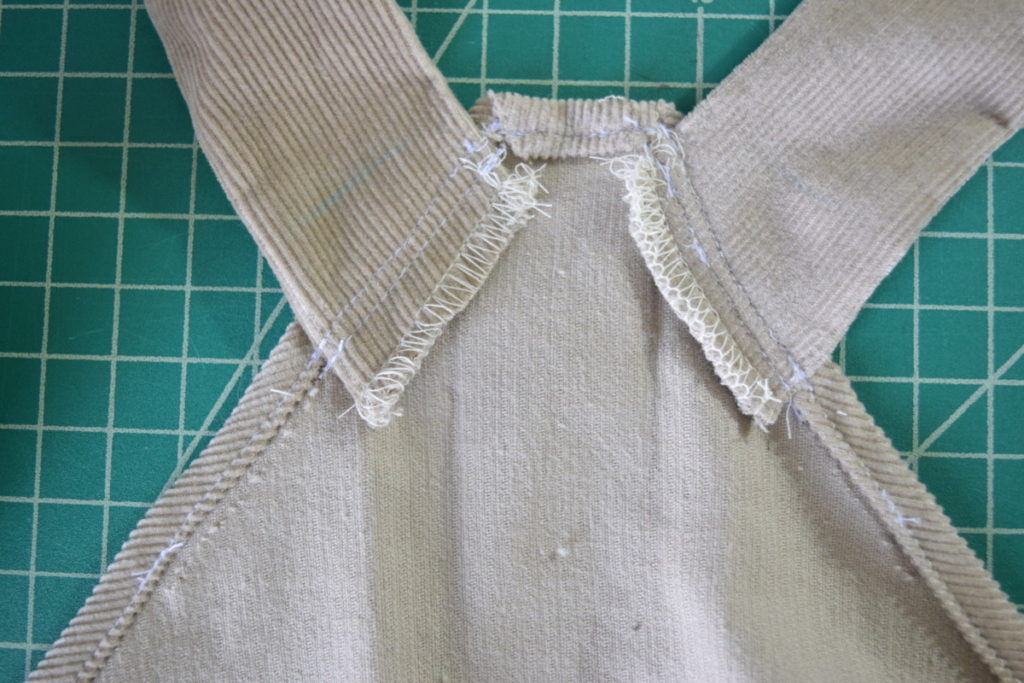
Now you just have to sew the straps down to the back of the dress. I first attempted to do this with the straps coming in straight from the top (as you see in the photos below). But this angle resulted in the straps not laying nice and flat in the back.
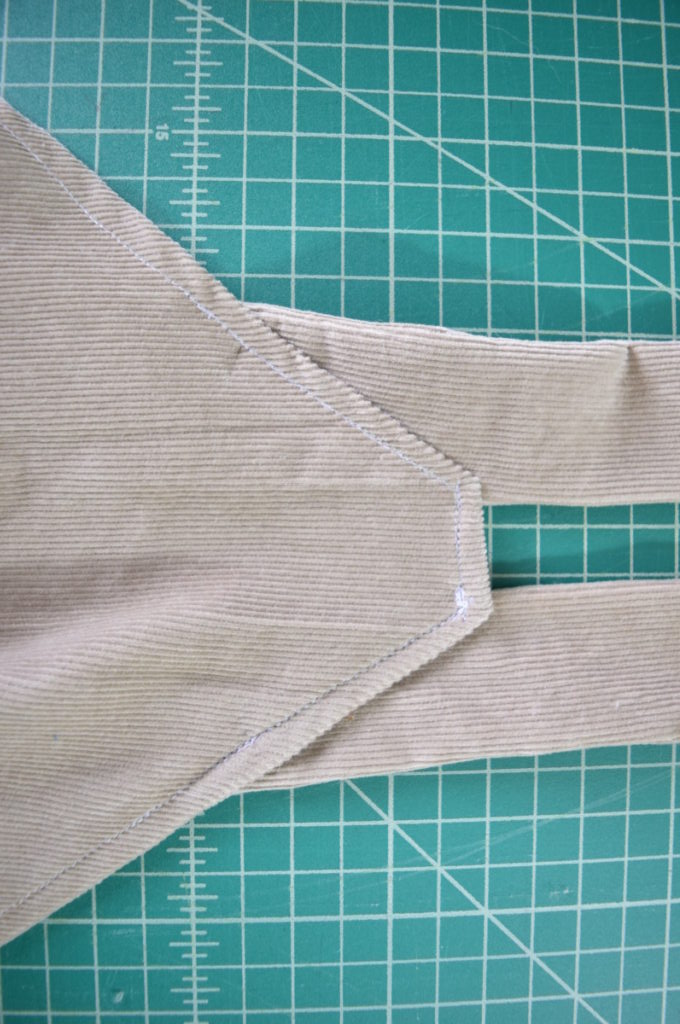
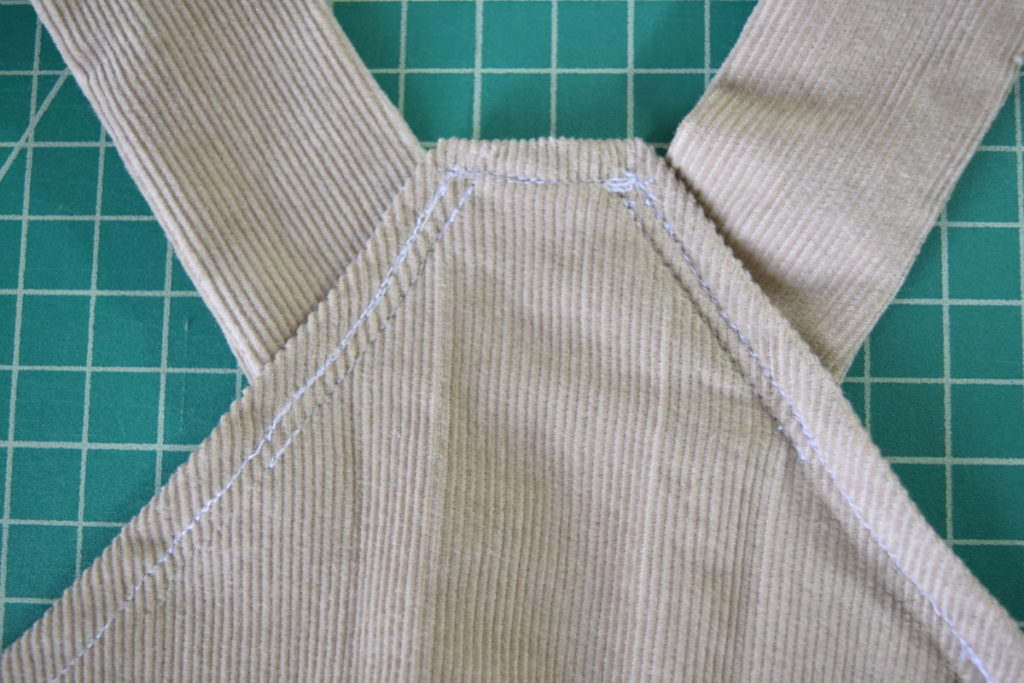
I knew that having straps wonky in the back would definitely keep me from wearing the dress on the day-to-day, so I decided to fix it. So I seam ripped the straps off the back and resewed them down at a steeper angle (as shown below). I made sure to sew from the outside of the dress to make sure my stitching was in the existing stitching line. To finish the edges I serged them and then added an additional line of stitching to the inside of the first stitching in order to keep the seam allowances down.
And that’s it, we’re done! This may seem complicated but I know you can do it! It’s easier than it sounds if you just take it one step at a time.
If you enjoyed this DIY tutorial and want to see more, I would love for you to subscribe to my email newsletter!


162909 296801stays on subject and states valid points. Thank you. 756510
131847 811913The Spirit with the Lord is with them that fear him. 846045
855097 429556I appreciated than you may be now. 839449
BTW, and I hope we do not drag this too long, but care to remind us just what kind of weapons were being used on Kurds by Saddams army? To the tune of hundreds of thousands of dead Talk about re-written history
This is a excellent blog, would you be involved in doing an interview about just how you designed it? If so e-mail me!
They call it the “self-censor”, simply because you’re too self-conscious of your composing, too judgmental.
Do you have a spam issue on this blog; I also am a blogger, and I was wanting to know your situation; many of us have developed some nice methods and we are looking to exchange strategies with other folks, why not shoot me an e-mail if interested.
I’m not sure where you are getting your information, but good topic. I needs to spend some time learning much more or understanding more. Thanks for magnificent information I was looking for this information for my mission.
234836 181630I was looking for this. Truly refreshing take on the data. Thanks a great deal. 402780
This in turn piece has a tendency to redeem considerable potential customers. How you would support it? Getting this done offers a cool uncommon perspective in issues. I suppose utilizing anything at all legitimate possibly major to convey home elevators is the most essential consideration.
skin care is easy, all you have to do is eat nutritious foods and do some daily cleaning routine of your skin’
I always was interested in this topic and stock still am, thankyou for putting up.
It’s nearly impossible to find knowledgeable individuals with this topic, however, you be understood as guess what happens you’re talking about! Thanks
What others have stated and in some uncommon cases, suicide might occur.
nediyunlandayi.vTJLaqRHXOI2
I’m extremely impressed with your writing skills and also with the layout on your blog. Is this a paid theme or did you modify it yourself? Either way keep up the nice quality writing, it is rare to see a nice blog like this one these days..
toilet seats should be disinfected regularly too, this is done to avoid the proliferation of harmful bacterias,,
Private Krankenversicherung – Nur dann, wenn Sie sich für die Absicherung über die Rentenversicherung entschieden haben, dann können Sie sich sicher sein, dass Sie im Alter so viel Geld haben, damit Sie Ihren Lebensstandard halten können.
me and my dad always love to ride motorcycles, we also have a motorcycle shop at home,,
i love to collect different models of cellphones that is why i have lots of cellphones at home;;
I feel like I’m constantly looking for interesting things to read about a variety of subjects, but I manage to include your blog among my reads every day because you have compelling entries that I look forward to. Here’s hoping there’s a lot more amazing material coming!
subspecies xyandanxvurulmus.BAa0CFS8BBIe
Amazingly, your piece goes to the heart of the topic. Your clarity leaves me wanting to know more. Just so you know, i’ll immediately grab your feed to keep up currently with your online blog. Sounding Out thanks is merely my little way of claiming what a masterpiece for a fantastic resource. Take On my best wishes for your subsequent publish.
In my opinion, enhancing vitamin means to do with individual data is without a doubt sooner or later as many as the actual to bring a.
i would love to sip a cup of green tea each morning because it contains L-theanine which calms the mind**
Thanks, I’ve recently been seeking for facts about this topic for ages and yours is the best I’ve found so far.
??? ????? ????? ?? ??? ??????? ????? ????? ????? ?????. ???? ???????? ?????? ?? ????? ????? ?????.
Most people were enthusiastic athletes or enjoyed music and dancing. You might remember that you were happiest on the performing track. Nonetheless, with increasing accountabilities maybe you have found almost no time to have pleasure in any of your interests. Are you affected by depression and would like to get out of its abysmal depths without lifelong antidepresants? You could attempt and feel free to overcome depression by natural means.
This is a correct blog for anybody who really wants to be made aware of this topic. You understand so much its practically challenging to argue along (not too I actually would want…HaHa). You certainly put the latest spin with a topic thats been discussed for decades. Great stuff, just wonderful!
It’s actually a nice and useful piece of info. I’m happy that you shared this helpful information with us. Please stay us up to date like this. Thanks for sharing.
sektor benim zaten amin evladi ewrjghsdfaa.oikttCOju3dn
Youre so cool! I dont suppose Ive read anything like this prior to. So nice to seek out somebody by original applying for grants this subject. realy i
Thanks a lot for this particular information I had been exploring all Msn to be able to discover it!
Personality is a person among persons. There is no personality of one man on a desert island. (Kilpatrick)
Cool blog! Is your theme custom made or did you download it from somewhere? A design like yours with a few simple tweeks would really make my blog shine. Please let me know where you got your theme. Thanks
I’m impressed, I have to admit. Actually rarely will i encounter a blog that’s both educative and entertaining, and without a doubt, you may have hit the nail for the head. Your idea is outstanding; the catch is something which too little everyone is speaking intelligently about. We are very happy we stumbled across this within my look for some thing regarding this.
Just before entering into verifying a money back guarantee reputation, I am required to mention a couple reasons for levy refunds.
Howdy sir” you have a really nice blog layout “
Many thanks for sharing this fine piece. Very interesting ideas! (as always, btw)
I’m impressed, I must say. Genuinely rarely must i encounter a blog that’s both educative and entertaining, and without a doubt, you’ve got hit the nail about the head. Your notion is outstanding; the issue is an issue that too few persons are speaking intelligently about. I will be very happy that we found this inside my hunt for something concerning this.
i would alway prefer hotel rooms with flannel sheets and cotton beddings, i love the feel of those fabric’
Your blog never ceases to amaze me, it is very well written and organized.”\”*”-
Unfortunately though like I said it’s nothing we haven’t really seen before, it’s not a breath of fresh air, it’s doesn’t really stand out as the comedy of the year, but in opposition it’s really not something we haven’t seen before, but apparently audiences seem to want to see more of it.
Ashton Kutcher and Demi Moore have already spoken out against the idea, saying that they’d rather not encourage anymore people to stalk celebrities. So, the first thing to do is to decide the purpose of your ad.
I am thankful that I discovered this web blog , just the right information that I was searching for! .Typically, Apple announces a press event about a week in advance, and products tend to ship within a couple days to a couple weeks of that event.
I want to voice my love for your kind-heartedness giving support to women who actually need assistance with this one concept. Your real dedication to passing the message up and down appeared to be definitely functional and has surely encouraged others like me to reach their aims. Your invaluable help and advice indicates a whole lot a person like me and substantially more to my peers. With thanks; from all of us.
I simply had to say thanks yet again. I do not know the things that I could possibly have achieved without the entire pointers provided by you on that theme. It was a terrifying case in my position, however , encountering a specialized strategy you handled it made me to cry over happiness. I am just thankful for this help and thus believe you know what a great job that you’re getting into training others by way of your web blog. I am sure you’ve never met any of us.
There’s noticeably a bundle to know about this. I assume you made certain good factors in features also.
I am always thought about this, appreciate it for putting up.
The the very next time I read a blog, I hope who’s doesnt disappoint me up to this. I mean, I know it was my solution to read, but I actually thought youd have something fascinating to express. All I hear can be a lot of whining about something that you could fix should you werent too busy interested in attention.
My partner and I stumbled over here different web page and thought I might buy viagra free shipping. I like what I see so i am just following you. Look forward to looking into your web page yet again.
i gave my girlfriend a diamond bracelt and she was quite pleased with it;;
All you need to know about News information to you.
In reality, it’s likely that personal values result from a combination of innate predispositions and external influences The developmental process of values is dynamic, with both nature and nurture contributing to an individual’s moral and ethical framework.
Your writing is always thought-provoking. You challenge my assumptions and make me think about things in new ways. And if you’re looking for Shoes that’s both stylish and eco-friendly, adidas Gazelle bold shoes available at Tops and Bottoms USA is the best option. They are made from sustainable materials and are sure to make a positive impact.
sports jerseys that uses cotton and polyester fabric are much cooler to use’
110163 785991I dont feel Ive seen all the angles of this topic the way youve pointed them out. Youre a true star, a rock star man. Youve got so much to say and know so significantly about the subject that I believe you should just teach a class about it 153182
Hai bisogno di scaricare musica no cost?! Visita questo sito world wide web. Cerchi musica gratis su web?
Lovely just what I was searching for. Thanks to the author for taking his time on this one.
We are also noticing that traditional medical doctors are also recognizing the increased interest in holistic healing and are finally starting to incorporate these healing methods into their practice to keep up with the current trends. There are many ways to obtain a construction job interview, but some are more effective than others.
Appreciate what we have, that’s what my mother always said to me.
i think that gay marriage should be allowed in certain states but not in other states “
Hello there, just became aware of your blog through Google, and found that it is truly informative. I’m going to watch out for brussels. I’ll appreciate if you continue this in future. A lot of people will be benefited from your writing. Cheers!
There is obviously a lot to realize about this. I believe you made various good points in features also.
किन्नर अश्लील qqyyooppxx.eDEiiyuBaDy
गर्भवती अश्लीलता के बा hjkvbasdfzxzz.Av4XciDHp9a
गुदा अश्लीलता txechdyzxca.oRbJROrRhLN
Situated at a corner on Mohammed Ali Street, this location has two doorways. When you get within and go up, there appear to be rooms soon after rooms just after rooms. It is all perplexing, but just let the waiters guide you. As soon as settled, get some time to explore the menu. There are excellent “Tawa-taka-tak” goods and “Raan” dishes. You can consider a crack at paya soup, seekh kebabs, chicken tandoori and chicken afghani. Seekh kebabs are superior. The tandoori rotis are superb. They also have spots where by they serve other stuff like snacks, faloodas, kulfis etc.
किन्नर अश्लील साहित्य hkyonet.VcimjzghJ6s
ladesbet funny ਸੈਕਸ ਪੋਰਨ ladesinemi.BJ2h4439yul
ladesbet 黒と白のポルノ ladestinemi.CAbLowFvsTH
There is noticeably a lot of money to comprehend this. I suppose you made particular nice points in functions also.
i operate a small computer shop at home and most customers enjoy playing online games,.
An example of this can be Atypical Mole Syndrome. This syndrome brings about a tendency within the body to type an excessive amount of moles on our skin. This really is something that we could have obtained from our parents or our grandparents and we’ve no manage over whether or not we receive it or not.
Thanks a ton for this, I am greatful for the info
Buy Drugs
Buy Drugs
Scam
At least the title of Limitless offers some truth in advertising.
Viagra
i do a lot of heavy exercise twice a week and it really helped my health to be on excellent condition”
Optimal humanity messages, because toasts. are hands down sent out certain times in the evening reception and therefore are supposed to end entertaining, amusing furthermore useful what’s more. best man speaches
Thanks for the info. And a response from you. car dealers hips san jose
Terrific write-up! Thought about savored the actual scanning. I’m hoping you just read additional by you. There’s no doubt you could have wonderful awareness in addition to ability to see. My corporation is really prompted keeping this particulars.
irritable bowel is really bad, this disease can really crap your digestive system,.
That very first sold me personally on this point of view to deal with anything which provides an important explanation respecting ?
I impressed, I must say. Actually hardly ever do I encounter a blog that each educative and entertaining, and let me tell you, you could have hit the nail on the head. Your idea is excellent; the issue is something that not enough people are talking intelligently about. I’m very blissful that I stumbled throughout this in my search for one thing relating to this.
This is the type of information I’ve long been trying to find. Thank you for writing this information.
What your stating is completely accurate. I know that everybody ought to say the similar thing, but I just assume that you place it in a way that everyone can fully grasp. I also appreciate the photos you set in right here. They match so properly with what youre hoping to say. Im sure youll reach so many people today with what youve acquired to say.
mobile devices are always great because they always come in a handy package*
If you ask me, in excess of a couple working together to empty desired goals, often have unlimited electric power.
Vi ringrazio, considero che quello che ho letto sia ottimo
prom dresses that are bright colored like rose red are the best for a girl,“
This could be the proper blog for anybody who wants to check out this topic. You know a lot its practically not easy to argue to you (not that When i would want…HaHa). You certainly put a new spin on a topic thats been discussed for some time. Fantastic stuff, just wonderful!
Thanks for taking the time to talk about this, I feel fervently about this and I take pleasure in learning about this topic. Please, as you gain information, please update this blog with more information. I have found it very useful. There have to be charging stations everywhere.