
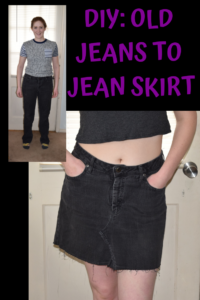
A jean skirt is a wardrobe staple. It’s a classic piece that can pair with anything. I’ve wanted one ever since middle school, when I saw more-stylish-than-me girls sporting frayed jean skirts. Every time I went shopping (which, even back then, only included thrift shops) I would scour the store for the perfect jean skirt. But I never found it. For some reason it never crossed my mind to actually make one for myself.
So, I finally remedied that and made myself a classic jean skirt that I will be rocking all summer long. And I have to mention, it was so easy. I don’t know why I didn’t try it sooner!


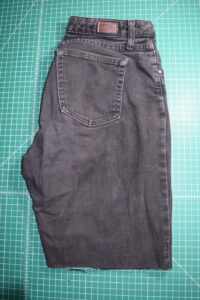
I got this old, worn-out pair of jeans from my sister. She knows I love remaking old clothes, so I got first dibs on her old jeans before they either got thrown away or donated.

The reason I decided these pants were perfect for a jean skirt was the comfortable, high waist and relatively loose legs.
So, let’s get started:
What you need:
*This list contains affiliate links for your DIYing convenience, so I receive a small commission if you buy something through my links. This really helps to support my site so I can keep creating DIY tutorials to help you create your dream wardrobe.
- Jeans
- Sewing machine
- Scissors
- Denim needle
- Sewing pins
- Thread
- Seam ripper (you can use your scissors but a seam ripper will make it way easier)
Instructions:
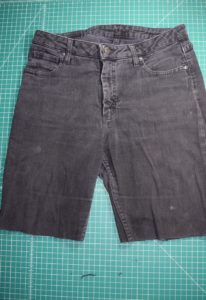
First, you’ll want to cut your jeans to several inches longer than you want your skirt to be. We’ll cut it shorter later, but it’s always safer to start longer and trim it later because you can’t add length back on after you’ve already cut it. To do this, fold your jeans in half, folding the front to the inside. Make sure everything is lying flat, then cut in a straight line all the way across the legs.

Once you unfold it, it should look like this:
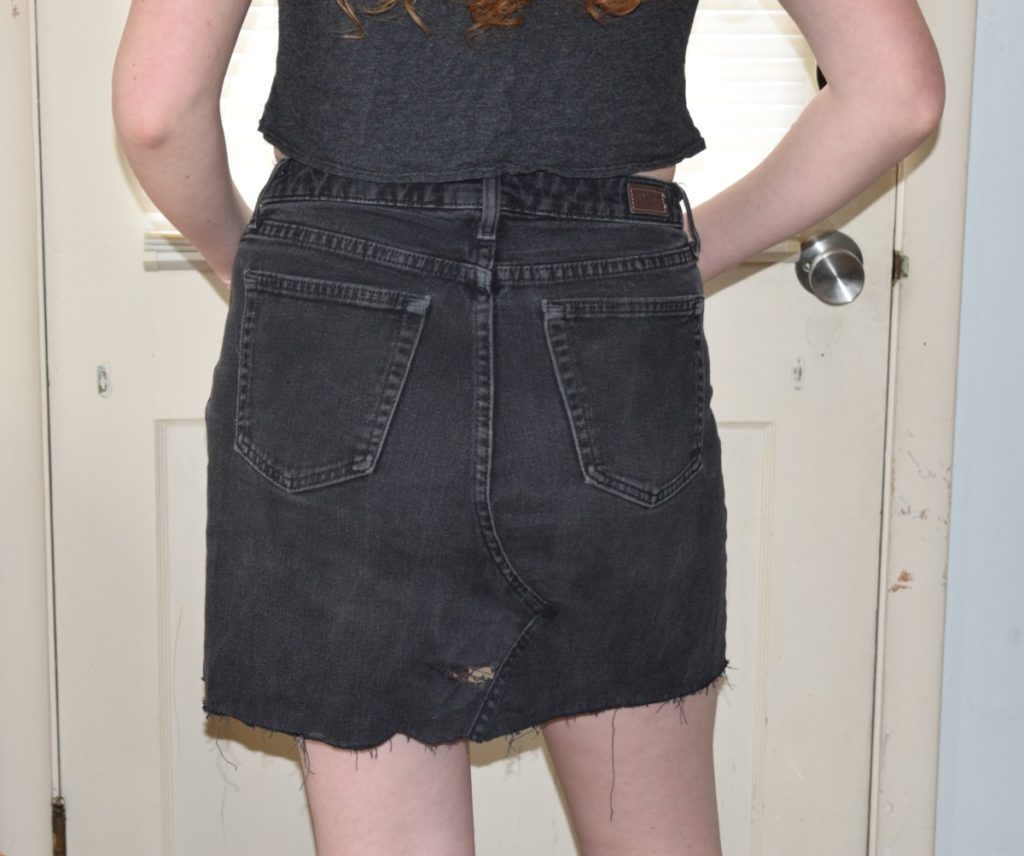
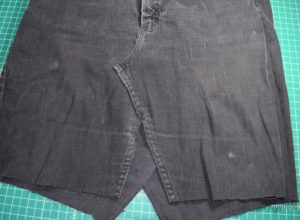
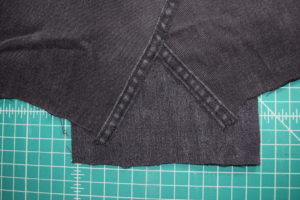
Now, seam rip the inner leg seams to open it up and get a “skirt” shape.
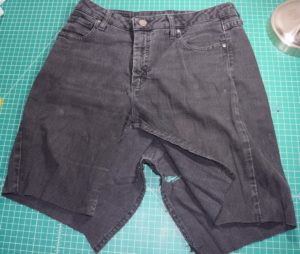
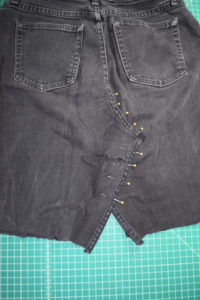
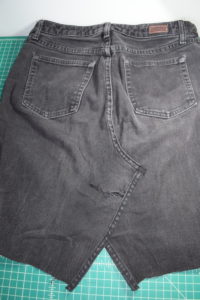
Next, seam rip the center front seam all the way to the zipper and the center back seam until the point where the seam starts to curve. After the seams are open, you can pin the front and back flaps down so that they lie flat. If the back flap won’t lie flat, you may need to open the seam a little higher.
Here’s what the back should look like when it’s all pinned together:
For some reason, I didn’t get a picture of the front pinned down, but it will look pretty much the same as the back.
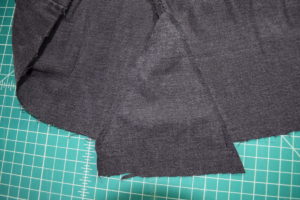
Now, sew down the front and back flaps, sewing along the original seam line close to the outer edge.
All sewed down:
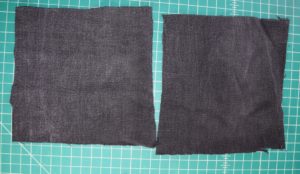
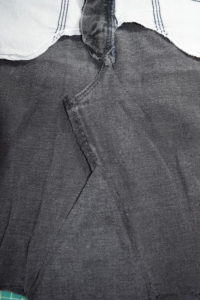
Next, cut a piece of fabric out of the leftover leg pieces large enough to fit over the entire triangle cut-out on the skirt front. Make sure the grain of the fabric is running in the same direction as the skirt. Cut another piece to fit over the cut-out at the back of the skirt.
Here’s what my pieces looked like:
Pin your front insert to the front cut-out on the inside of the skirt.
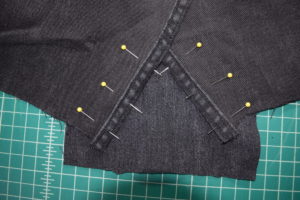
Now just sew the insert to the skirt, sewing in the original seam line close to the inside edge.
Repeat this same method to attach the back insert to the back cut-out.
Trim the extra fabric away from the inside of the skirt, both around the triangle inserts and where the two leg pieces overlapped.
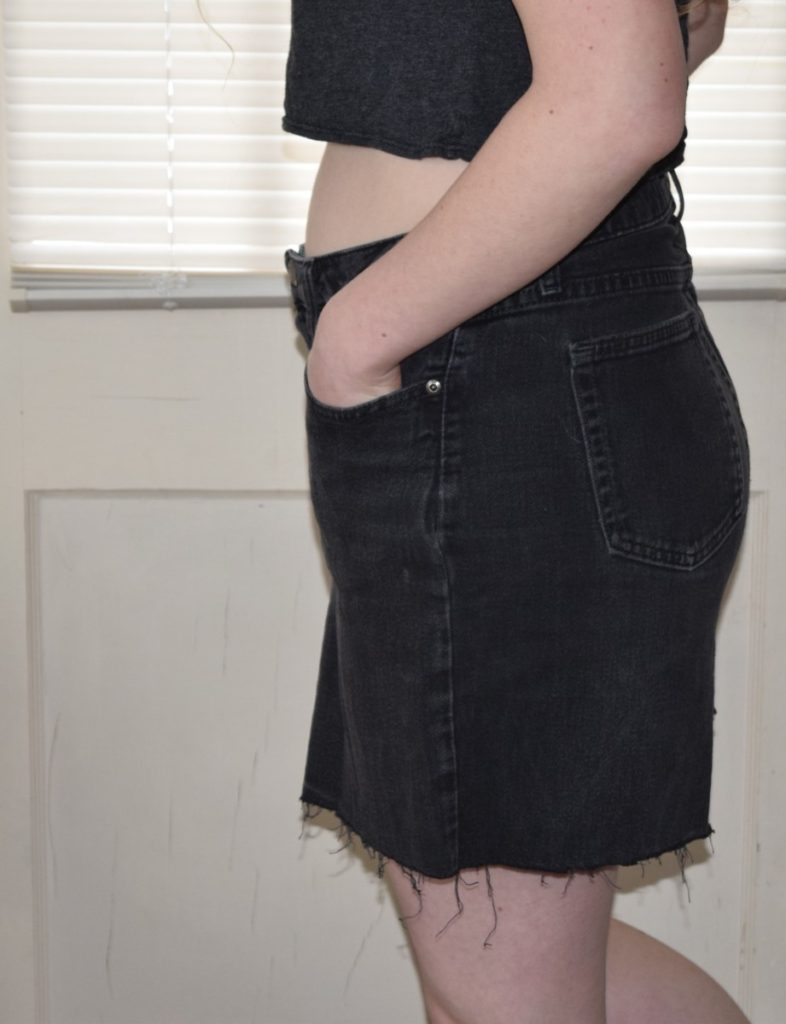
Finally, try your skirt on and cut the hem to the length you want. You can also fray the edges using tweezers or by scraping scissors along the edge. Once you wash and dry the skirt, the fraying should really start to show.


Leave A Comment